EasyManua.ls Logo

Radio Shack Pro-2032 - Preparation and Setup; Connecting the Antenna; Connecting an Optional Antenna

Radio Shack Pro-2032
26 pages
To Next Page IconTo Next Page
To Previous Page IconTo Previous Page
Loading...
PREPARATION
CONNECTING
THE
ANTENNA
fTi
f
It)
To
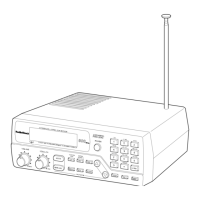
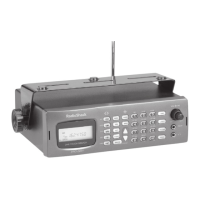
attach
the
supplied
telescoping
an¬
tenna,
simply
screw
it
into
the
hole
on
the
top
of
the
scanner.
Antenna
length
controls
the
sensitivity
of
the
scanner.
The
table
below
shows
how
to
adjust
the
length
of
the
antenna
to
specific
frequencies.
30-
174
MHz
Extend
Fully
380-512
MHz
Extend
2
segments
806
-
960
MHz
Collapse
Fully
(1
segment
only)
CONNECTING
AN
OPTIONAL
ANTENNA
The
telescoping
antenna
is
adequate
for
strong
local
signals.
For
best
re¬
sults,
attach
a
multi-band
outdoor
an¬
tenna
(not
supplied)
to
the
scanner.
Your
local
Radio
Shack
store
sells
a
complete
line
of
outdoor
antennas.
Follow
these
steps
to
install
an
out¬
door
antenna.
1.
Select
a
location
as
high
as
possi¬
ble.
2.
Mount
the
antenna
following
the
in¬
structions
that
come
with
the
an¬
tenna
and
its
mounting
hardware.
3.
Plug
the
antenna
cable
into
the
scanner’s
ANT
(antenna)
jack
on
the
rear
of
the
scanner
using
50-
ohm
coaxial
cable
(RG-58.
RG-8/M
or
RG-8
not
supplied).
For
lengths
over
50
feet,
use
RG-8/M
or
RG-8
low-loss,
coaxial
cable.
Note:
This
scanner
uses
a
BNC
an¬
tenna
connector.
You
may
need
an
antenna
adapter
to
use
another
an¬
tenna.
Warning:
When
installing
or
re¬
moving
an
outdoor
antenna,
use
extreme
caution.
If
the
antenna
starts
to
fall,
let
it
go!
It
could
contact
overhead
power
lines.
IF
THE
ANTENNA
TOUCHES
THE
POWER
LINE,
CONTACT
WITH
THE
ANTENNA,
MAST,
CABLE,
OR
GUY
WIRES
CAN
CAUSE
ELECTROCUTION
AND
DEATH!
Call
the
power
company
to
re¬
move
the
antenna.
Do
not
at¬
tempt
to
do
so
yourself.
6

Related product manuals