Radio Systems Millenium-A Console Page 16
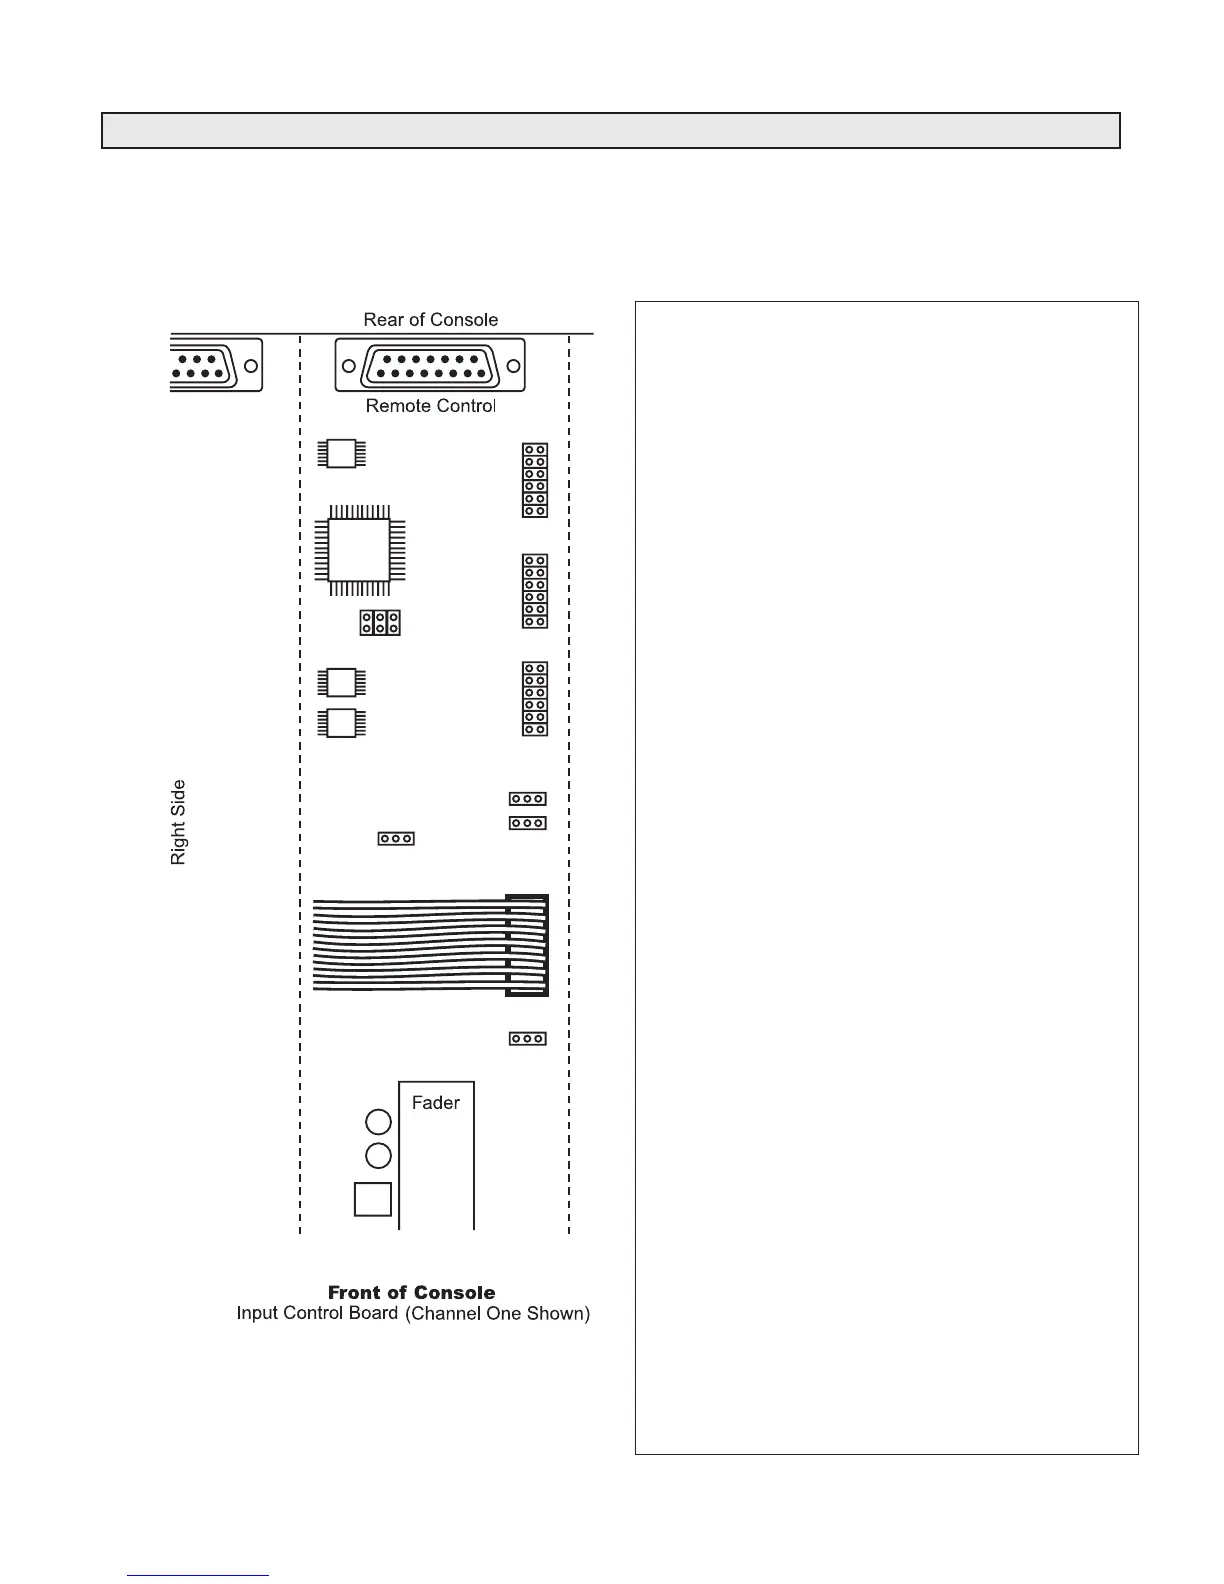
Board Channel Logic Jumpers
Location*
A Install for fader start (special order fader required)
B Install for remote B start and stop commands to
control the remote outputs
C Install for input B to hold and remove for input B to
pulse the remote pulse/hold outputs
D Install for remote A start and stop commands to con-
trol the remote pulse/hold outputs
E
R
Install for “classic” remote control protocols
F Install to disengage cue when channel is turned on
H Install for input A to hold and remove for input A to
pulse the remote pulse/hold outputs
J
Q
Install for cue to follow the on/off mode for “Auto-Cue”
K
Q
Install for cue on fader detect (special order fader
required)
L
Q
Install for no cue in input B (cue switch is now cough
for input B)
M
Q
Install for no cue in input A (cue switch is now cough
for input A)
N Install for “Cue Exclusive” (turn off mix buses
when in cue mode)
P Install for Input A mute 2
R Install for input B mute 2
S Install for timer reset with input A
T Install for input A mute 1
U Install for timer reset with input B
V Install for input B mute 1
W Input B stop lamp local/remote jumper. Jump
pin 2 to center pin for local console lamp control
(Jump pin 1 and center pin for remote lamp control)
X Input A stop lamp local/remote jumper. Jump
pin 2 to center pin for local console lamp control
(Jump pin 1 and center pin for remote lamp control)
Y Jumper must be installed between pin 2 and
center pin for cue bus lamp normal operation
Z Jumper must be installed between pin 1 and
center pin for analog console operation
A
B
C
D
E
F
H
J
K
L
M
N
P
R
S
T
U
V
W
X
1 2
1 2
1 2
1 2
Z
Y
AA
Notes:
Items in bold are factory default jumper settings.
See following page for remote control connector pin-outs.
Consult section 2.2 for a detailed explanation of control
programming and functions.
Q
Cue Options - Consult manual section 2.2.6 and 2.2.7 for
various cue modes and operational descriptions.
R
Remote Options - See illustration B-2 and B-3 for
remote control options, settings and wiring.
Illustration B-1
Six Channel Control Board Jumper Settings
for Millenium Analog Consoles
Part # 18516