Do you have a question about the RadioLink R8XM and is the answer not in the manual?
Guidelines for safe operation, including weather conditions, location, and pre-flight checks.
Notices regarding age suitability, handling near children, and protection against moisture.
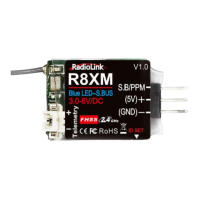
Details the R8XM receiver's features, control distance, supported signals, and compatible transmitters.
Step-by-step instructions for pairing the R8XM receiver with a transmitter using the ID SET button.
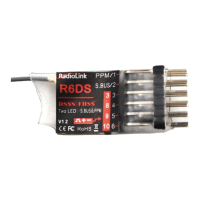
Explains SBUS (Purple LED) and PPM (Red LED) modes and how to switch between them.
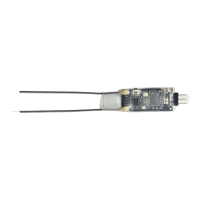
Best practices for positioning antennas to maximize signal transmission and avoid interference.
Covers real-time transmission of RSSI, receiver voltage, and model voltage up to 6S LiPo.
How to configure low voltage and RSSI alarms using the Parameter Setup APP.
Describes the specific beep patterns emitted for low transmitter voltage, receiver voltage, model voltage, and RSSI.
Instructions for outputting RSSI values from the receiver to an FPV monitor for racing or driving.
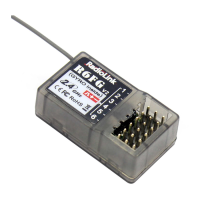
The RadioLink R8XM is an 8-channel receiver designed for remote control applications, offering robust performance and real-time telemetry capabilities. It operates on the 2.4GHz FHSS (Frequency Hopping Spread Spectrum) band, ensuring reliable signal transmission over a significant control distance. This receiver is compatible with a range of RadioLink transmitters, including the T8FB (BT/OTG), T8S (BT/OTG), RC6GS (V3/V2), and RC4GS (V3/V2), making it a versatile component for various models such as racing drones, rotary wings, fixed wings, gliders, multicopters, cars, boats, and robots. It is particularly suited for applications requiring integration with a flight controller.
The primary function of the R8XM is to receive control signals from a compatible RadioLink transmitter and translate them into commands for the model's servos and other components. It supports both PPM (Pulse Position Modulation) and SBUS (Serial Bus) signal outputs, providing flexibility for different flight controllers and servo setups. Users can easily switch between these two signal modes by quickly pressing the ID SET button twice within one second. A red LED indicates PPM mode, while a purple LED signifies SBUS mode.
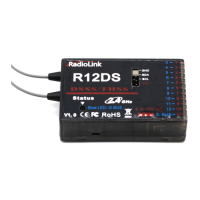
A key feature of the R8XM is its real-time built-in telemetry system. This allows the receiver to transmit crucial data back to the transmitter, providing the user with immediate feedback on the model's status. The telemetry system monitors several parameters:
The telemetry range of the R8XM is designed to be the same as its control range, ensuring that users receive critical data even at extended distances. This real-time feedback is invaluable for safe and informed operation, especially in racing, driving, or sailing scenarios where continuous monitoring is essential.
The R8XM is designed for ease of use, starting with its binding process. Each receiver has a unique ID code and must be bound to a transmitter before initial use. Once bound, the ID code is stored in the transmitter, eliminating the need for re-binding unless a new R8XM is introduced. The binding procedure is straightforward:
It's important to note that the R8XM features signal amplification, and its telemetry range matches its control range of 4000 meters. Therefore, maintaining a distance of more than 50 cm between the transmitter and receiver during binding is crucial to prevent signal blockage and ensure successful binding. If the devices are too close (e.g., within 50 cm) after binding, signal loss may occur, which can be resolved by increasing the distance between them.
The R8XM also integrates alarm features to enhance safety during operation. When used with compatible RadioLink T8FB/T8S (BT) transmitters, low voltage alarms can be configured via the Parameter Setup APP on Android phones, iPhones, or computers. These alarms provide audible warnings from the transmitter when specific voltage thresholds or RSSI levels are breached:
These alarms help prevent unexpected failures due to insufficient power or loss of signal, allowing users to take corrective action before a critical situation arises.
For advanced users, the R8XM can output RSSI values directly to an FPV monitor, providing an on-screen display of signal strength during flight. This feature is particularly beneficial for FPV racing and other applications where real-time visual feedback of signal quality is desired. Specific instructions and compatibility details for outputting RSSI to FPV monitors with different flight controllers (e.g., F4/F7, Mini Pix/TURBO PiX/PIXHAWK) are available through RadioLink's online resources.
Proper installation and care are essential for maximizing the R8XM's performance and longevity. RadioLink provides several recommendations for antenna installation to optimize signal transmission:
After completing all installation steps, it is recommended to turn off the transmitter and then repower it to test if the receiver is correctly bound and functioning as expected.
The R8XM is not a toy and is not suitable for children under 14 years of age. Adults should keep the product out of reach of children and exercise caution when operating it in their presence. Additionally, users should avoid operating their models in adverse weather conditions, as poor visibility can lead to disorientation and loss of control. It is also important to avoid using the product in crowded or illegal areas. Before each use, always ensure that trim levers are at zero and the battery is properly charged. All servos and their connections should be checked, and the receiver should always be turned off before the transmitter to prevent unexpected movements. If operating in wet conditions is unavoidable, covering the transmitter with plastic bags or waterproof cloth is recommended to prevent moisture ingress.
| operating voltage | 3-6 V DC |
|---|---|
| operating current | 40 mA±5 mA@5V |
| model voltage telemetry | 2S-6S LiPo battery (7.4V-25.2V) |
| channel quantity | 8 channels |
|---|---|
| output frequency | 2.4 GHz ISM band (2400 MHz~2483.5 MHz) |
| control distance | 4000 meters |
| dimension | 22*17 mm |
|---|---|
| weight | 3 g |
| antenna length | 90 mm |