Do you have a question about the RadioLink R6DSM and is the answer not in the manual?
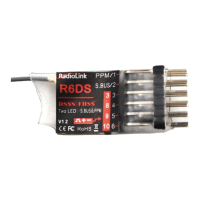
Details the receiver's dual signal mode, featuring a red LED and SBUS signal for 10 channels.
Step-by-step instructions for successfully pairing the R6DSM receiver with its compatible transmitter.
Key attributes including channels, voltage, current, dimensions, weight, antenna, precision, and range.
Guidelines for optimal antenna positioning to ensure the best possible RF signal reception.
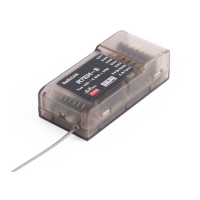
The R6DSM is a compact and versatile 2.4G 10-channel receiver designed for use with Radiolink transmitters, including models like the AT9, AT9S, AT10, and AT10II. This receiver is particularly well-suited for racing drones due to its small size, lightweight design, and advanced signal processing capabilities. It operates using both FHSS (Frequency Hopping Spread Spectrum) and DSSS (Direct Sequence Spread Spectrum) technologies, working synchronously to ensure robust and reliable signal reception, even in challenging environments. This dual-spectrum approach enhances interference immunity and provides a stable connection between the transmitter and the drone, which is crucial for high-performance applications like racing.
One of the key operational features of the R6DSM is its dual signal working mode. When powered on and functioning correctly, a red LED on the receiver will illuminate continuously. In this mode, the receiver outputs a 10-channel SBUS signal, providing comprehensive control over various drone functions. The SBUS signal is a serial communication protocol that allows multiple channels to be transmitted over a single wire, simplifying wiring and reducing the overall weight and complexity of the drone's electronic setup. This is a significant advantage for racing drones where every gram and every millisecond counts. The continuous red LED serves as a clear visual indicator that the receiver is actively receiving a signal and is ready for operation, allowing pilots to quickly assess the status of their connection before flight.
Matching the R6DSM receiver with a compatible transmitter is a straightforward process designed for ease of use. To initiate the binding procedure, the transmitter and receiver should be placed in close proximity, ideally within one meter of each other, to ensure a strong initial connection. The next step involves powering on the transmitter first, followed by the R6DSM receiver. A critical step in the setup is to connect Channel 3 (CH3) of the R6DSM to the Electronic Speed Controller (ESC). This connection is often necessary for the initial power-up and communication handshake between the receiver and the drone's flight system. Once these preliminary steps are completed, the binding process itself is activated by a small black button located on the R6DSM. The user needs to press this binding button twice within a two-second interval and then release it. Upon successful initiation of the binding sequence, the receiver's light will begin to blink. This blinking indicates that the receiver is actively searching for and attempting to establish a connection with the transmitter. After approximately eight blinks, if the match code is successful, the receiver's signal LED will stop blinking and remain continuously on. This steady illumination confirms that a stable and secure connection has been established between the transmitter and the receiver, and the drone is now ready for flight. This clear visual feedback mechanism ensures that pilots can confidently verify the binding status before takeoff, enhancing safety and operational reliability.
Maintenance and installation of the receiver antenna are crucial for optimizing the performance and range of the R6DSM. Proper antenna placement and care directly impact the effective control distance and signal integrity. Firstly, the antenna must be kept as straight as possible. Any bending or coiling of the antenna can significantly reduce its effective range and compromise signal reception. For larger model aircraft, especially those with significant metal components, signal interference can be a concern. In such cases, it is recommended to place the antennas on both sides of the model. This strategic placement helps to ensure that the best possible RF signal condition is maintained regardless of the aircraft's orientation or flying attitude, minimizing signal dropouts and maintaining consistent control.
Furthermore, the antennas must be kept away from conductive materials. Materials such as metal and carbon can block or reflect RF signals, leading to reduced range and signal degradation. A minimum distance of half an inch from these materials is advised to prevent interference. It is important to note that this guideline primarily applies to the active radiating part of the antenna; the coaxial part, which is shielded, does not need to adhere to the same strict separation. However, even the coaxial part should not be bent into a small radius, as this can damage the internal wiring and affect performance. Another critical aspect of antenna placement is to keep them as far away as possible from potential noise sources. Motors, Electronic Speed Controllers (ESCs), and other electronic components can generate electromagnetic interference (EMI) that can disrupt the receiver's signal. Isolating the antennas from these noise sources helps to maintain a clean and strong signal, ensuring reliable control.
Once the physical installation of the antennas is complete, the receiver's operational readiness needs to be confirmed. This involves pressing and holding the Easy Link (ID SET) button for one second. This action initiates the receiver's operational mode. After all the installation and setup steps are finished, the LED indicator on the receiver will turn red and remain steadily illuminated, signifying that the receiver is actively working and ready. For added protection and shock proofing, especially in the context of racing drones where impacts are common, the receiver can be packed with sponge or foam when installed into the model. This cushioning helps to absorb vibrations and protect the delicate electronics from physical damage. Finally, to ensure that the receiver is fully under the control of the transmitter with a correct connection, the user should turn off the transmitter and then power it back on. This reinitialization allows the program functions to verify and assure a stable and correct connection, completing the setup process and preparing the drone for flight. These meticulous installation and maintenance steps are vital for maximizing the R6DSM's performance, ensuring a safe and enjoyable flying experience.
| Frequency Range | 2.4 GHz |
|---|---|
| Channels | 6 |
| Modulation | GFSK |
| Receiver Sensitivity | -105 dBm |
| Operating Current | 30 mA |
| Distance | 1.5 km |
| Spread Spectrum Mode | FHSS |
| Channel Bandwidth | 500 kHz |
| Signal | PPM |