50 ESP-LX+ & LXi+ Installation, Programming, & Operation Guide
Mount Controller on Wall
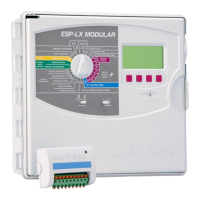
The ESP-LX+ has four mounting holes on the back of the
cabinet three keyhole slots at the top of the cabinet and one
circular hole at the bottom of the cabinet. The shipping carton
for the controller contains a mounting template. You may wish to
cut this template out and use it to mark the controllers mounting
holes in the desired location before you begin drilling.
➊ To install the controller on a flat wall surface, use the left and
right keyhole slots at the top of the cabinet.
➋ To install the controller on a narrow stud, use the center
keyhole slot.
➌ For all installations, use the small round hole at the bottom
of the cabinet.
➍ Hold the controller or mounting template at eye level against
the mounting surface. Use a pencil to mark the position of
the holes on the mounting surface. Then remove the
controller cabinet or template.
➎ On flat wall surfaces, drive an appropriate fastener for the
type of wall into the two outside keyhole marks.
➏ For narrow stud installations, drive an appropriate fastener
for the type of wall into the middle keyhole mark.
➐ Use a nail to tap a small pilot hole on the mark for the
lower mounting hole. However, DO NOT drive a fastener
into this location yet.
➑ Use the keyhole slot(s) to hang the controller cabinet on
the fasteners. Make sure the shafts of the fasteners are well
up in the narrow part of the keyholes.
➒ Drive the last fastener through the lower mounting hole.
Verify that the cabinet is secure. If necessary, tighten the
fasteners in the upper keyhole slot(s).


 To Next Page