Weather Station - Model “PRO”
Nov., 2001 Page 20
Model “PRO”- Weather Station
Cozz GT27145B
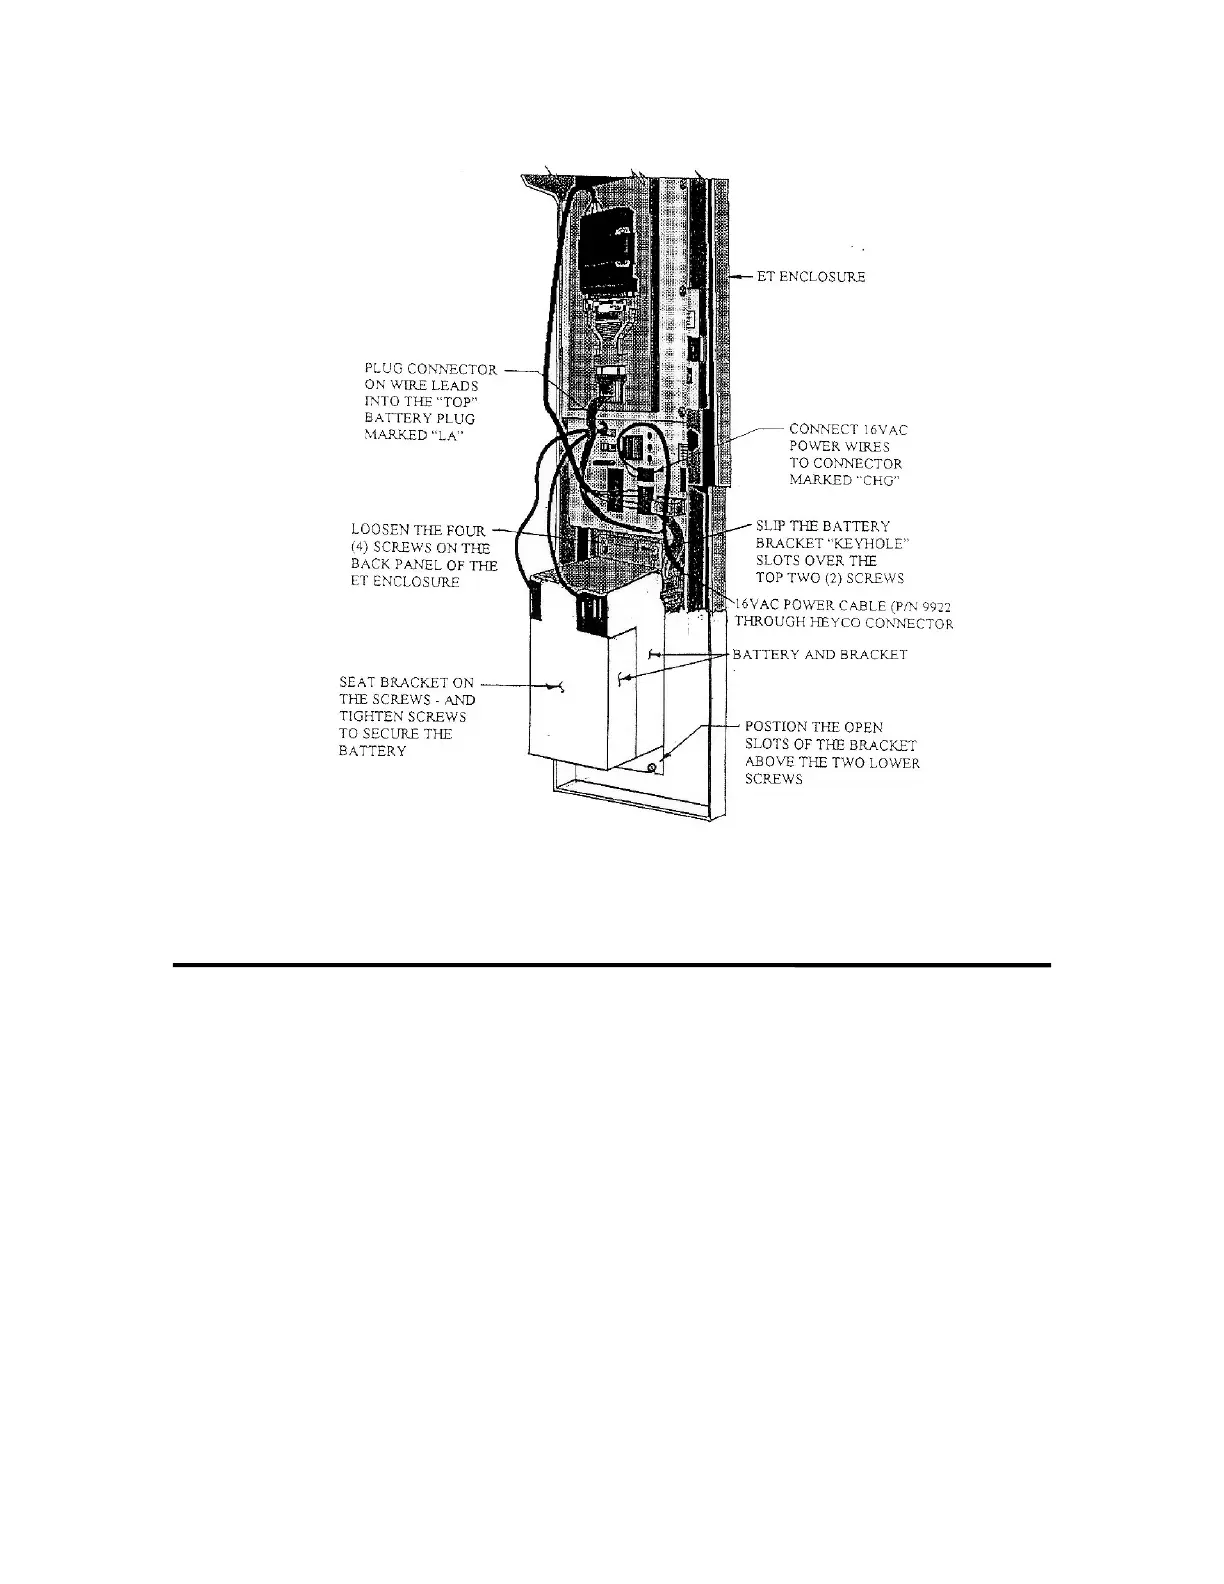
FIGURE 9 - 16VAC CONNECTION AND RECHARAGEABLE BATTERY
INSTALLATION
Loosen the four (4) screws located on
the back panel of the Enclosure. Slip
the end of the battery bracket, that has
the two (2) keyhole slots in it over the
upper two (2) screws. Line up the
battery bracket slotted holes, in the other
end of the bracket, with the two (2)
lower screws. Now push “down” on the
battery - seating the bracket in place with
the screws. Tighten all four screws
to properly secure the battery to the back
panel of the ET Enclosure.
Plug the connector on the wire leads of
the battery to the “top” battery
connection - marked “LA” - which is
located on the Enclosure panel assembly
just above the battery location.