4
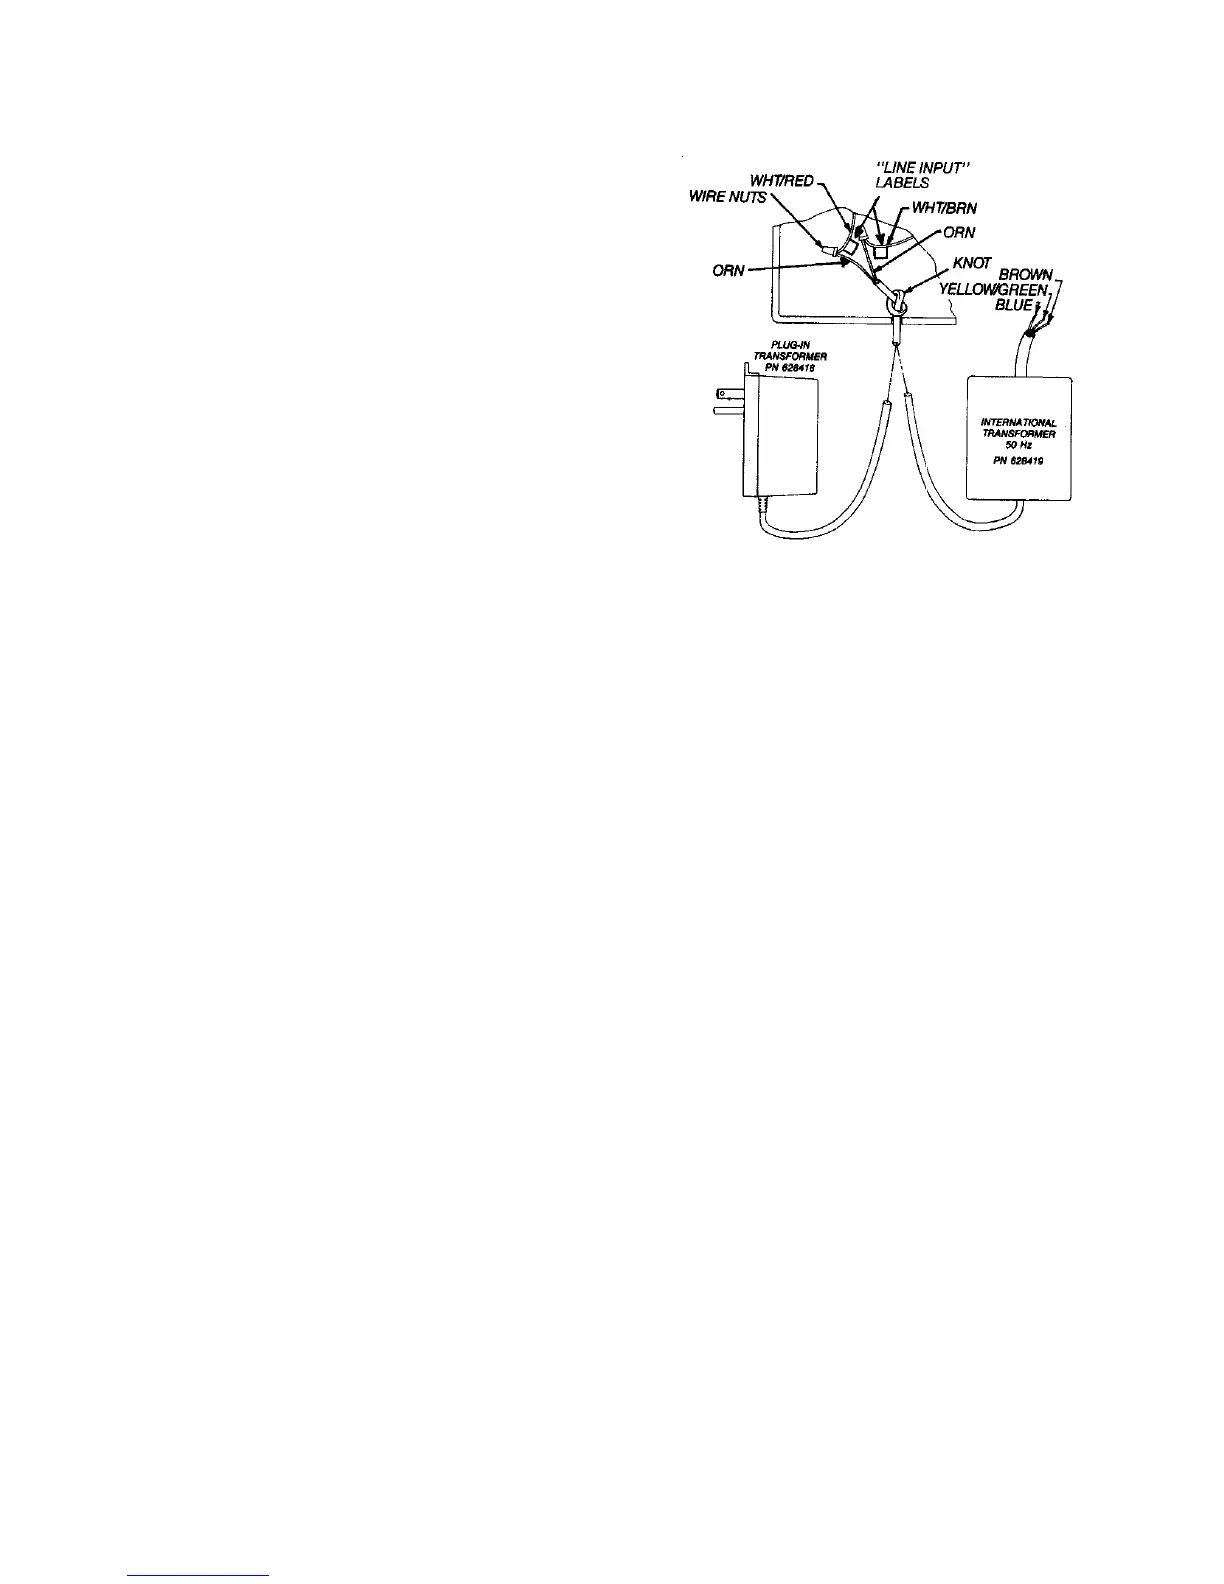
Prior to plugging the transformer into a 120 VAC
wall receptacle, insert the wire through the
1
/
4
"
hole in the lower left corner of the controller, tie
an overhand knot in the wire about 5" from the
end (inside the case). This will prevent inadver-
tent disconnection of the wire. Connect one or-
ange wire to the wht/red wire with the "line in-
put" label and connect the other orange wire to
the wht/brn wire with the "line input" label. (See
Figure 4)
Now, plug transformer into wall receptacle.
(Note: International transformer is not "plug-in"
type.)
Instructions for Attaching Plug-In Transformer.
Electrical System Checkout
1. Rotate the STATION dial counterclockwise to position REST at the top directly un-
der the Station pointer.
2. Pull all pins on the HOUR and DAY dials to the "out" position.
3. Put the MODE switch in the AUTO position.
4. Make sure transformer is plugged into a wall receptacle.
5. Adjust each station TIME control to the 5 minute mark. (See Figure 6.)
6. Rotate the STATION dial (counterclockwise) to position Station 1 under the pointer.
Watering should commence shortly as the automatic mechanism latches with the Sta-
tion dial.
The 5-minute interval should provide sufficient time to observe control valve operation.
If more time is required, simply adjust the timing knobs as necessary. The controller
will advance through each station, in sequence, providing opportunity to observe each
circuit for proper operation.
Upon satisfactory checkout of the system, proceed to adjust the controller clock.
SETTING THE CONTROLLER
With the main power ON, proceed to adjust the clock for the correct time and day.
1. Put the MODE switch in the OFF position.
2. Rotate the HOUR dial (clockwise only) to position the current time opposite the
TIME pointer at the top of the panel. Observe the dial for the correct AM or PM numer-
als.
ATTACHING TRANSFORMER TO
CONTRLLER
Figure 4
 Loading...