5
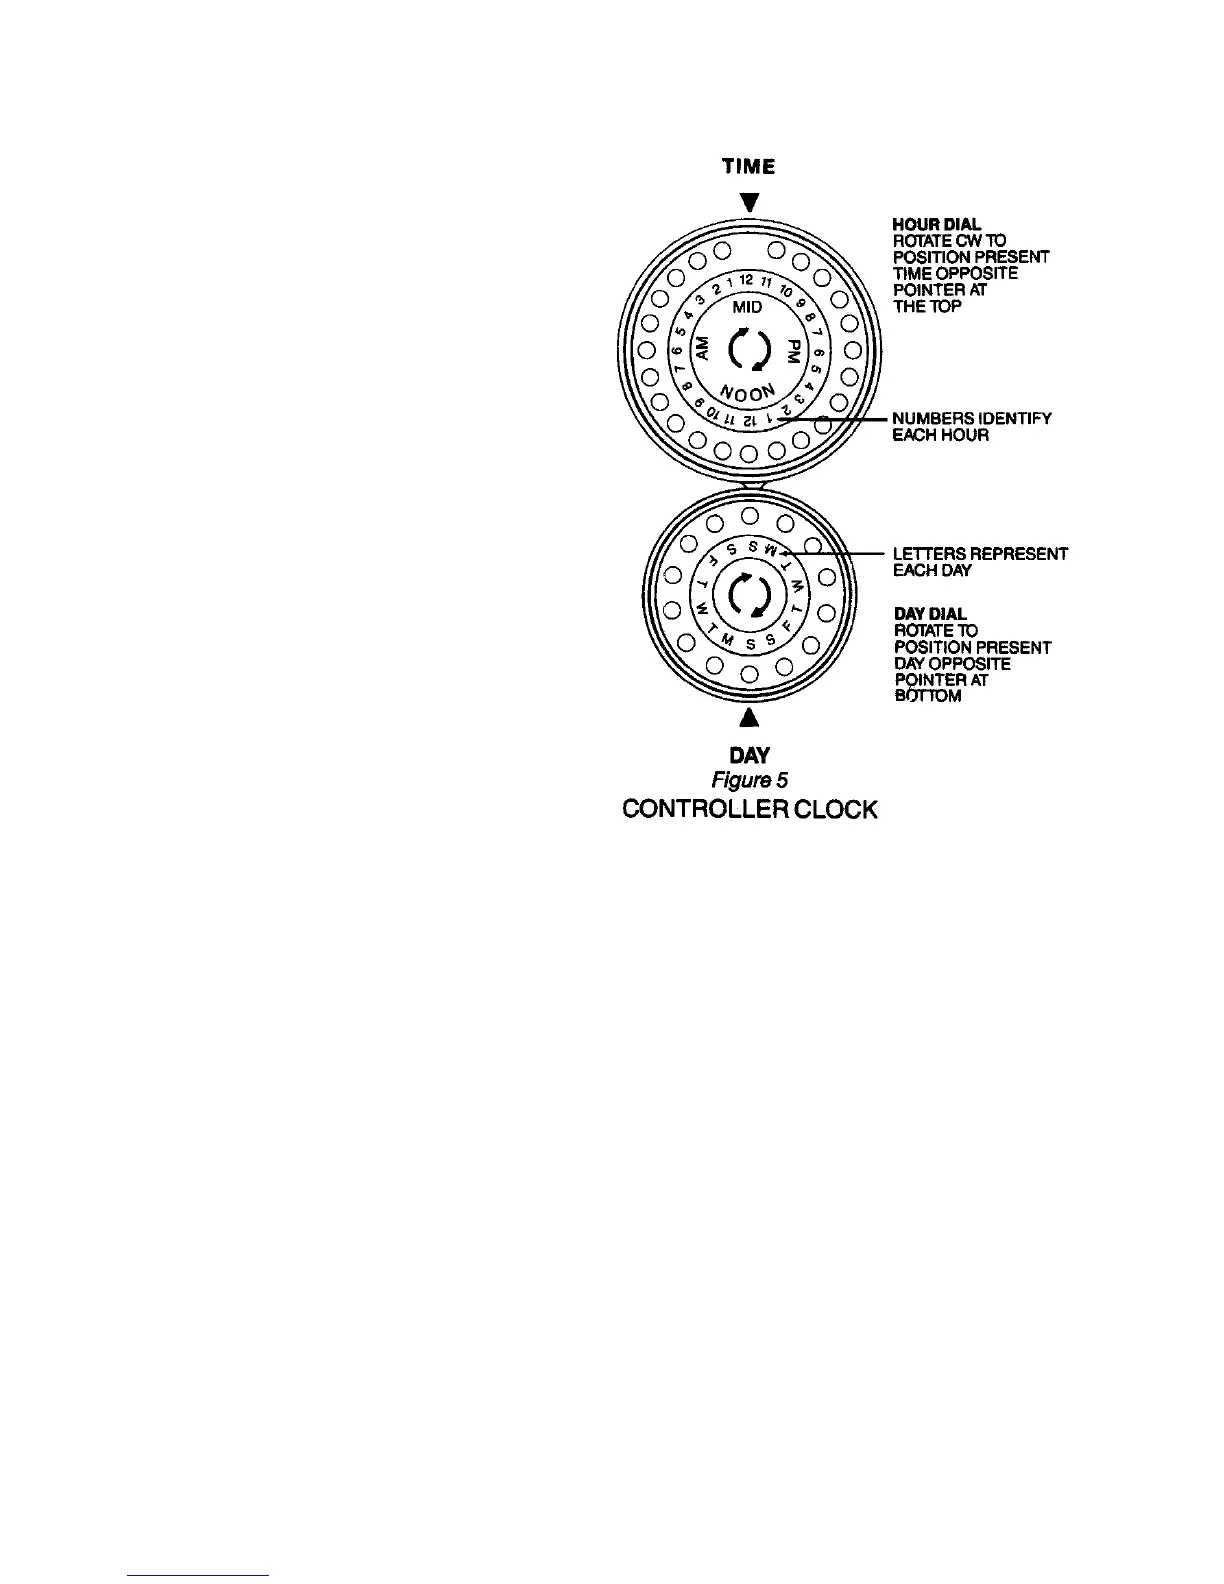
Example: If the correct time is 1:35 PM,
position the dial such that the TIME
pointer will point midway between the 1
and 2 numerals on the PM side of the
dial. If a more precise adjustment is de-
sired, the best procedure would be to
push-in the pin corresponding to the up-
coming hour (in this example, the 2 PM
pin) and on that hour, slowly rotate the
dial until you hear the "click" of the
micro-switch.
3. Proceed to set the present day by ro-
tating the calendar DAY dial to position
the correct letter opposite the DAY
pointer at the bottom of the dial.
4. Next, rotate the STATION dial in a
counterclockwise direction to position
REST at the top under the STATION
pointer. This completes the controller
clock setting.
SCHEDULING AUTOMATIC OPERATION
Make sure the HOUR and DAY dials are set to the correct time and that all pins are in
the "out" position.
1. Push in the pin(s) corresponding to the day(s) on which watering is desired. Re-
member, each DAY pin represents a 24 hour period beginning at midnight.
2. Next, select the desired starting time(s) and push in the corresponding pin(s) on the
HOUR dial.
3. The first mark (square dot on the station dial) is the minimum time setting and rep-
resents approximately 3 minutes. The small white arrow moves with the knob for visual
indication of each setting. (There will be no valve output when the arrow is positioned
between "off" and the "square dot.'') The ratchet notches represent 1 minute incre-
ments for precise settings. The OFF position at each timing dial, omits the station from
the schedule.
 Loading...