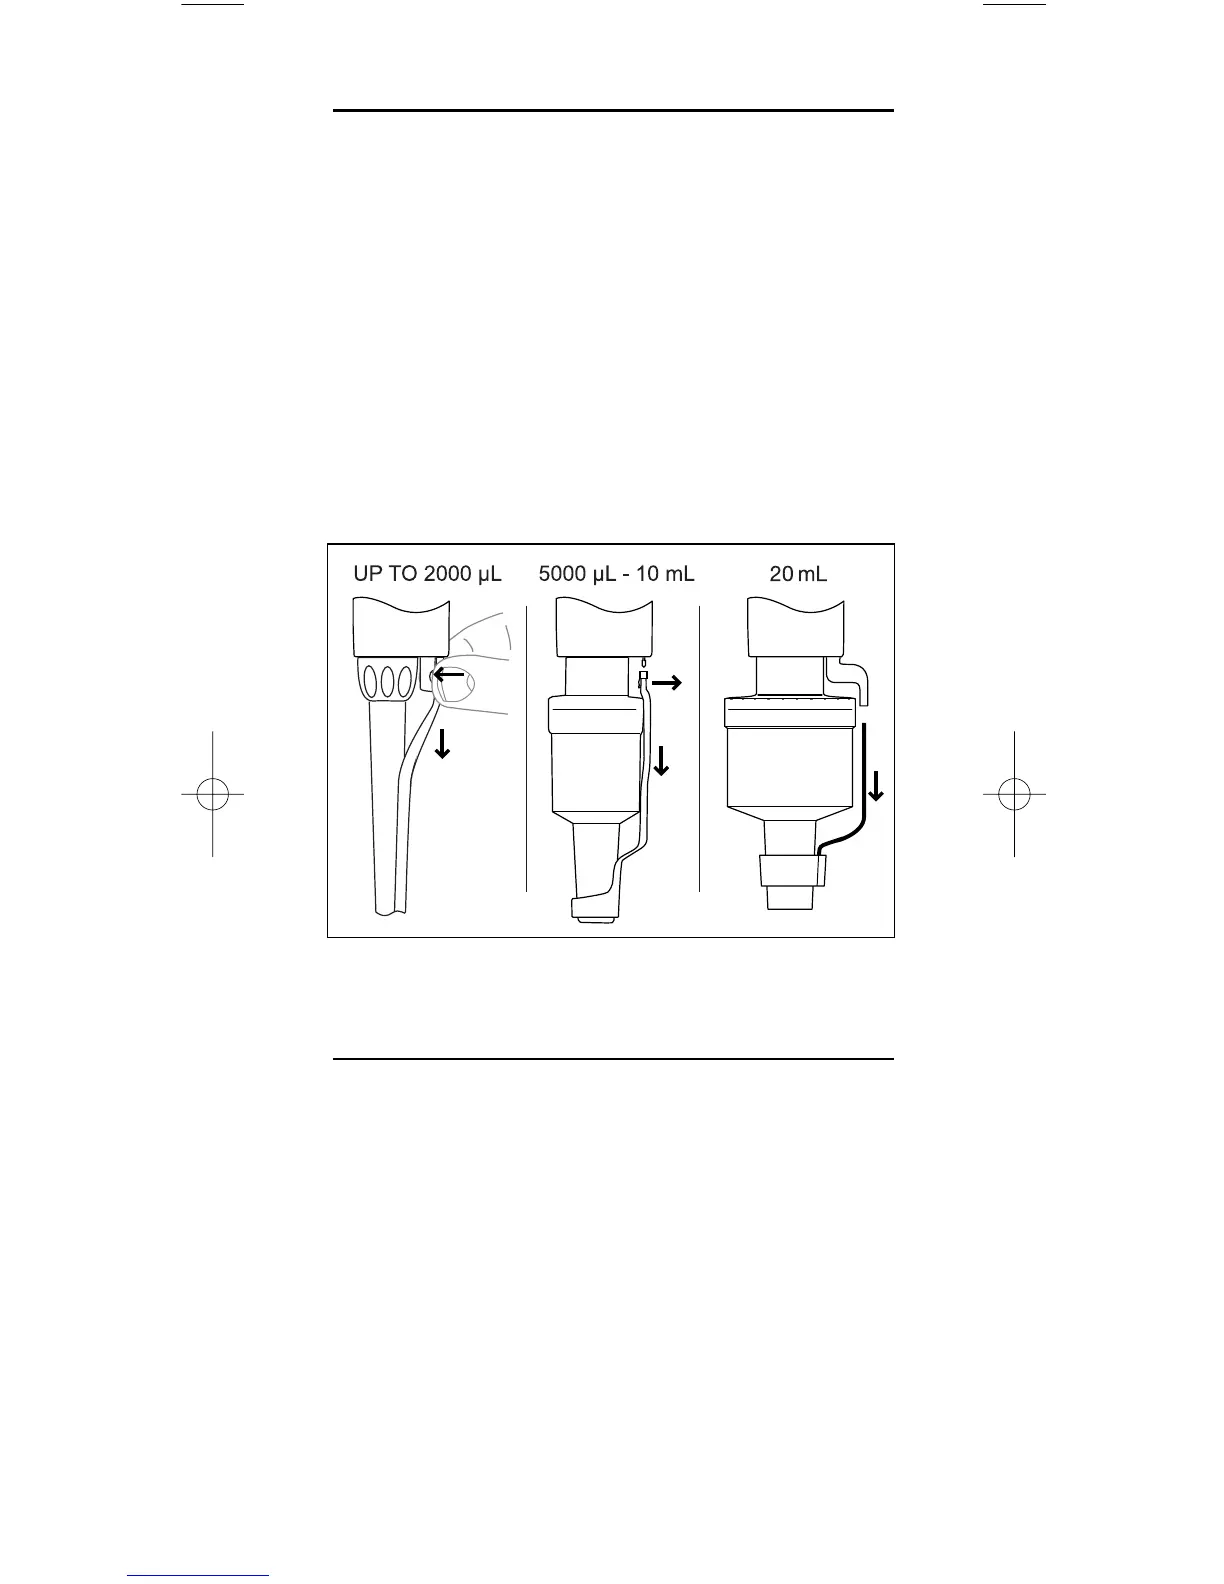
Tip Ejector Arm Removal
Three types of tip ejector are used and all types can be
removed with minimum effort - do not use force.
For models up to 2000 µL, press in the quick-release tabs
on the ejector arm and pull the ejector down.
For 5000 µL and 10 mL models, grasp the top of the ejector
arm and pull outward then downward.
For the 20 mL model, pull off the lower part of the ejector
arm; the upper part stays in place. (Replace by aligning the
rod with the hole in the upper part and pressing firmly.)
To replace the ejector arm (except 20 mL), insert the shaft
through the large opening, align the top with the tip ejector
pushrod, and push until the ejector arm snaps in place.
Pipet-Lite Storage
After use, store the pipette in a clean safe place. Pipet-Lite is
a precision instrument and should be treated with the level of
care appropriate for laboratory instrumentation. Three types
of hanger are available to hold your Pipet-Lite conveniently
when not in use.
CR-7: Free-standing carousel holds seven pipettes.
HU-M3: Set of three individual magnetic Hang-Ups
™
for
mounting on ferrous surfaces.
HU-S3: Three Hang-Ups attached to a clamp which fits onto
a shelf.
7
Figure 3 Removing the Tip Ejector Arm