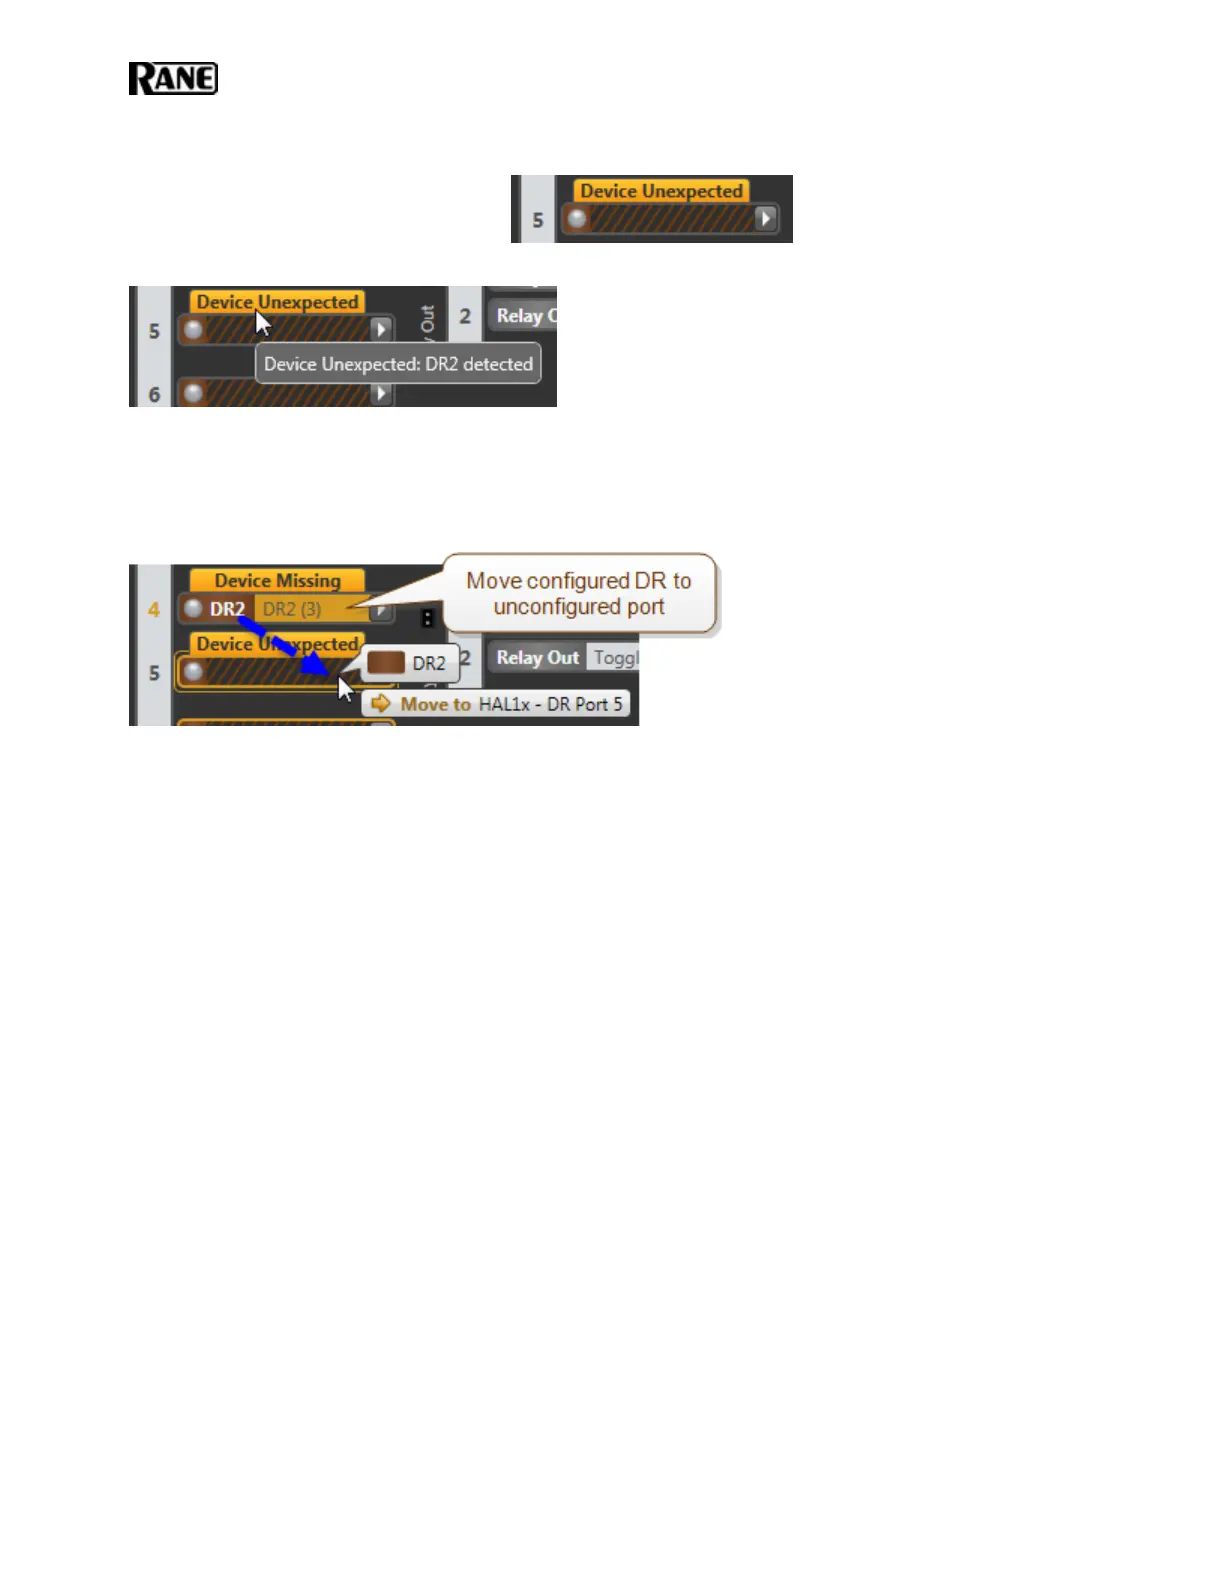
to DR Port 5 on the HAL, yet the port is not configured. The DR Port 5 in the Halogen Hardware Workspace dis-
plays an orange Device Unexpected message:
Hover your cursor over the orange message to see what physical device HAL detects on that port.
This problem occurs in two situations: either you have not yet configured the port or you have configured the
wrong port. To correct the first situation, simply configure the port so that it matches the device that is already con-
nected. In the second situation, look for a configured port that is displaying an orange Device Missing message. If
this is the port that you intended to use with the connected device, simply move the configured device from the
port displaying Device Missing (by dragging the colored device bar) to the port displaying Device Unexpected.
Perform an Audio Test
After verifying that the EXPs, RADs and DRs are configured correctly and working properly, you should perform
an audio test. You can perform this test the old-fashioned way by wandering about and checking the actual audio,
or you can perform your audio test from within the Halogen software. To do so, start the audio and then view the
audio flow in the Processing Map (in the Processing Workspace). Open output block properties and view their
meters in real time. Or, if needed, add a meter block where appropriate for verifying the audio. You can also, of
course, view the Signal and Overload LEDs on the RADs, the HAL, and/or the EXPs to verify that the audio sig-
nal is flowing correctly.
Save the Final Configuration File
We already delivered our lecture on the benefits of saving your configuration to a backup file – so we won’t do
that again. Instead, we’ll just tell you how to do it.
1. Connect to the HAL device. From the Device menu in the Halogen application toolbar, click Connect. In
the Connect to Device dialog box that appears, find the HAL device you want. Click the Connect button
associated with that HAL device.
2. From the File menu in the application toolbar, click Save or Save As.
3. When prompted, type the filename for this new configuration file. All Halogen configuration filenames
have an extension of .hal and, by default, are stored in the C:\\Users\<username>\My Doc-
uments\Halogen Configs folder. You can save the file to a different location if desired, however.
Creating a Verification Configuration
Even if you do not have a pre-defined configuration file or the necessary information to create one for your system,
you can still test that the installed devices can send and receive audio signals. Use Halogen to create a simple
HAL SYSTEM INSTALL GUIDE
85