Page 9Page 8
Option 2: Program the SmartRescue to Allow the Emergency Phones to call the SmartRescue First, then Outside
Number(s)
1. Leave SmartRescue handset hung up
2. Hold down red Disconnect and Sub-Master 1 buttons for 5 seconds
3. Releasebuttons(youwillhearaconrmationtone)
4. Press Phone 2 button, then red button, then the Phone 1 button
5. PressSub-Master2button,thenSub-Master1button(youwillhearaconrmationtone)
**Used when sta is available to answer calls.
Step 9: Programming the Emergency Phone(s)
Option 1:CallEmergencyNumbersOsitewithoutStoppingattheSmartRescue
1. Press Enter to get into program mode
2. Press 1, Enter, (Emergency Number), Stop
3. If using 2 emergency numbers, press 2, Enter, (Emergency Number), Stop
4. Repeat for up to 5 total emergency numbers
5. To exit program mode, press and hold Stop for 2-3 seconds until warble sound
Option 2: CallSmartRescueFirst,ifNoAnswerCallEmergencyNumbersOsite
1. Press Enter to get into program mode
2. Press 1, Enter, (Emergency Number), Stop
3. Press 2, Enter, (same Emergency Number as entered in b), Stop
4.To exit program mode, press and hold Stop for 2-3 seconds until warble sound
Program the Location Message:
Note: This is always done, unless your Call Center requests it not to be.
1. Press Enter to get into program mode
2. To turn on message, press 1, 3, Enter, 2
a. For no message, press 1, 3, Enter, 0
3. Press 6, Record, (wait for beep, speak your message), Stop
4. To program frequency of message, press 1, 3, Enter, ___
1 = Plays message once
2=Playsmessagetwice(thisisstandardconguration)
3 = Plays message until the called party presses * on their phone
5. To exit program mode, press and hold Stop for 2-3 seconds until warble sound
**The Elevator Industry REQUIRES the ability to call into each elevator from outside of the
building. For instructions on how to put each phone into Consolidator Mode, see page 11.
Operations & Testing the System
Step 10: Operating and Testing the System
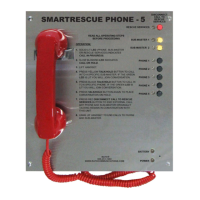
1. Once all connections are made, the following LEDs should be lit:
• Power LED, located on bottom edge of the face plate, will be constantly lit green.
• Battery LED, located on bottom edge of the face plate, will be constantly lit:
• Red = Low level charge
• Yellow = Mid level charge
• Green = Full charge
Note: Battery may take up to 18 hours to fully charge.
 Loading...