Do you have a question about the Raymarine autopilot and is the answer not in the manual?
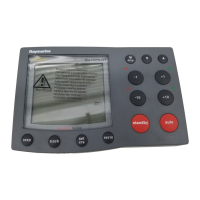
Summarizes the key functions and screen layout on the ST6001+ control unit.
Provides instructions for engaging/disengaging the autopilot, using Auto mode and adjusting the autopilot’s performance.
Explains how to change the lighting on the control unit display and keypad.
Tracking between waypoints created on navigation equipment connected to the autopilot system.
Using the autopilot to maintain a course relative to a true or apparent wind angle.
Explains how to adjust the rudder gain setting (mainly applies to non-GyroPlus Type 150/400 systems).
Describes how to use data pages to display SeaTalk and NMEA information on the control unit.
Provides information to help you identify and resolve common autopilot problems and error messages.
Explains how to maintain your autopilot system.
Outlines the product support available from Raymarine worldwide.
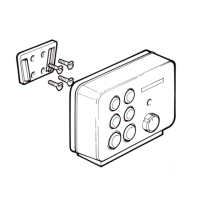
How to select a suitable location for the ST6001+ control unit.
How to install the ST6001+ control unit (surface mount and flush mount options).
How to connect the control unit to SeaTalk (for power supply and SeaTalk data exchange).
How to connect NMEA equipment to the control unit.
How to check an ST6001+ connected as a repeater unit on an existing autopilot system.
With the boat safely tied up, check the autopilot system and adjust some key autopilot settings.
The purpose of this seatrial is to calibrate the compass and optimize the autopilot set-up for your boat.
Explains the structure of the Calibration mode, and how to access the four calibration groupings.
Allows you to control the ST6001+ display features (bar graph type and data page information).
Includes autopilot settings that you may need to adjust in response to changing sea conditions.
Used specifically for the initial autopilot seatrial (see Chapter 6 for full details).
Controls the main autopilot settings and also the calibration lock.
Explains the key differences when using the ST6001+ to control a non-150/400 autopilot.
Explains how to commission your autopilot after installation.
Explains the Calibration mode when the ST6001+ is used with a non-150/400 autopilot.
| Brand | Raymarine |
|---|---|
| Model | autopilot |
| Category | Marine Equipment |
| Language | English |