Note:
DoNO Tremovetheprotectivecapfromthebaseconnectoruntilyouarereadytofitthewind
vanearm.
1.Decideonthecableroutingoptionthatsuitsyourinstallation.
2.Markthemountingsurfacebasedonyourcableroutingoption:
i.Option1—Placethebaseoftheunitinthedesiredlocation,withtheconnectionendfacing
directlyforwards,andmarkthepositionofthemountingholes.
ii.Option2—Usethesuppliedmountingtemplatetomarkthepositionofthemountingholes
andthecablehole .
3.Drillholesinthemountingsurfacebasedonyourchosencableroutingoption:
i.Option1—Drillaholeateachofthe2mountingholelocations.
ii.Option2—Drillaholeateachofthe2mountingholelocationsandan8mmholeforthe
cablerouting.
4.Unreeltheunit’scablefromthespindleitissuppliedon.
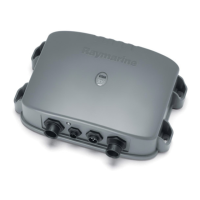
5.Ifoption2hasbeenchosenoryouneedtousethejunctionbox,youmayneedtoremovethe
spadeterminalsfromtheendofthecabletofeedthecablethroughtheholeinthemounting
surface.
6.Usingtheprovidedfixingssecuretheunit’sbasetothemountingsurface,ensuringthatthecable
doesnotgetsquashedbetweenthebaseandthemountingsurface.
7.Removetheprotectivecapfromtheconnectorinthebase,ensuringitstaysattachedtothebase.
8.Ensuringcorrectconnectororientation,insertthewindvaneassemblyintothebase.
9.Slidethelockingcollardownthearmtowardsthebase.
10.Tightenthelockingcollarusingonehandandturningclockwiseuntiltight.
11.Slidetherubbercoverdownthearmandfittotheendofthelockingcollar.
Installation19
 Loading...