EasyManua.ls Logo

Raynor COMMANDER 2000RGD User Manual

Default Icon
72 pages
To Next Page IconTo Next Page
Page #1 background imageLoading...
Page #1 background image
For Residential Use Only
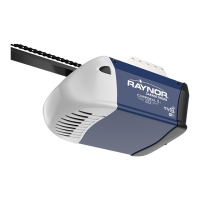
Garage Door Opener
Owners Manual
COMMANDER
Model 2000RGD
1/2 HP
Please read this manual and the enclosed safety materials carefully!
Fasten the manual near the garage door after installation.
The door WILL NOT CLOSE unless the Protector System
®
is connected and
properly aligned.
Periodic checks of the opener are required to ensure safe operation.
The model number label is located on the back of your opener.
Raynor Garage Doors
1101 E. River Road
Dixon, Illinois 61021
Complies with UL 325
Regulations effective
January 1, 1993.
®

Table of Contents

Question and Answer IconNeed help?

Do you have a question about the Raynor COMMANDER 2000RGD and is the answer not in the manual?

Raynor COMMANDER 2000RGD Specifications

General IconGeneral
BrandRaynor
ModelCOMMANDER 2000RGD
CategoryGarage Door Opener
LanguageEnglish

Summary

Safety Information and Precautions

Test Your Door for Balance

Test garage door balance and check for sticking or binding before installation.

ASSEMBLY STEP 1 Fasten the Rail To the Power Unit

ASSEMBLY STEP 2 Install the Trolley

Guides on sliding and positioning the trolley onto the opener rail correctly.

ASSEMBLY STEP 3 Attach the Rail Brackets

IMPORTANT INSTALLATION INSTRUCTIONS

Essential warnings and guidelines to follow before proceeding with the opener installation.

Installation Step 1 Determine Header Bracket Location

Installation Step 2 Install the Header Bracket

Installation Step 3 Attach the Rail to the Header Bracket

The Protector System®

IMPORTANT INFORMATION ABOUT THE SAFETY REVERSING SENSOR

Crucial information on how the safety reversing sensor works and its installation requirements.

Installation Step 4 Install the Safety Reversing Sensor

Installation Step 5 Position the Opener

Installation Step 6 Hang the Opener

Installation Step 7 Install the Door Control and Connect all Wiring

Installation Step 8 Electrical Requirements

Installation Step 9 Complete Safety Reversing Sensor Installation

Installation Step 12 Fasten Door Bracket

Installation Step 13 Connect Door Arm to Trolley

Adjustment Procedures for One-Piece Doors

Adjustment Step 1 Adjust the UP and DOWN Limits

Adjustment Step 2 Adjust the Force

Adjustment Step 3 Test The Protector System®

Adjustment Step 4 Test the Safety Reverse System

Steps to test the door's automatic reversal mechanism when encountering an obstruction.

IMPORTANT SAFETY INSTRUCTIONS

Operation of Your Opener

Receiver & Remote Control Programming

Having a Problem?

Having a Problem? (continued)

Related product manuals