Outdoor Installation
The stackless top provided with the heater is the stan-
dard venting method for outdoor installations. The
stackless top may be used in its standard top-mount-
ed configuration or moved to the rear of the heater for
a rear-exhaust configuration. See the diagram below.
Care must be taken when locating the heater out-
doors, because the flue gases discharged from the
vent cap can condense as they leave the cap.
Improper location can result in damage to adjacent
structures or building finish. For maximum efficiency
and safety, the following precautions must be
observed:
1. Periodically check venting system. The heater’s
venting areas must never be obstructed in any
way and minimum clearances must be observed
to prevent restriction of combustion and ventilation
air. Keep area clear and free of combustible and
flammable materials.
NOTE: Condensate can freeze on the vent cap.
Frozen condensate on the vent cap can result in a
blocked flue condition.
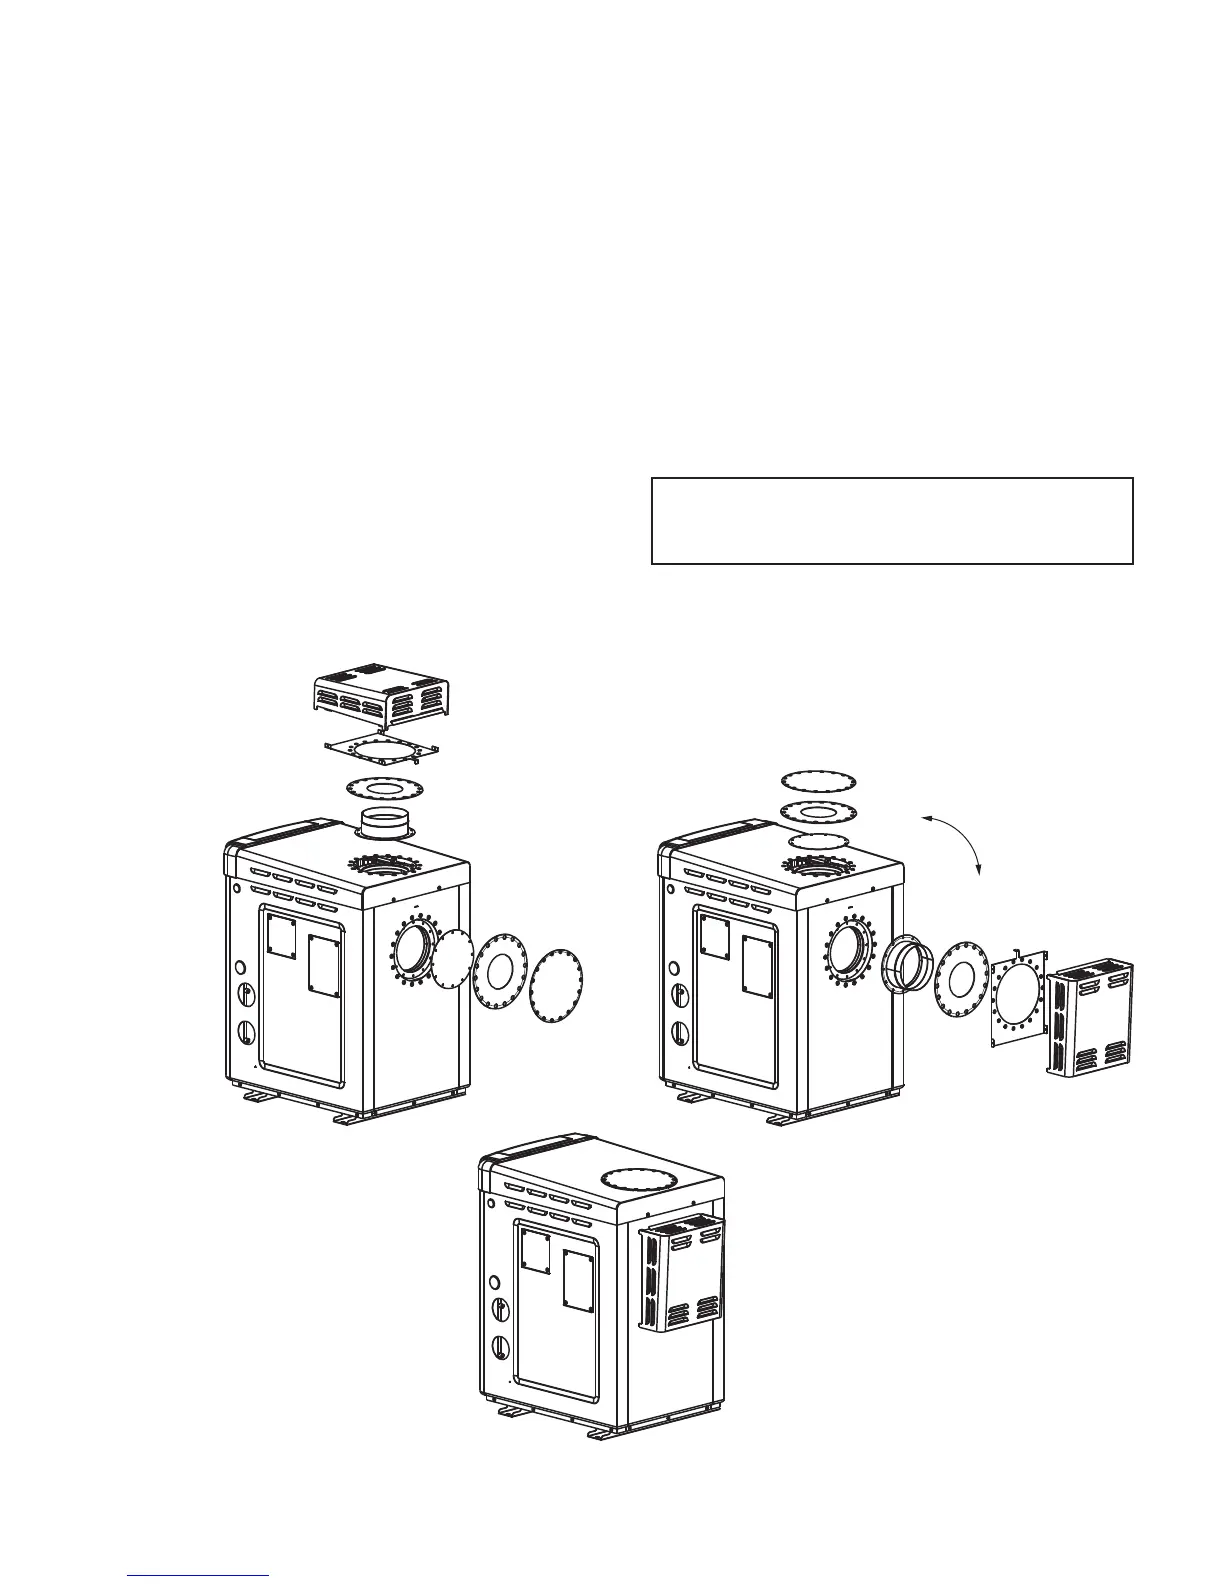
1) DISASSEMBLE
STACKLESS TOP
AND FLUE EXHAUST
COVER
2) SWAP LOCATIONS OF
STACKLESS TOP
AND FLUE EXHAUST
COVER
3) COMPLETED
REASSEMBLY
Outdoor Venting - Conversion to Stackless Rear Exhaust
2. Do not locate adjacent to any window, door, walk-
way, or gravity air intake. The vent must be locat-
ed a minimum of 4 ft horizontally from such areas.
3. Install above grade level and above normal snow
levels.
4. Vent terminal must be at least 3 ft above any
forced air inlet located within 10 ft.
5. Adjacent brick or masonry surfaces must be pro-
tected with a rust-resistant sheet metal plate.