METER MODE (cont.)
STEP DISPLAY REMARKS
**DISPLAY*TEST**
**DISPLAY*TEST**
Current Credit £XXX.XX
Emer Credit Left £XXX.XX
Current Debt £XXX.XX
Time HH:MM
Date DD/MM/YYYY
Total Credit £XXX.XX
Total Cards XXXXXXXXXX
Standing Charge £XXX.XX
Rate 1 Unit Cost £XXX.XX
Rate 2 Unit Cost £XXX.XX
kWh Rate 1 XXXXXXX.X
kWh Rate 2 XXXXXXX.X
kWh Total XXXXXXX.X
Emergency Credit £XXX.XX
Emergency Avail £XXX.XX
1
2
3
4
5
6
7
8
9
10
11
12
13
14
15
16
Test all character positions on display.
The consumer has £XXX.XX credit remaining.
The consumer has £XXX.XX emergency credit left.
The consumer has used up all credit and has
accumulated a debt of £XXX.XX.
Current Time.
Current Date.
Total value of credit that has been inserted.
Total number of cards inserted.
Standing Charge per 24 hours.
The tariff for rate 1.
The tariff for rate 2.
kWh registered on rate 1.
kWh registered on rate 2.
Total kWh registered.
Emergency Credit.
If the meters prepaid credit is above this point then
emergency credit is not selectable.
3.3 Standing Charge Collection
The standing charge is collected every 24 hours at midnight.
3.4 Rate Switching
The meter is configured to have up to 2 different rates controlled by an internal time switch.
3.5 Disconnection
3.5.1 No Remaining Credit
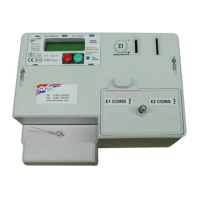
When the prepaid credit expires and the meter has gone into debt the main
contactor will be open, thus disconnecting the power. To restore power,
sufficient coins must be inserted to clear the outstanding debt.
An emergency credit facility is also available to reconnect power.
3.5.2 Reverse Energy Detection
If reverse power is detected above a pre-determined level the display will
indicate “RED” (Reverse Energy Detection). Reverse detection can only be reset
via the private mode switch buttons. Refer to page 8 for resetting.
4