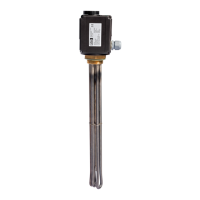
EEHR Electric screw-in heating element — 18.05.2018 English —
Prior to shipping, this device was carefully inspected and packed. Damages during transport cannot be excluded. Following receipt of the goods, please
check the delivery for completeness and damage. Document any damage sustained during transportation. Contact the forwarding agent to register a
complaint accordingly.
ATTENTION
Device damage from overheating!
Device damage due to overheating of the connection.
• Prevent thermal insulating of the device protective cover.
Install the device in the storage tank.
Note!
The current VDE standards and regulations, plus the directives applicable to the usage application must be adhered to.
These prerequisites must be met for installation:
• Sealed storage tank made from metal.
• Sufficient clearance for installation work. (Installation length + 150 mm)
• Screw-in sleeve that is shorter than the unheated length of the screw-in immersion heater (approx. 130 mm).
• Horizontal installation position.
• A thread size corresponding to the sleeve (alternatively, installation can be performed using a counter nut which is not supplied).
Proceed as follows:
1. Screw the device into the intended threaded bore at the storage tank.
- using incorrect tools may cause device damage. Use an open-ended spanner of the correct size. Installation using pliers, etc. is not
permitted.
– To seal the screw-in thread, use the supplied flat gasket.
– Take care to prevent cross-threading of the screw-in thread when screwing in.
– Ensure that the cable gland points downward after having been screwed in.
2. Tighten the device to no more than 70 Nm.
– Use a 60 mm AF open-ended spanner to tighten
3. Check the device:
– For secure seating.
– For sufficient tightness of the screw-in thread to the storage tank.
The device is installed.


 To Next Page