Variomat Touch — 09.2020 - Rev. A
9. Press "OK" to conclude the start routine.
Note!
After successful conclusion of the start routine, you are in Stop mode.
Do not yet switch to Automatic mode.
8.4 Filling the tanks with water
The following information applies to the devices:
• Control unit and primary tank.
• Control unit and primary tank and one secondary tank.
• Control unit and primary tank and more than one secondary tanks.
Filling level of primary tank
8.4.1 Filling with a hose
Preferably use a water hose to fill the primary vessel with water when the
automatic make-up device is not yet connected.
• Use a vented water hose filled with water.
• Connect the water hose to the external water supply and the "FD" feed and
drain cock (1) at the primary vessel.
• Check whether the shut-off valves between control unit and primary vessel
are open (supplied pre-wired in open position).
• Fill the primary vessel with water until the filling level has been reached.
8.4.2 Filling with the solenoid valve in the make-up
1. Use the "Manual mode" button to switch to "Manual" mode.
2. Open the “WV make-up valve” via the corresponding button until the
specified filling level is reached.
– Continuously monitor this process.
– If a high-water alarm is generated, the make-up valve “WV make-up
valve” is automatically closed.
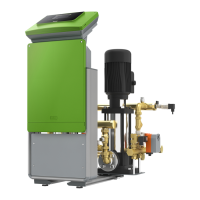
8.5 Venting the pump
Risk of burns
Escaping hot medium can cause burns.
• Maintain a sufficient distance from the escaping medium.
• Wear suitable personal protective equipment (safety gloves and
goggles).
Vent the "PU" pump as follows:
• Remove the vent screw (2) from the pump (1) and vent the pump until
bubble-free water escapes.
• Screw the vent screw (2) back in and tighten.
• Check the vent screw (2) for leaks.
Note!
Repeat the venting if the pump delivery rate is zero.
8.6 Parametrising the controller in the Customer menu
Use the Customer menu to display or correct system-specific values. In the
course of commissioning, the factory settings must be adjusted for the system-
specific conditions.
– For adjusting the default settings, see chapter 10.3 "Configuring settings in
the controller" on page 19 .
– For information about controller operation, see chapter 10.1 "Operator
panel" on page 19 .
8.7 Starting Automatic mode
Automatic mode can be started as soon as the system is filled with water and the
gases contained have been vented.
• Press button "AUTO“.
– During commissioning, continuous degassing is automatically
activated to remove any residual free or dissolved gases from the
system. This time can be set in the Customer menu as required by
the system conditions. The default setting is 12 hours. Subsequent to
the continuous degassing, the device automatically switches to
interval degassing.