29
Equipment Operation
TYPICAL CANVAS-NO RADAR ARCH
Following is an overview of the canvas system. The can-
vas parts consist of the bimini top, side curtains, aft cur-
tain, windscreen and if equipped the bimini camper can-
vas along with bows and hardware.
The canvas requires a set installation procedure which
makes the job easier and faster. Sometimes a second per-
son can help in the canvas set-up. Once the skipper has
gained experience he will find shortcuts to the installation
process. Normal installation requires no special tools. Never
fold canvas parts containing clear vinyl windows such as
windscreens, side or aft curtains since the clear windows
could be damaged. This is especially true in colder climates.
Roll all canvas parts and make sure the vinyl windows are
dry to prevent debris forming on the window material.
Store in a clean, dry environment. A little bit of silicone
spray on the zippers and vasoline on any snaps periodi-
cally helps canvas parts fasten easier.
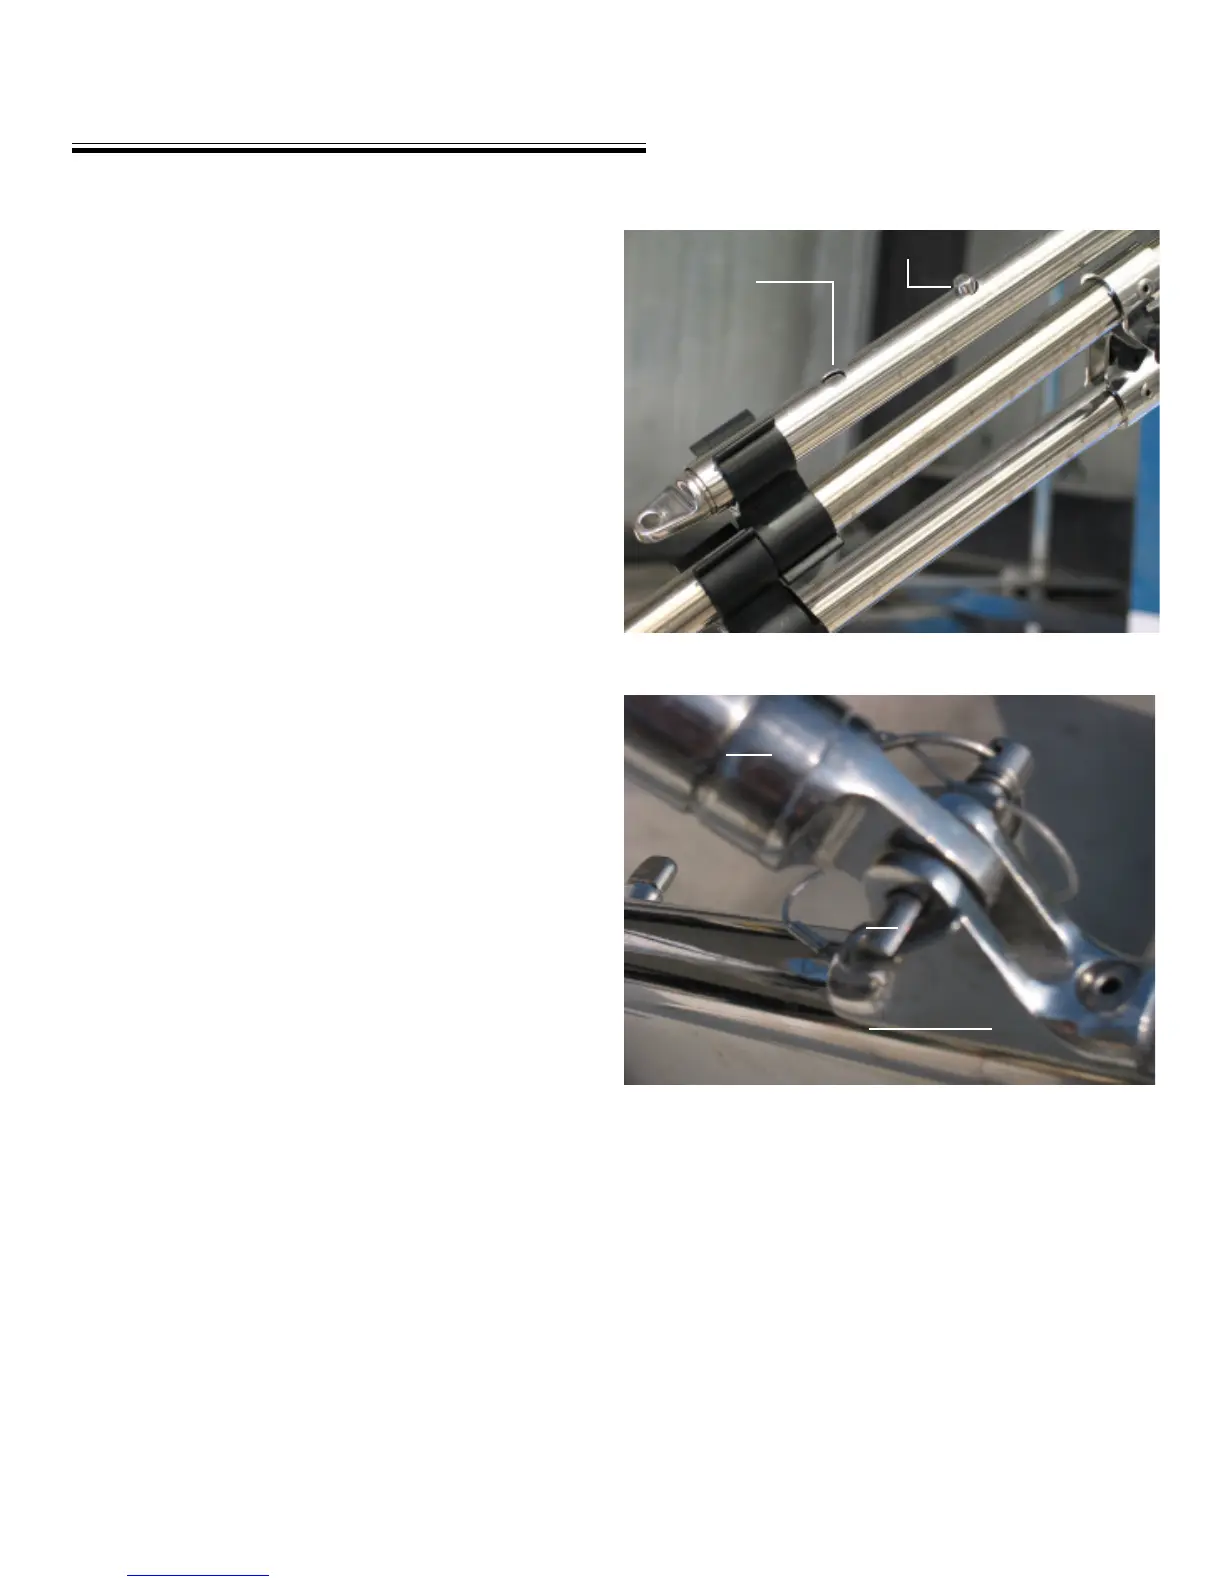
Bimini Top/Windscreen Connector
The bimini top sets at an angled position when not in use.
At speeds over 40 mph the canvas must be set in this stowed
position with all boots zipped up and appropriate bows
and canvas parts fitted inside the boots.
To set up the bimini top:
1. Unzip the top boot and store it for future use.
2. Pull the bimini top forward to unfold the entire top.
3. Make sure the forward inner bow support locking pin is
in the lower pin hole for initial adjustment.
4. Do the same with the other side. See illustration A.
5. Ensure the port and starboard lower forward bows are
attached to the clevis connectors and locked with the clevis
pin. See illustration B.
Initial bottom
hole position
Final top hole position
Illustration A
Clevis Connector
Clevis Pin
Bow Eye
Illustration B