30
Chapter 7
6. Leave the 2 front black adjustment straps disconnected
at this time.
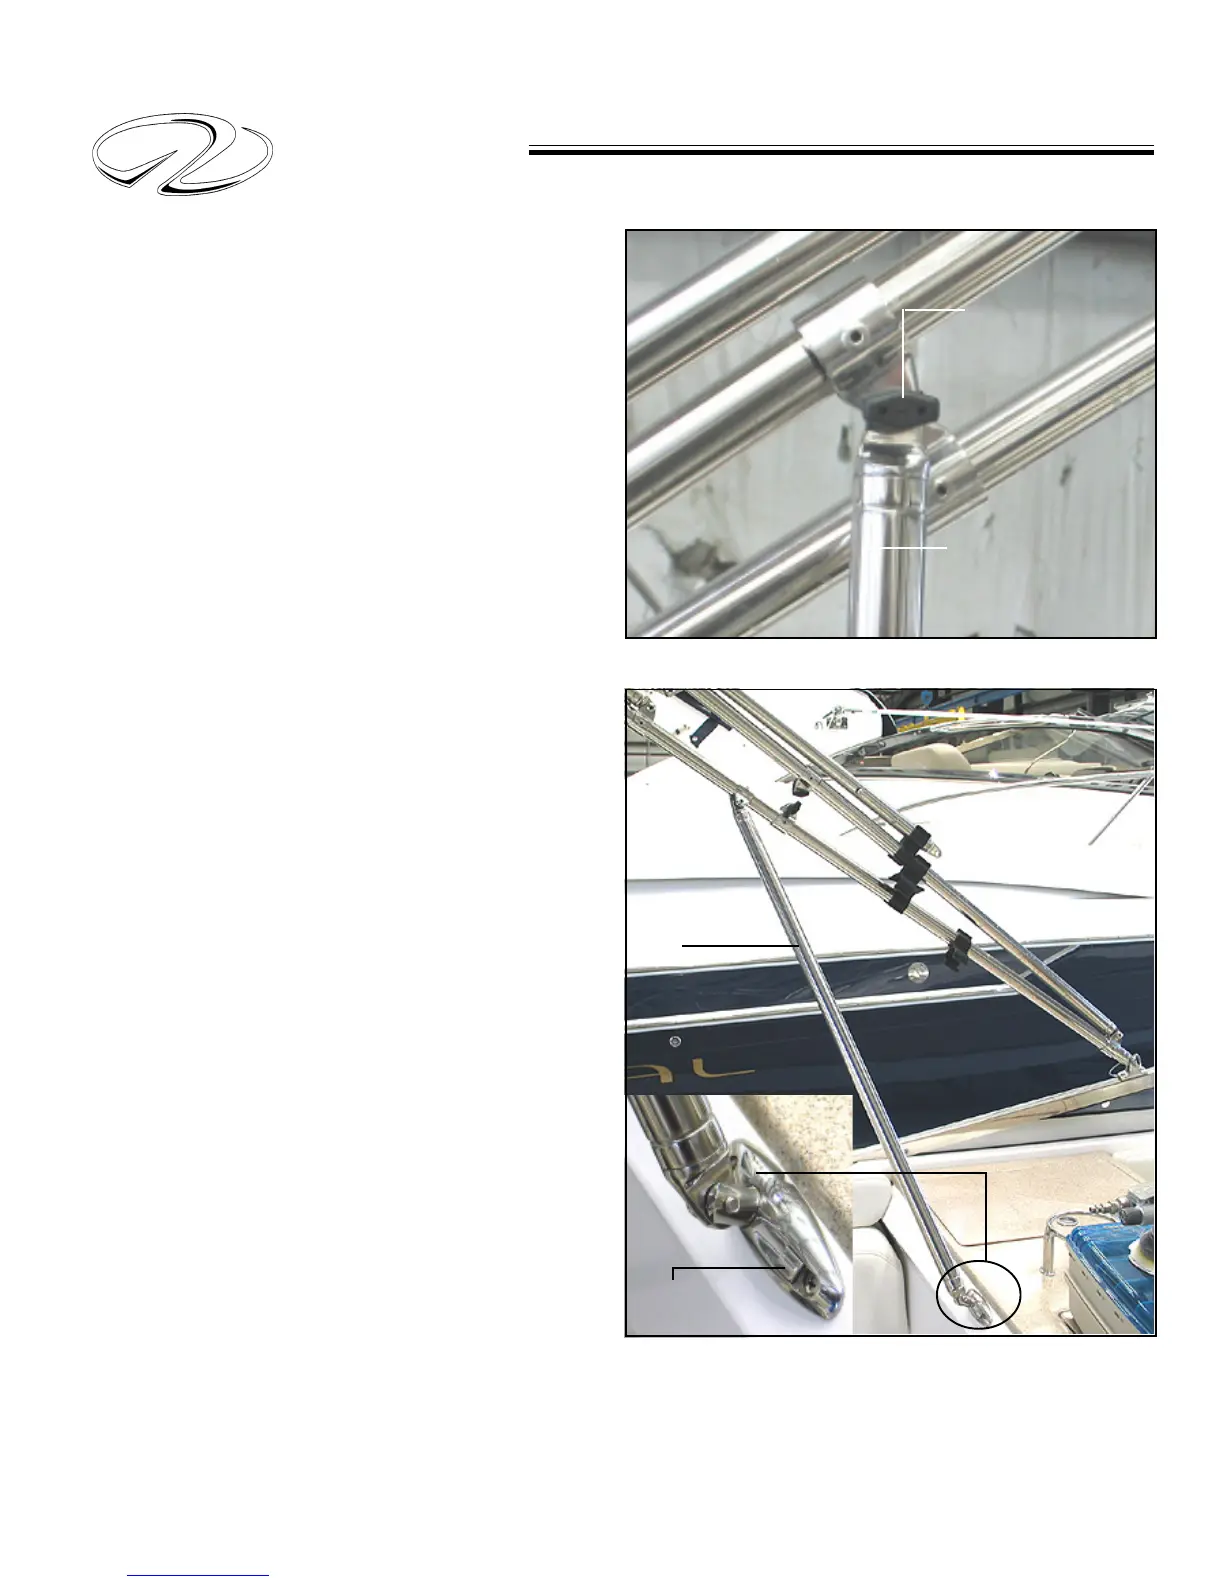
7. Note the 2 black knobs attached to the bows. They are
used to attach the stabilizer bar to the bow framework.
Make sure the knobs are tight since this bar assists in hold-
ing the canvas framework. Install the stabilizer bar on the
opposite side. See illustration C.
8. Pull the bimini canvas to stern.
9. Next, install the bimini windscreen by zipping it up to
the bimini top. To ease snapping the windscreen to the
deck snaps it may be made easier by unzipping the flaps.
Make sure the cabin door is shut to prevent falling. Rezip
the flaps shut.
10. The side curtains usually are marked port and star-
board. Zip the side curtain to the bimini top. Next, unzip
the flaps to access the deck snaps easier. Rezip the flaps
shut.
11. To take the slack out of the bimini top at this time
note the two forward canvas bows. There are two hole
adjusters in the outside bow. From earlier, the bow is in
the lower hole. Push the bow to the top hole for tighten-
ing up the canvas. Do the same with the other forward
bow for the final bimini top adjustment. Pull the top for-
ward and connect adjustment straps to tighten canvas.
12. Notice the longer stabilizer bar. Insert it in the latch
located at the port dash. This bar assists in keeping the
canvas form wobbling from port to starboard. To release
the stabilizer bar push the latch to port.
13. Zip the aft curtain to the aft bimini canvas. Then snap
it completely around the stern deck. It may be easier to
accomplish the above task with the flap zipped out in
order to reach all the snaps. Finally, rezip the flap shut.
14. If equipped with bimini camper canvas remove it from
the boot. Install into the bimini top aft zipper. Attach the
aft bows and secure the push pins. Install bimini side and
aft curtains.
Stabilizer Bar-Short
Stabilizer Bar
Knobs
Illustration C
Push Latch To
Release Bow
Long Stabilizer
Bow