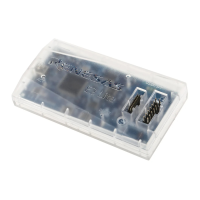
The Renesas E2 Emulator and E2 Emulator Lite are on-chip debugging emulators designed for Renesas' mainstream MCUs, specifically supporting the RE Family. These tools facilitate the development and debugging of user programs on target microcontrollers.
Function Description:
The E2 Emulator and E2 Emulator Lite serve as essential development tools for debugging and programming Renesas MCUs. The E2 Lite provides basic debugging functionalities, making it a highly affordable option. The E2 Emulator, in addition to the E2 Lite's features, offers enhanced capabilities such as high-speed downloading (up to twice the rate of the E2 Lite) and adjustable power supply to the user system (from 1.8 V to 5.0 V at 0.1-V intervals). The E2 Emulator can also function as a Flash Programmer, allowing for the programming of flash memory.
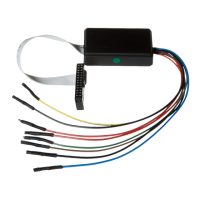
Both emulators connect to a host machine (personal computer) via a USB interface cable and to the user system (the application system with the MCU to be debugged) via a user-system interface cable. The debugging process involves using programming software, such as the Renesas Flash Programmer, and an emulator debugger (e.g., e² studio) to control and monitor the MCU.
Key debugging functions supported include:
- Memory Reference or Change: Allows viewing and modifying memory contents during program execution.
- Breaks: Supports software breaks (2000 points), hardware breaks (execution address: four points; data access: two points), and forced breaks.
- Trace Function: Acquires information such as branch-source PC values, branch-destination PC values, interrupt occurrences, and return from interrupts. Trace recording can be started by user-program execution and ended by stopping the user program or when trace memory becomes full.
- Performance Measurement: Measures performance between the start and stop of user program execution.
- Hot Plug-in: Supported for seamless connection and disconnection.
The E2 Emulator also offers extended functions not available in the E2 Lite, such as:
- Solution for Tuning Current Consumption: Measures current consumption by the user system when power is supplied from the E2.
- External Trigger Input/Output: Allows external triggers to be input to or output from the E2 expansion interface.
Important Technical Specifications:
- Supported Devices: RE Family MCUs.
- Interface: SWD I/F (Serial Wire Debug Interface) for debugging (DBG) and SCI I/F (Serial Communication Interface) for flash programming (PRG) on the E2. The E2 Lite supports SWD I/F for debugging but does not support SCI I/F for flash programming.
- Power Supply to User System:
- E2: Can supply power from 1.8 V to 5.0 V, up to 200 mA.
- E2 Lite: Can supply power of 3.3 V, up to 200 mA.
- Operating voltage range for the emulator itself is 1.8 V to 5.5 V.
- Current Consumption (when user system is powered externally):
- E2: Approximately 20 mA at 3.3 V, 40 mA at 5.0 V.
- E2 Lite: Approximately 20 mA at 3.3 V, 40 mA at 5.0 V.
- Connector Types:
- 20-pin (1.27-mm pin pitch) connector (Samtec FTSH-110-01-L-DV-K)
- 10-pin (1.27-mm pin pitch) connector (Samtec FTSH-105-01-L-DV-K or FTSH-105-01-L-DV)
- Interface Cables:
- 20-pin to 20-pin cable (comes with E2, separately sold for E2 Lite)
- 20-pin to 10-pin cable (separately sold for both E2 and E2 Lite)
- Recommended Circuitry: Signal lines between the connector and the MCU should be as short as possible (within 50 mm). No capacitors, series resistors, or filters should be installed on signal lines to ensure correct communication.
- Reset Pin (RES#): The output of the user system's reset circuit must be an open collector if a user logic reset circuit is included. If not, the RES# pin from the connector should be directly connected to the MCU's RES# pin.
- MD Pin: Connection is optional. Set to high level for debugging, low level for flash memory rewriting. The MCU's MD pin circuit includes a pull-up resistor.
- EHMD Pin: Must be switched to low level during debugging as the MCU cannot enter energy harvesting mode.
- GND Pins: Must be securely connected to the VSS pin of the MCU and be at the same ground level.
- Flash Programming Conditions: Requires the MCU to be in "all power supplied mode" (ALLPWON), "normal power control mode" (NORMAL), and code flash memory in "read mode." The system clock frequency (ICLK) must be 1 MHz or higher, and the flash memory function stop bit (FLFSTP) in FSTPCR must be 0.
- Software Breakpoints: Can be set in flash memory under specific MCU conditions (ALLPWON, NORMAL, read mode, ICLK ≥ 1 MHz, FLFSTP = 0, and "Use Flash Breakpoints" enabled). Do not set in secure areas or read addresses where breakpoints are set during user program execution.
- Peripheral I/O Registers Occupied by Debugger: DBGSTOPCR, MTB (SFR area), SYOCDCR. These registers should not be modified during debugging.
- Memory Protection Units (MPUs):
- Arm® MPU: Protected area is not accessible.
- Bus master MPU: Accessible.
- Slave MPU: Accessible.
- Security MPU: On-chip SRAM/peripheral I/O registers: Reading returns dummy value (0x00), writing is ignored. Flash memory: Reading returns dummy value (0x00), writing is possible if data are downloaded.
Usage Features:
- Power On/Off Procedure: A specific sequence must be followed when turning on/off the emulator, host machine, and user system, especially when a separate power supply is used for the user system or when power is supplied from the emulator.
- Power Supply Function: The E2/E2 Lite can supply power to a simple evaluation system. However, for programs requiring high reliability, a stable, separate power supply for the user system is recommended.
- Debugging Configurations: The e² studio debugger allows for detailed configuration of connection settings, including holding reset during connect, specifying ID code for debugging after rewriting, and setting the work RAM start address for flash reprogramming.
- Flash Memory Reprogramming: The emulator debugger can reprogram flash memory for debugging operations, writing a temporary program to on-chip SRAM to facilitate this.
- Low-Power Modes: Debugging in SSTBY or SNOOZE mode has limitations, as the emulator debugger cannot access the system bus. Forcedly stopping a program in these modes will release the MCU from the low-power state. DSTBY mode debugging is not supported.
- Power Control Modes: Transitions to boost mode are not possible during debugging. The PLL cannot be used as the MCU's operating clock during debugging.
- Trace Function: The MTB trace function uses the on-chip SRAM for trace recording. Users must ensure that the trace recording area does not conflict with the user program's use of SRAM.
Maintenance Features:
- Connector Handling: Always grasp the connector cover when connecting or disconnecting cables to prevent damage to the wiring. Ensure correct cable insertion direction.
- ESD Precautions: CMOS devices are sensitive to electrostatic discharge. Measures such as using anti-static containers, grounding tools and operators, and maintaining environmental control (e.g., humidifiers) are crucial.
- Product Reliability: Renesas products are classified as "Standard" or "High Quality." Users must ensure that the product's quality grade and usage conditions (maximum ratings, operating voltage, heat dissipation, etc.) are appropriate for their application.
- Final Evaluation: Before mass production, a final evaluation of the user program written to flash ROM should be performed without the E2/E2 Lite connected to ensure correct operation.
- MCU Re-programming: After debugging, if the MCU is to run independently, it must be re-programmed using programming software to guarantee correct operation.
- MCU Stress: MCUs used for debugging undergo stress from repeated flash memory programming. These MCUs should not be used in mass-production for end users.
- Software Breakpoint Removal: All software breakpoints must be removed when disconnecting the emulator debugger, followed by a CPU reset to reprogram flash memory.