E2/E2 Lite Notes on Usage
R20UT4582EJ0100 Rev.1.00 Page 19 of 30
Jul.16.19
3.1.2 When Power is Supplied to the User System from the Emulator
<When using the emulator>
(1) Connect the user system.
Connect the emulator and the user system with a user-system interface cable.
(2) Connect the host machine and turn on the emulator.
Connect the emulator and the host machine with a USB interface cable, then turn on the emulator.
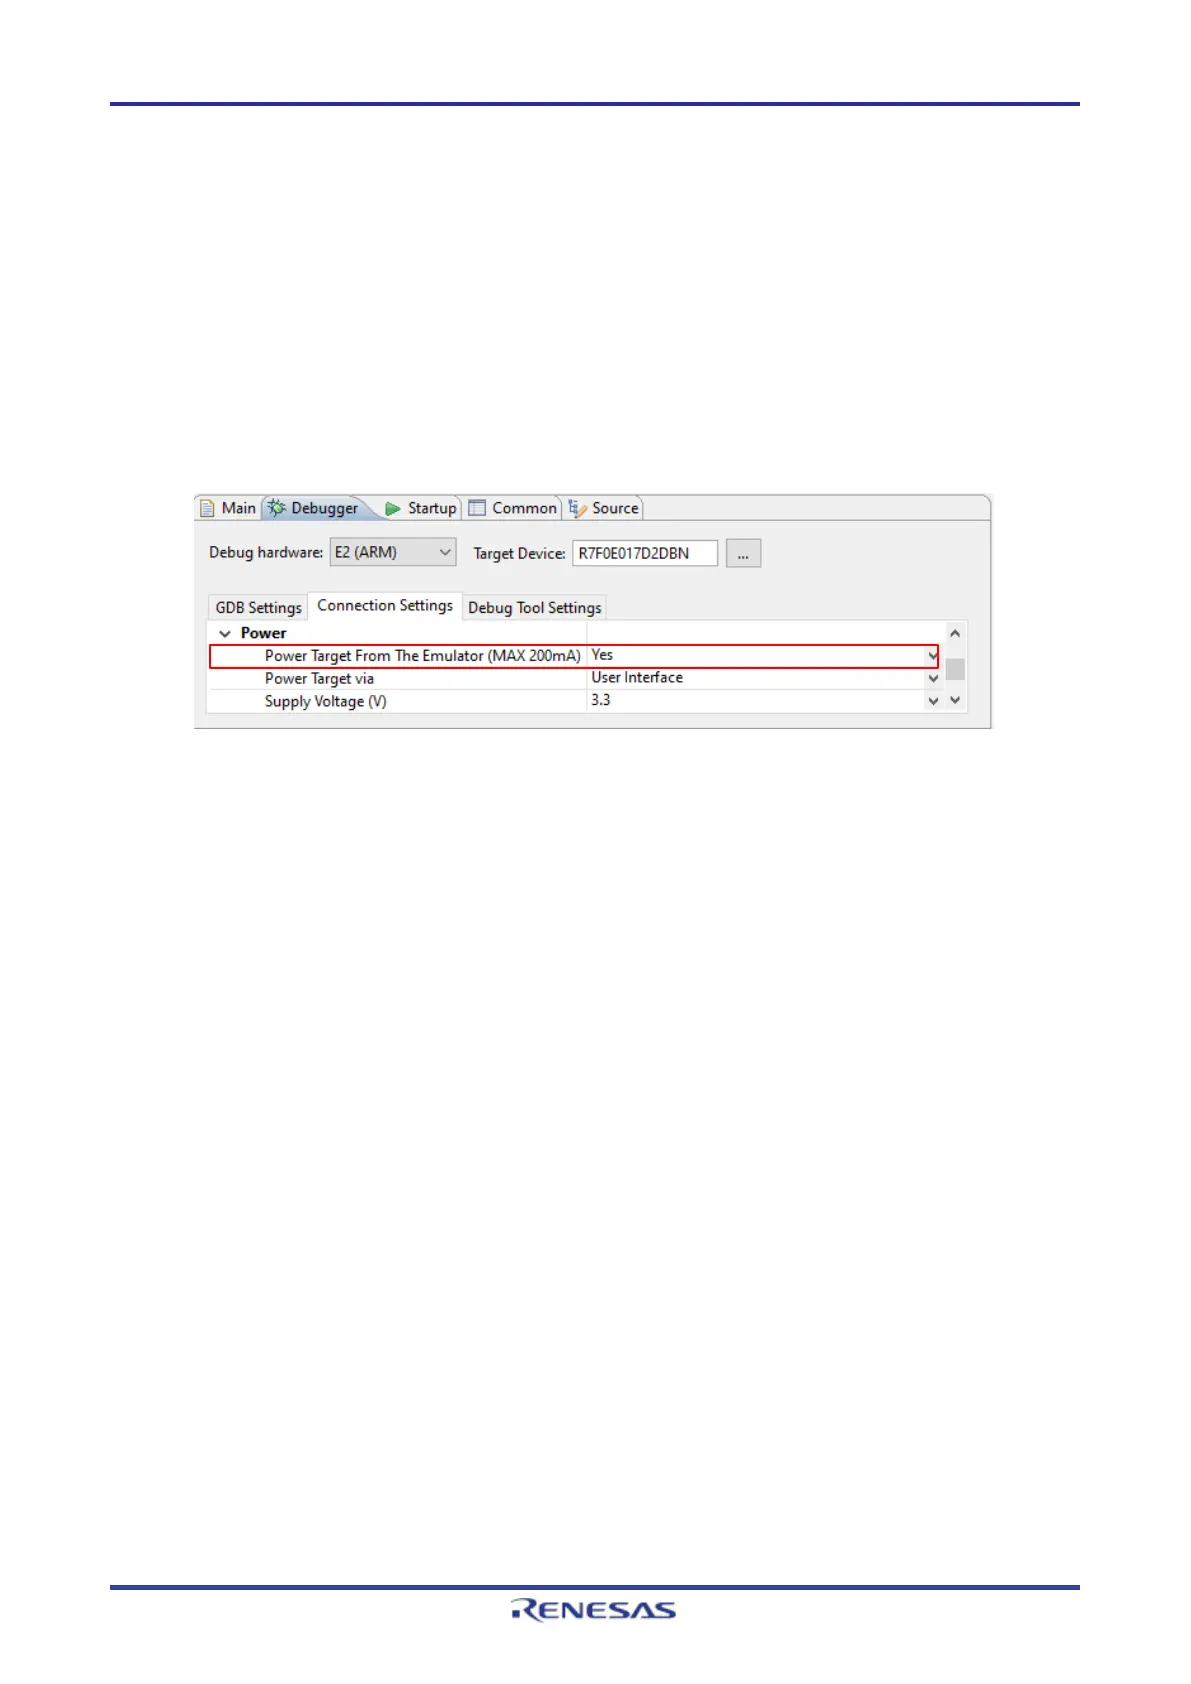
(3) Launch the emulator debugger.
Launch the emulator debugger and select the setting of power supply to the user system.
Under [Power] on the [Connection Settings] tabbed page, select [Yes] for [Power Target From The
Emulator (MAX 200mA)] (the operation is explained for the case when the e
2
studio is in use). Refer to
section 3.3, Notes on Using the Emulator Debugger, for how to open the [Debug Configurations] window.
Figure 3.1 Setting for Supplying Power
(4) Connect the emulator debugger or programming software to the emulator.
Connections may vary depending on software.
<When finished using the emulator>
(1) Disconnect the emulator from the emulator debugger or programming software.
Disconnections may vary depending on software.
(2) Close the emulator debugger or programming software.
Close the emulator debugger or programming software.
(3) Turn off the emulator and disconnect the emulator.
Disconnect the USB interface cable from the emulator, then turn off the emulator.
(4) Disconnect the user system.
Disconnect the user-system interface cable from the user system.
3.2 Power Supply Function of the E2/E2 Lite
The E2/E2 Lite can supply power to a simple evaluation system.
• E2: Can supply power of 1.8 V to 5.0 V, up to 200 mA.
• E2 Lite: Can supply power of 3.3 V, up to 200 mA.
When using the power supply function of the E2 or E2 Lite, check the voltage that is actually being supplied
to the user system since this depends on the environment.