Renesas RA Family Getting Started with Low Power Applications for RA6 and
RA4 Groups
R11AN0471EU0104 Rev.1.04 Page 17 of 40
Oct.1.21
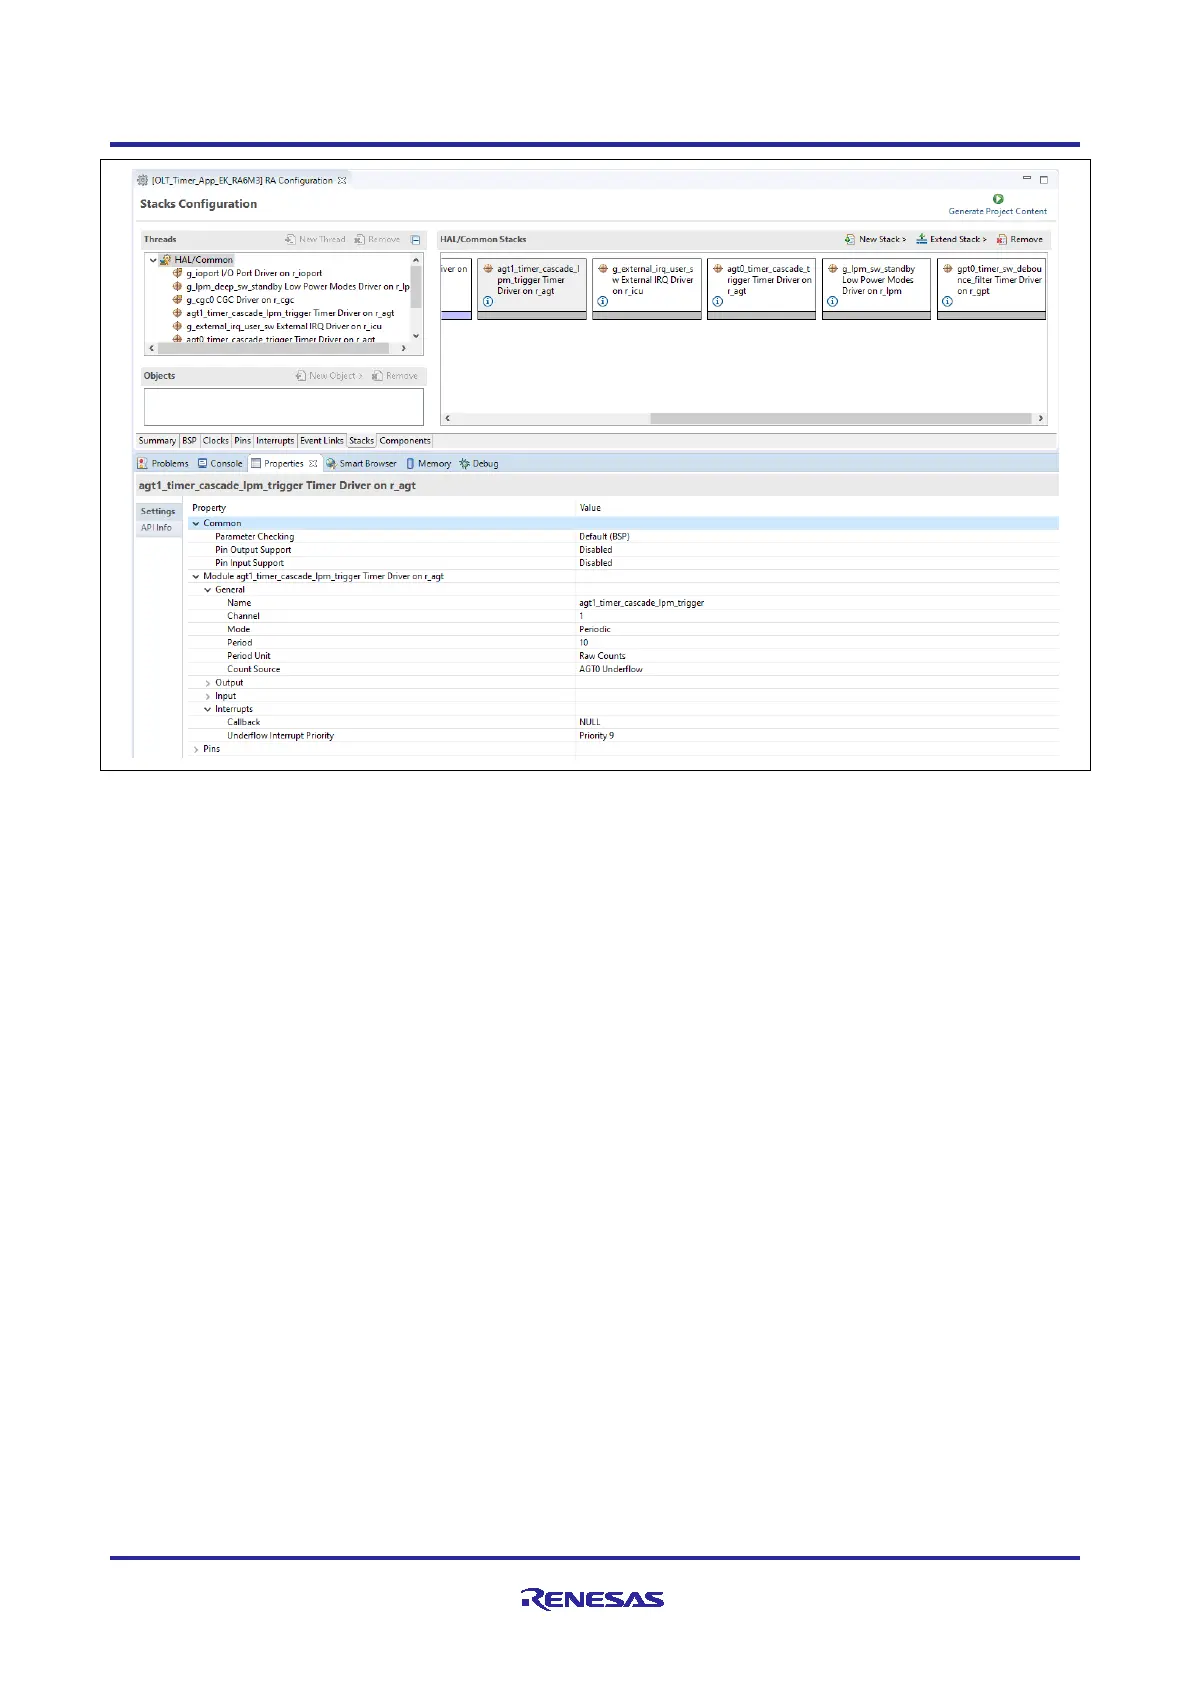
Figure 14. AGT1 Properties Configuration using the Properties Tab
3.4 Pin Configuration
The FSP application can support multiple pin configurations. In this application we use two different pin
configurations, one for active mode of operation and other for power saving mode operation. Refer to the
Renesas Flexible Software Package (FSP) User’s Manual on how to configure the FSP Pin Configuration.
3.4.1 Pin Configuration in Normal Mode
The pin configuration in normal mode is the MCU pin functions that you want to use in normal operating
condition. Figure 15 shows the pin configuration of the EK-RA6M3 kit which is used in normal mode.

 Loading...