- 9 -
EN
7.3 &KDQJLQJVXFWLRQ¿OWHUV\VWHP
7KHVXFWLRQ¿OWHUV\VWHPFRQVLVWVRIDVSRQJH¿OWHUDQGDVLQWHU¿OWHU
9DFXXPFDQRQO\EXLOGXSLQDFOHDQVXFWLRQ¿OWHUV\VWHP
1HYHURSHUDWHWKHGHYLFHZLWKRXWWKHFRPSOHWHVXFWLRQ¿OWHU
¿
5
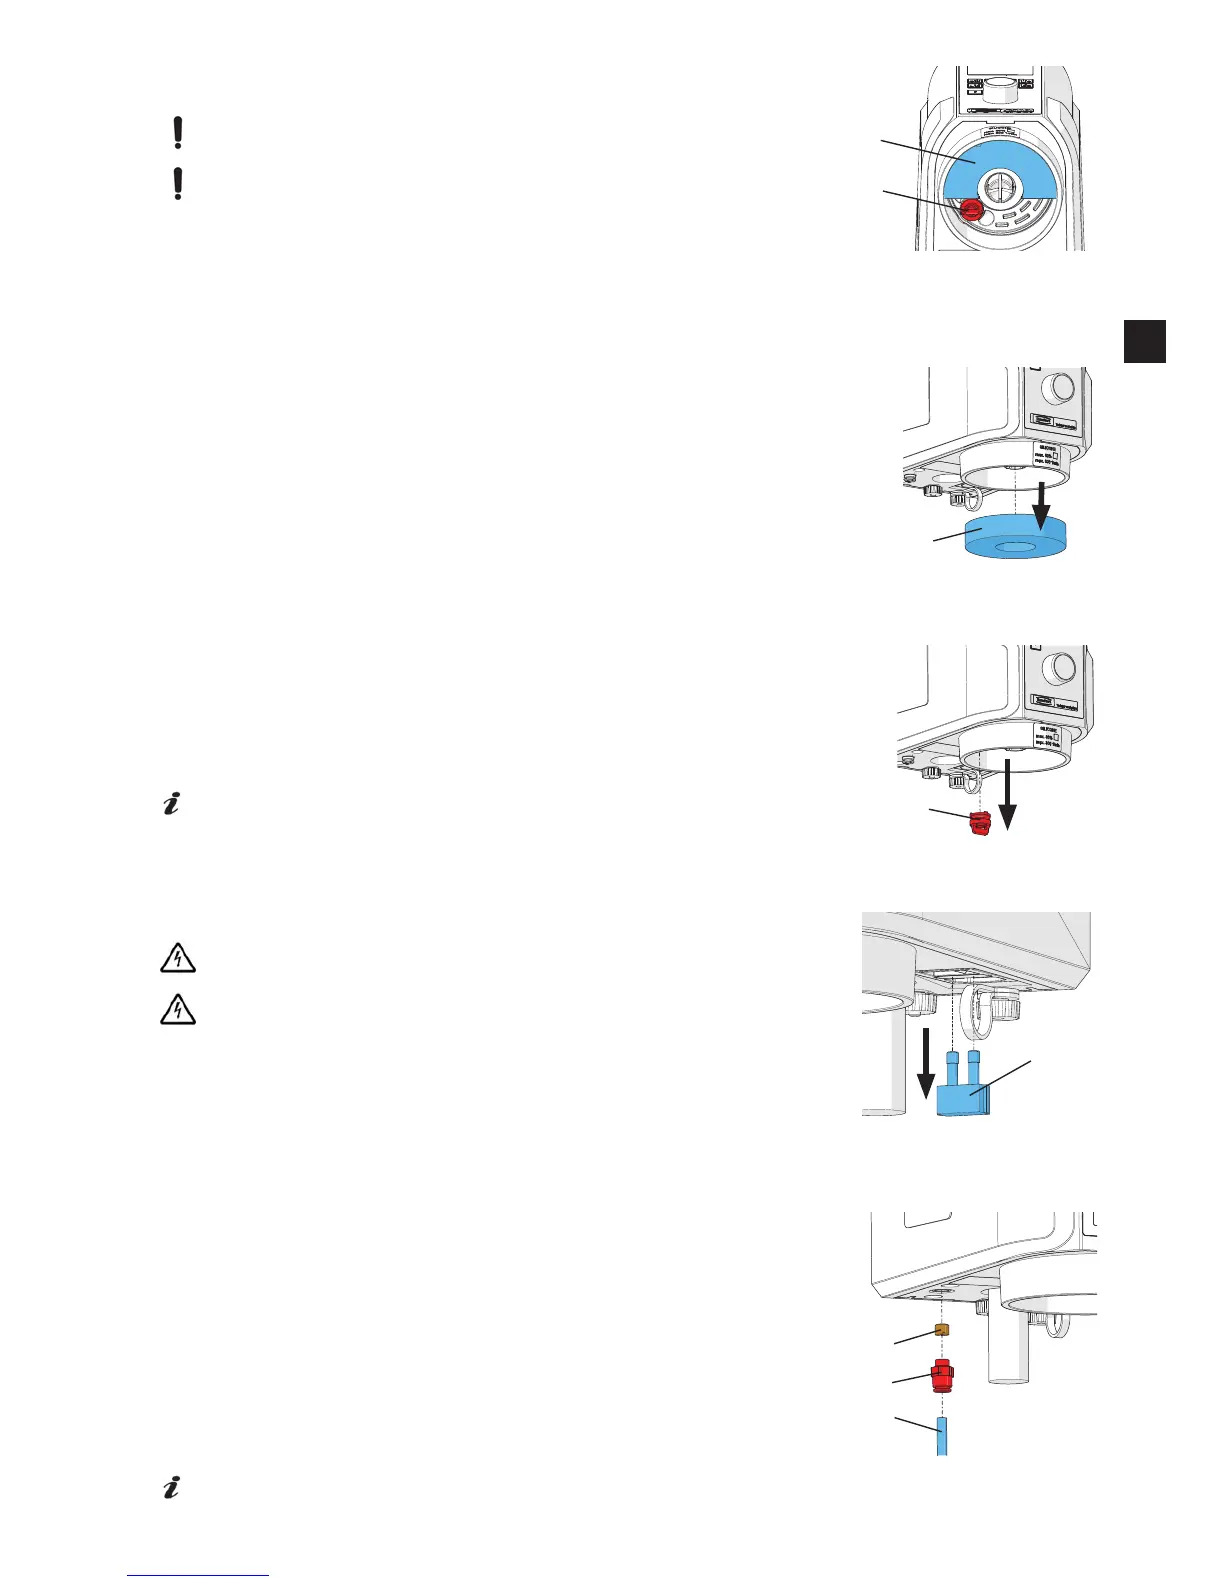
7.3.2 6LQWHU¿OWHU
3XOOWKHVSRQJH¿OWHURXWLQWKHGLUHFWLRQRIWKHEDVH
/RRVHQWKHVLQWHU¿OWHUE\WXUQLQJFRXQWHUFORFNZLVHDQGUHPRYH
,QVHUWQHZVLQWHU¿OWHUDQGWLJKWHQFORFNZLVH7KHVLQWHU¿OWHUVKRXOG¿WWLJKWO\
5HSODFHWKHVSRQJH¿OWHU
7KHVLQWHU¿OWHUFDQDOVREHFOHDQHGLQWKHXOWUDVRQLFEDWK
5HFRPPHQGDWLRQ3ODVWHUVROYHQW*2$UWQR
¿
14
7.4 Changing fuses
Before replacing a fuse, disconnect the appliance from the mains.
Never use a fuse of larger impedance.
1. Switch the appliance off.
2. Disconnect from mains.
3. Unlatch the fuse holder (7) on both sides and remove.
4. Change blown fuse.
5. Replace the fuse holder by sliding back into the socket until both sides lock into place.
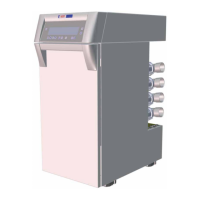
7.5 &KDQJLQJLQOHW¿OWHU
7ZLVWHUHYROXWLRQYHQWXUL only
1. Disconnect the appliance from the compressed air supply.
2. Press the compressed air connection ring (12) upwards and remove the com-
pressed air tube (18).
/RRVHQWKHFRPSUHVVHGDLUFRQQHFWLRQVFUHZ¿WWLQJDQGUHPRYHWKH¿OWHU
(13).
6FUHZWKHQHZ¿OWHULQWRWKHFRPSUHVVHGDLUFRQQHFWLRQUHSODFHWKHVFUHZ¿WWLQJ
and hand-tighten
5. IPlug the compressed air tube (17) into the tube attachment on the compressed
air connection (11) as far as it will go, passing the point of slight resistance.
6. Reconnect the appliance to the compressed air supply.
)UHTXHQWLQWDNH¿OWHUEORFNDJHLVDQLQGLFDWLRQRIFRQWDPLQDWHGFRPSUHVVHG
DLU,QVXFKFDVHVZHUHFRPPHQGWKHXSVWUHDPLQVWDOODWLRQRID¿OWHUSUHVVXUHUHJXODWRU
VHHVHFWLRQÄ$FFHVVRULHV³
¿