- 4 -
EN
4. Commissioning
4.1 Setup Recommendations
Operate the appliance at room temperature 15 - 30ºC [59 – 86ºF].
:KHQVHWWLQJXSWKHDSSOLDQFHSOHDVHQRWHWKHIROORZLQJ
Do not place the appliance under a heat source.
Do not place the appliance in front of open windows.
Do not set the appliance up where it will be subjected to direct sunlight.
Do not subject the appliance to high humidity.
4.2 Wall Mounting
3OHDVHKDYHWKHIROORZLQJLWHPVRQKDQG
pencil,
drill template,
Phillips head screwdriver,
drill
drill bit 8 mm [5/16th inch] - appropriate for the wall material.
Make sure the wall on which you intend to mount the device is capable of bearing its weight!
Please ensure that there are no electric cables or water pipes running
through the wall at the place of installation!
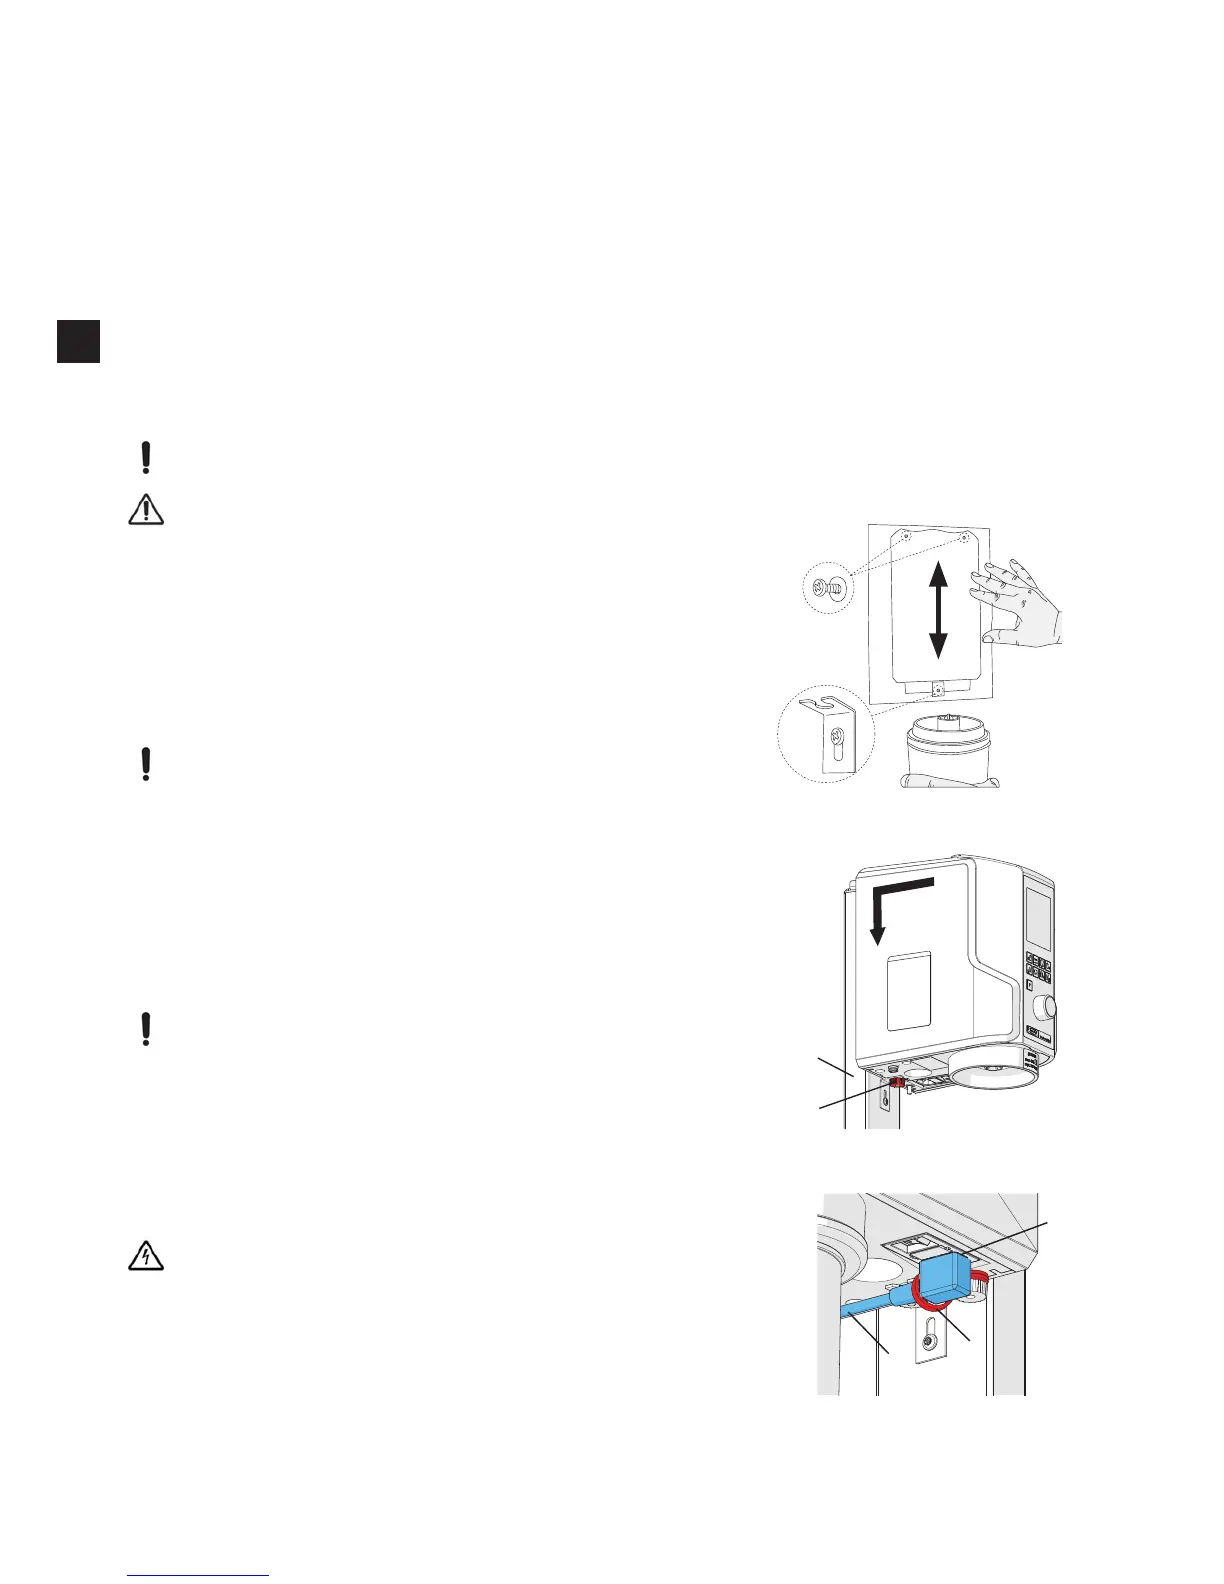
1. Establish optimum working height.
2. Align the drill template and mark the drill holes.
3. Drill the required holes >>> depth at least 55 mm [2.2 inch].
4. Insert the dowels.
5. Screw the top screws into the dowels. Allow the screws to protrude
9-10 mm [0.35 - 0.4 inch].
6. Screw the lower mounting bracket into place.
7. Hang the appliance on the wall.
6HFXUHWKHGHYLFHE\WLJKWHQLQJWKHNQXUOHGQXW¿J
Tighten the knurled nut securely
¿
4.3 Benchtop Models
7KHVWDQGFDQEHXVHGWRFRQYHUWWKHYDFXXPPL[HUWRDÀRRUPRXQWHG
appliance.
1. Position the stand on a level surface.
2. Hang the appliance in the stand.
3. Secure the appliance by tightening the knurled nut (10).
Tighten the knurled nut securely.
The stand is not part of the standard delivery and must be ordered as an optional
accessory (refer to section „3.3 Accessories“).
¿J
19
10
4.4 Electrical connection
Ensure the mains supply and voltage marked on the nameplate is identical.
Secure the mains cable (17) through the cable safety catch (9).
Plug mains cable into socket (8) on appliance
.
Plug in at the mains.
8
9
¿