39
www.renishaw.com
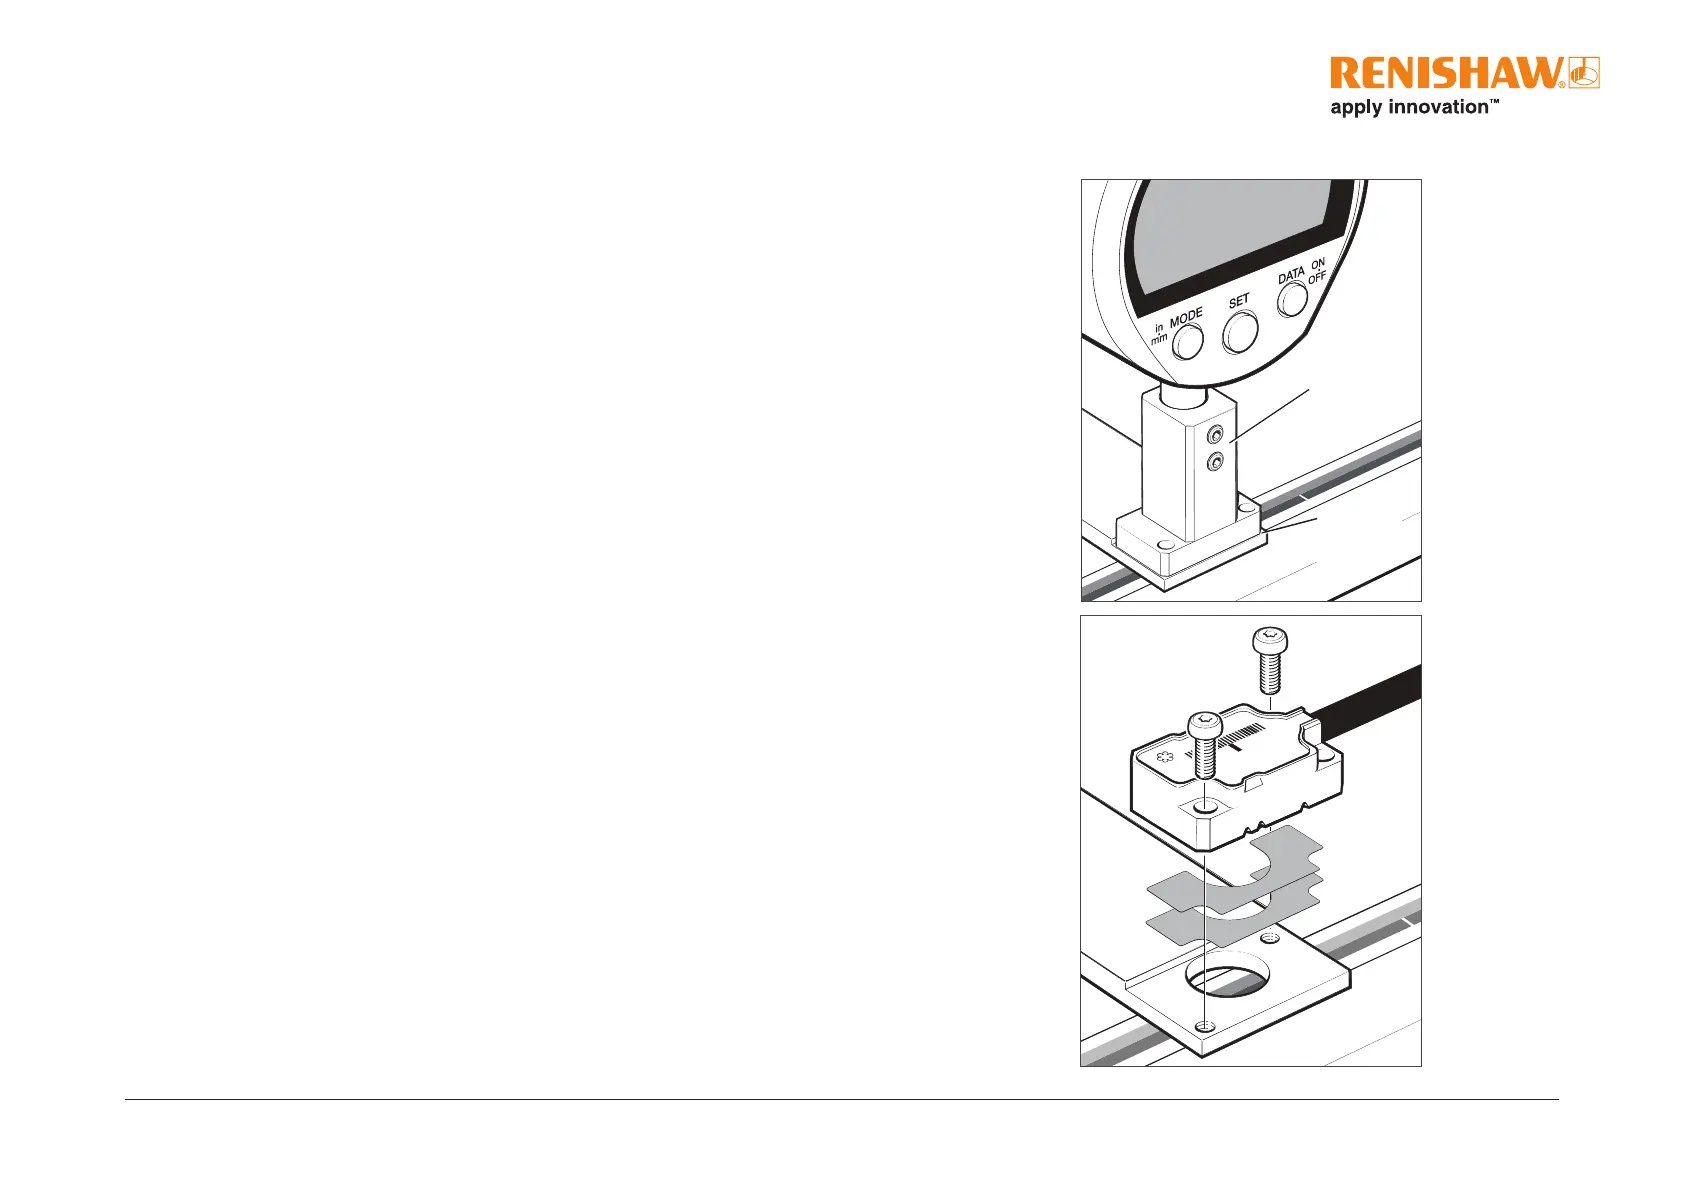
DTi adapter
Readhead
mounting
surface
1. Using a digital dial gauge or similar, measure the distance from the readhead mounting surface to the scale surface.
Care must be taken to ensure the scale surfaceisnot scratched.
• Insert the gauge into the adapter and zero the gauge on a at surface.
• Position or x the gauge / adapter in place of the readhead and measure the distance to the scale surface.
Contact your local Renishaw representative for details of the DTi adapter and digital dialguage.
2. Subtract the distance measured from the nominal rideheight of 2.5mm to calculate therequired shim thickness.
Forexample if the distance measuredis 2.37mm the required shim thickness is130µm.
3. Select a combination of two shims that gets within10µm of the difference. For distances less than 100µm a single shim
should be used; for distances greater than 100µm select one thick (≥100µm) and one thin(<100µm) shim. In the above
example this could either be 1× 100µm shim and 1 × 40µm shim or 1×100µm shim and 1 × 20µm shim.
4. Place the chosen shim(s) between the readhead and the bracket.
5. Fix the readhead to the bracket using screws in diagonally opposite xing holes, ensuring readhead is tightened down
evenly and parallel to the bracket face.
6. Connect the system up. See pages 25 to 36 for relevant system connection.
7. Check the readhead set-up LED is green along the full axis of travel.
8. Proceed with ‘System calibration’ on page45.