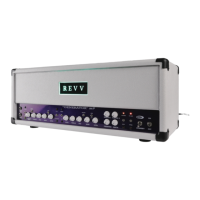
REVV | D25
11
TUBES &
BIASING
POWER TUBES
26
D25 has been designed for use with 6V6GT power
tubes. It is recommended that 6V6GT power tubes be
used whenever replacement is necessary for optimal
performance.
PREAMP TUBES
27
D25 uses 12AX7 preamp tubes in tube positions V1
and V2. Preamp tubes do not need to be biased and
usually have a long life, unlike power tubes. However
it is possible for a preamp tube to become faulty at any
stage of its rated lifespan.
POWER TUBE BIAS
28
The power tubes can be biased without opening the
chassis. You will need a digital multimeter set to the
lowest DC voltage range. (Make sure you refer to the
meter’s user manual and are familiar with the meter not
all meters are capable of reading such a small signal.)
Note: Use tubes that are matched! It is recommended
that a matched pair of 6V6GT tubes be used when
replacing the power tubes.
Note: While the bias setting of the power tubes has
been made user-friendly, we do not expect everyone
to be experienced enough to perform the procedure,
and we strongly recommend that an experienced
technician complete the process to prevent damage to
the amplifier or power tubes.
SETTING THE BIAS
29
If you check the bias, use your multimeter in the
bias test points to verify that the tubes are at the
recommended bias setting. If the bias setting needs
to be adjusted or new tubes are installed, the D25’s
chassis must be removed from its shell. Remove the
top panel on the rear of the amplifier. Remove and set
aside chassis screws, then gently pull the amplifier out.
If you are changing tubes, do so now. Make sure that
the power cable is unplugged from the amplifier.
Once the tubes are replaced, or you are ready to adjust
the bias, plug the amplifier back into the mains and
turn on the power switch. Ensure D25 is connected
to a speaker or the reactive load push button is set
to internal load (in). Let the amplifier warm up for a
minute, then turn on the standby switch. Wait another
3 minutes to let the tubes warm up further. Ensure your
multimeter is connected to the bias test points on the
amp. Now, using the bias adjustment trimmer (located
in the small hole between the power tubes), turn the
trimmer until the required reading is visible on the
multimeter. Once the bias is set as recommended, turn
D25’s power o. Wait until the tubes have cooled o
(approx 10 minutes), then reassemble the chassis & top
rear panel. Ensure you securely fasten all screws.
BIAS CHART
30
Type Recommended
set point
Safe Range
6V6GT 50mV 45mV to 55mV