2322
3. Press OK once to view options to “Delete Current”
recording or “Delete All” recordings.
4. With “Delete All” selected, press OK.
5. When prompted with “Erase All Images?” press the MIC
button to scroll down to “OK” and press OK to delete all
recordings.
4.2.2 Computer Playback
Recommended Media Players: QuickTime Media Player / VLC /
Windows Media Player
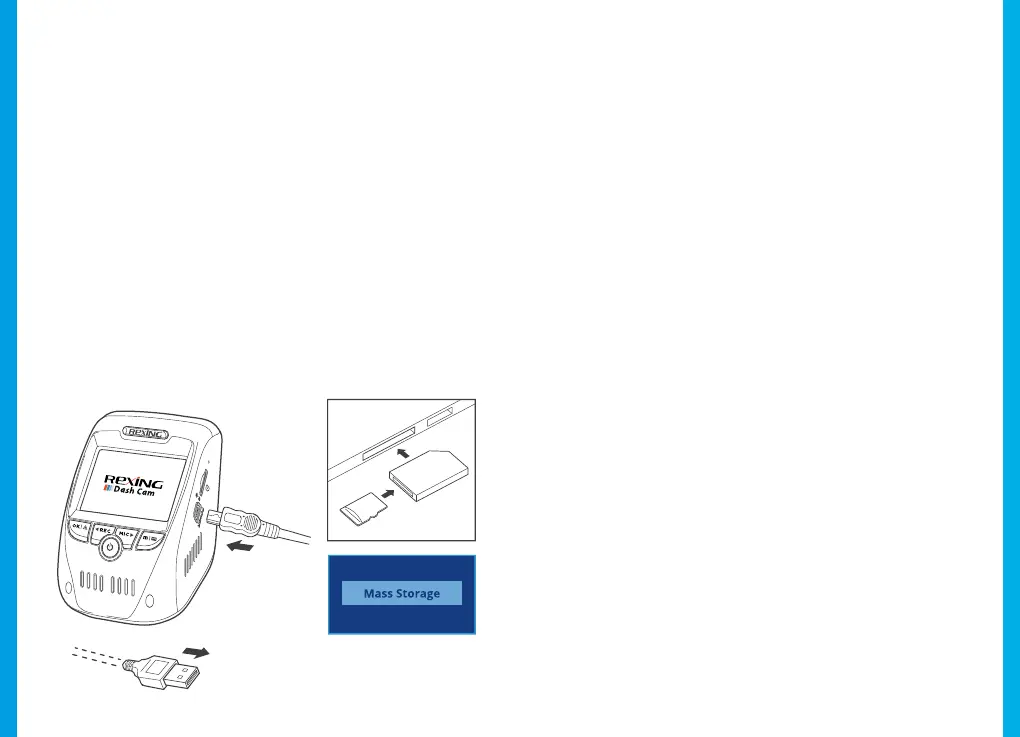
Using an SD card adapter
Insert your Micro SD card into an SD card adapter, then insert
the SD card adapter into your computer or card reader to access
your card storage. Your videos will be stored under “\CARDV\
MOVIE”.
Using a USB cable
Connect your camera to your computer using the provided USB
cable and select “Mass Storage” to access your card storage.
Your videos will be stored under “\CARDV\MOVIE”.
Locked files
Locked videos can be found on the memory card under
“\CARDV\MOVIE\RO”.
4.2.3 GPS Playback
You can play back your recordings in a specialized application
that allows you to view speed and location information
alongside your footage.
Minimum System Requirements
Operating System: Windows 7, 8, or 10, MAC OS X
Display Resolution: 1280x720
Installing the application:
1. Locate your dash cam at support.rexingusa.com to access
the GPS Playback software.
2. Download the zip folder containing the software installer.
3. Unzip the folder to access the installer le contained
within.
4. Open the installer and follow the instructions to install the
GPS Playback software to your computer.
5. Once installed, you may launch the application.
Opening a GPS video le:
1. Once you’ve opened the application, navigate to the top
Connect USB
connector to
computer
Select Mass Storage