Form CP-MAPS-D12 with FX05, P/N 209341 Rev 4, Page 3
Display
The “welcome window” displays the active status of the unit (“oFF” or “on”). If
the unit is in the “on” mode, press the “Down” arrow key for the following to be
displayed:
· SAT = Space Temperature
(If a space temperature sensor is not installed,
the display shows a vertical dotted line.)
· dAt
= Discharge Air Temperature Sensor Value
· oAt = Outdoor Air Temperature Sensor Value
· En = Enthalpy (btu/lb)
(If a humidity transmitter is not installed, the display
shows a dotted vertical line.)
· Dp
= Dewpoint Value (If a humidity transmitter is not installed, the display
shows a dotted vertical line.)
When any of the above are displayed, press the “Enter” key to display the
active value or continue to the next sensor value.
After 10 seconds, the display will return to the active status of the unit (“oFF”
or “on”).
For identication and
troubleshooting of lockout
“Alarm” Displays, see
page 18.
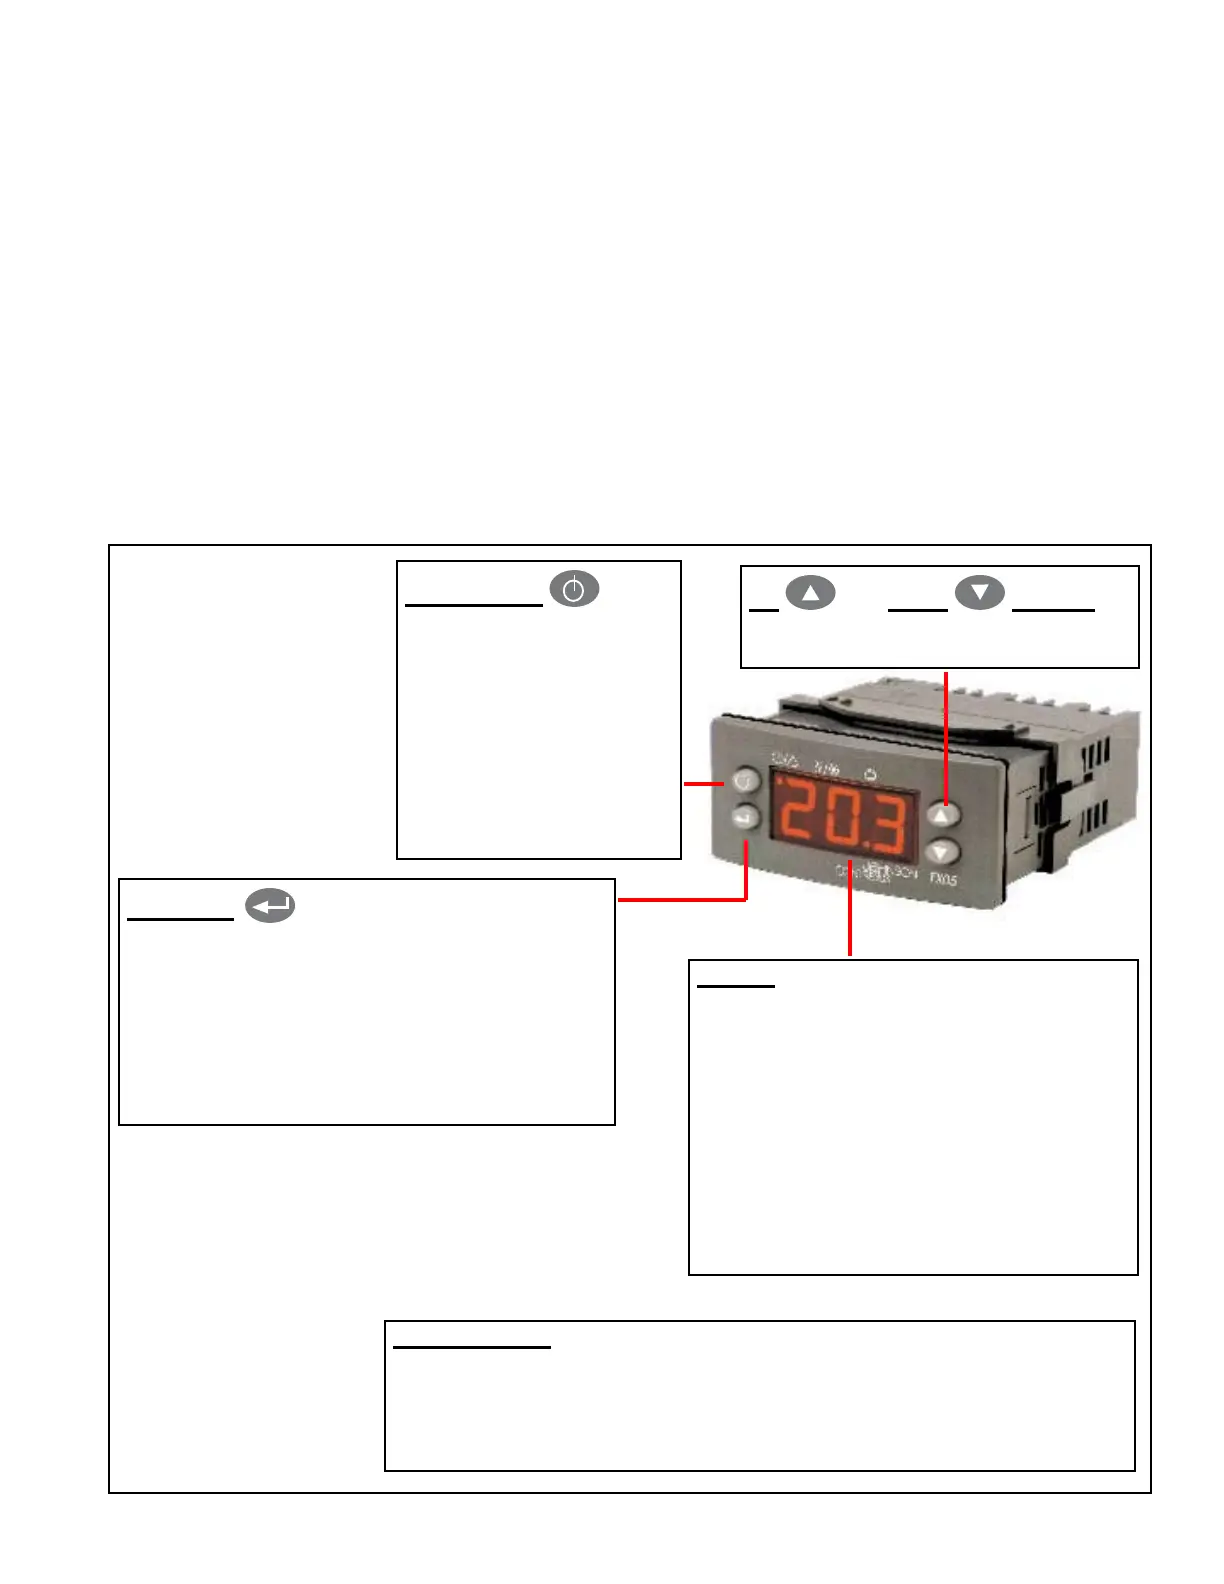
FIGURE 2 - Model
FX05 Programmable
Controller located
in the Electrical
Compartment of
the Unit
Function Key - Press
the function key to shut
the unit down. Pushing it
again for 5 seconds will
re-enable the unit. Hold
both “enter” and “func-
tion key” down for 5 sec-
onds to change from °F to
°C or adjust time clock (if
equipped).
Display (Welcome Window) - With power
applied, the display will read “oFF” or
“on”. (If the display is ashing, see Alarm
Section, page 17-18.) Terminals TB-48 and
TB-49 must be jumpered or eld contacts
closed for display to read “on”.
If the display indicates “on”, pressing the
down key will show sensor input. Pressing
the enter key will show sensor values.
If no action is taken, the display will return
to “on” after 10 seconds.
Up and Down Buttons
- Toggle between settings or adjust
values.
Unit Test Mode (See page 19.) - Hold “enter” key together with “down
arrow” key for 5 seconds to enable auto test mode (display ashes
“tst”). Unit will operate each output for one minute. Pushing the up
arrow key for 5 seconds allows manual selection and testing of outputs.
To exit test mode, push the down arrow key for 3 seconds.
Enter Key - Hold down 10 seconds: To
change or check setpoints (see tables, pages
14-17, for adjustable parameters).
Hold down 5 seconds: To view unit status,
outputs, and determine active controller
mode.
Press the enter key to save new settings.