12
Operating and installation instructions RF-KIT Power Amplifier RF2K-S
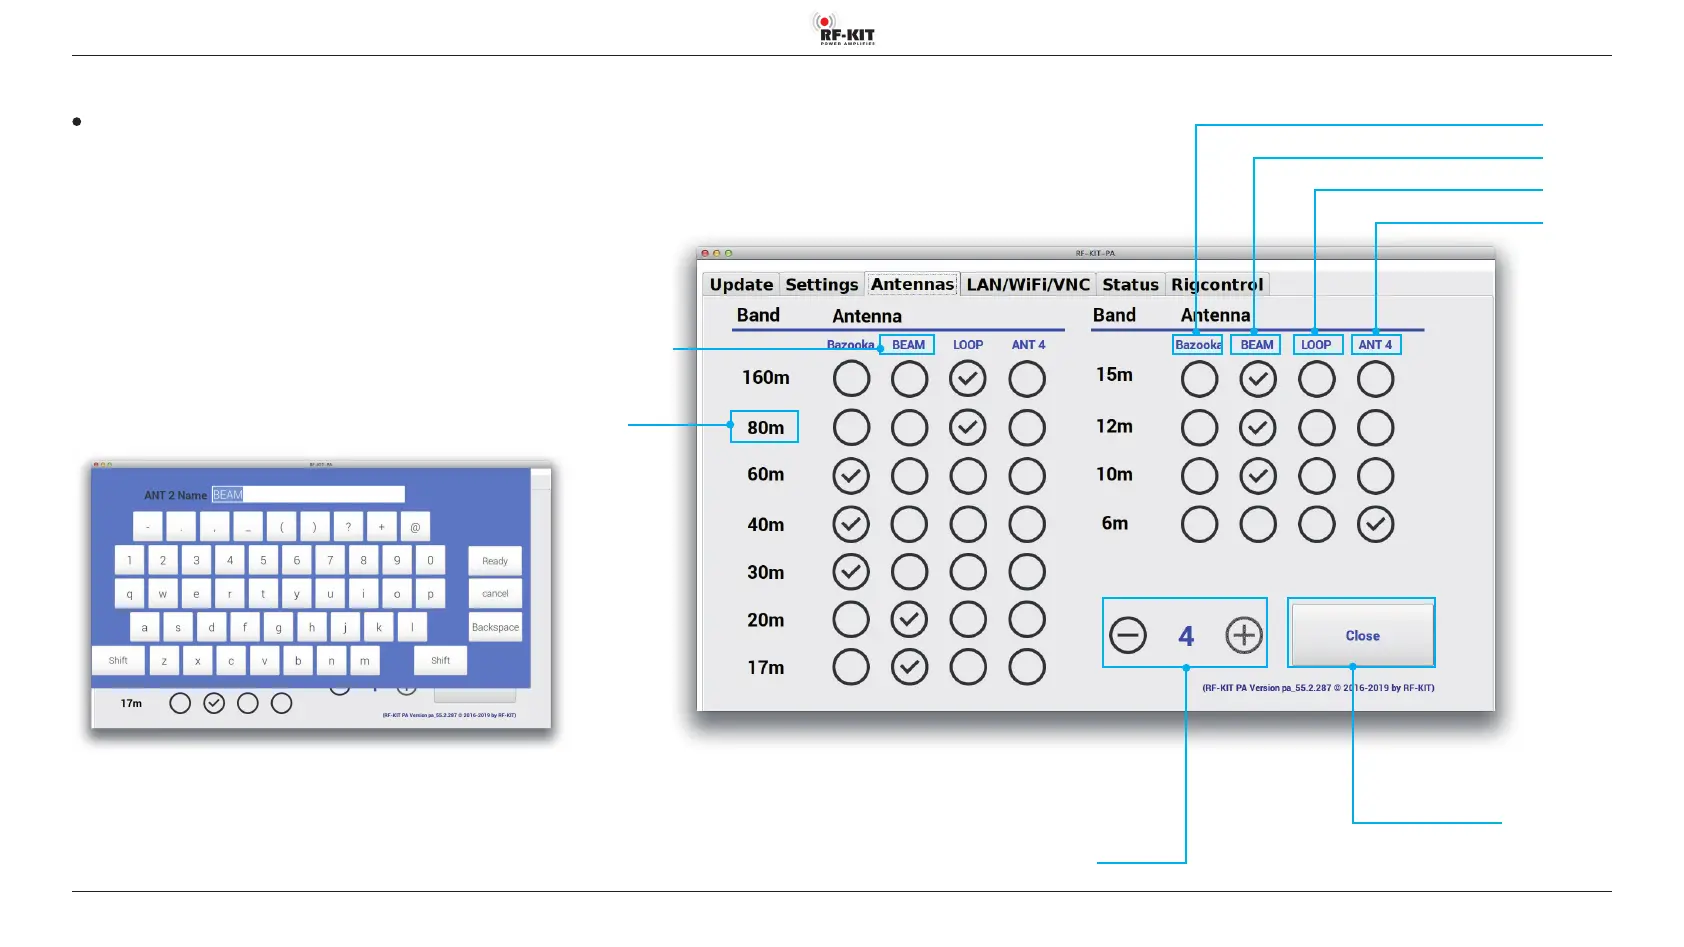
5.2.3 Antennas
Antennas
Here you assign a connected antenna for each band.
Depending on the assignments made here, the selected antenna is,
depending on the currently selected band, automatically choosen during
operation.
► Touch switching area Antennas.
► Set the number of connected antennas (1-4) by touching „-“ or „+“ in
switching area Number Connected Antennas.
Each antenna can be given a name via the Touchscreen (2):
► Touch the switching area Antenna Name
(ANT 1 / ANT 2 / ANT 3 / ANT 4) of every antenna whose name you
want to edit.
A virtual keyboard appears at the Touchscreen (2):
► Use this virtual keyboard to create a Name (ANT x Name) for the
choosen antenna.
Switching area Close
Touching this switching area closes the user menu;
subsequently the main screen will be displayed
Switching area Number Connected Antennas
Name ANT 4
Name ANT 3
Name ANT 2
Name ANT 1
Switching area
Antenna Name
How to assign a antenna to a certain band:
► Touch an empty circle in the corresponding column / row.
A „check mark“ appears and marks the current antenna assignment
for the respective band.
► Tapping in a set circle deletes the assignment.
Band