Installing Options
50
3
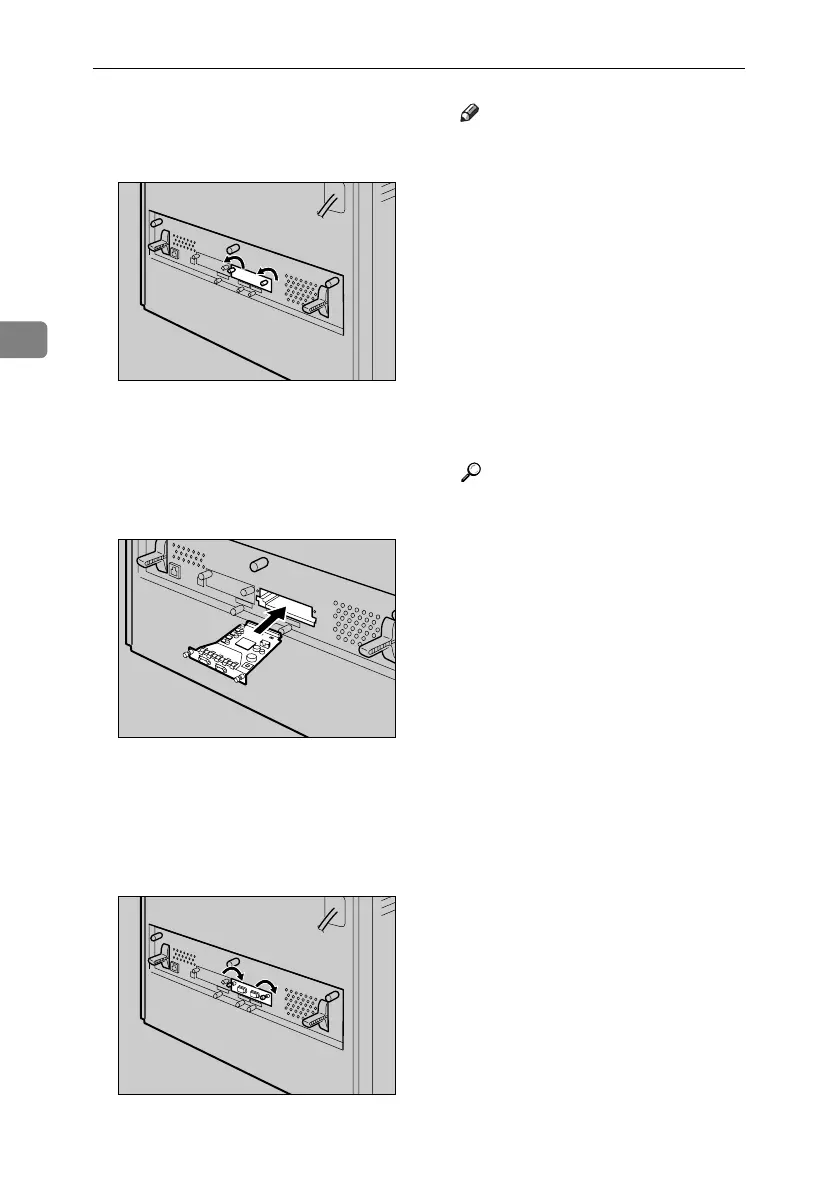
C Loosen the two screws and re-
move the cover of the 1394 inter-
face board installation unit.
The removed cover is not used
when installing the 1394 interface
board.
D Fully insert the 1394 interface
board.
Make sure that the 1394 interface
board is firmly connected to the
controller board.
E Tighten the two screws to secure
the 1394 interface board.
Note
❒ After finishing installation, you
can check the 1394 interface
board is properly installed:
Print the configuration page
from the “List/Test Print”
menu. If it is installed properly,
you will see “IEEE1394 ” for
“Controller Option”.
❒ If the 1394 interface board is not
installed properly, reinstall it
from step
A
. If you cannot in-
stall it properly even after at-
tempting reinstallation, contact
your sales or service representa-
tive.
Reference
For printing the configuration
page, see p.30 “Test Printing”.
AET091S
AET092S
AET093S
GaiaP1GB_Setup-F4_FM_forPaper.book Page 50 Friday, June 3, 2005 7:50 AM

 Loading...


