Installing an option card
34
Installing and removing options
Installing an option card
The printer has two connectors that support the following option cards:
• Hard disk with adapter card
• Internal print server
• RS-232 Serial Interface Card
• Parallel 1284-B Interface Card
• Coax/Twinax Adapter for SCS
Warning: Option cards are easily damaged by static electricity. Touch something metal such as the printer
frame before you touch an option card.
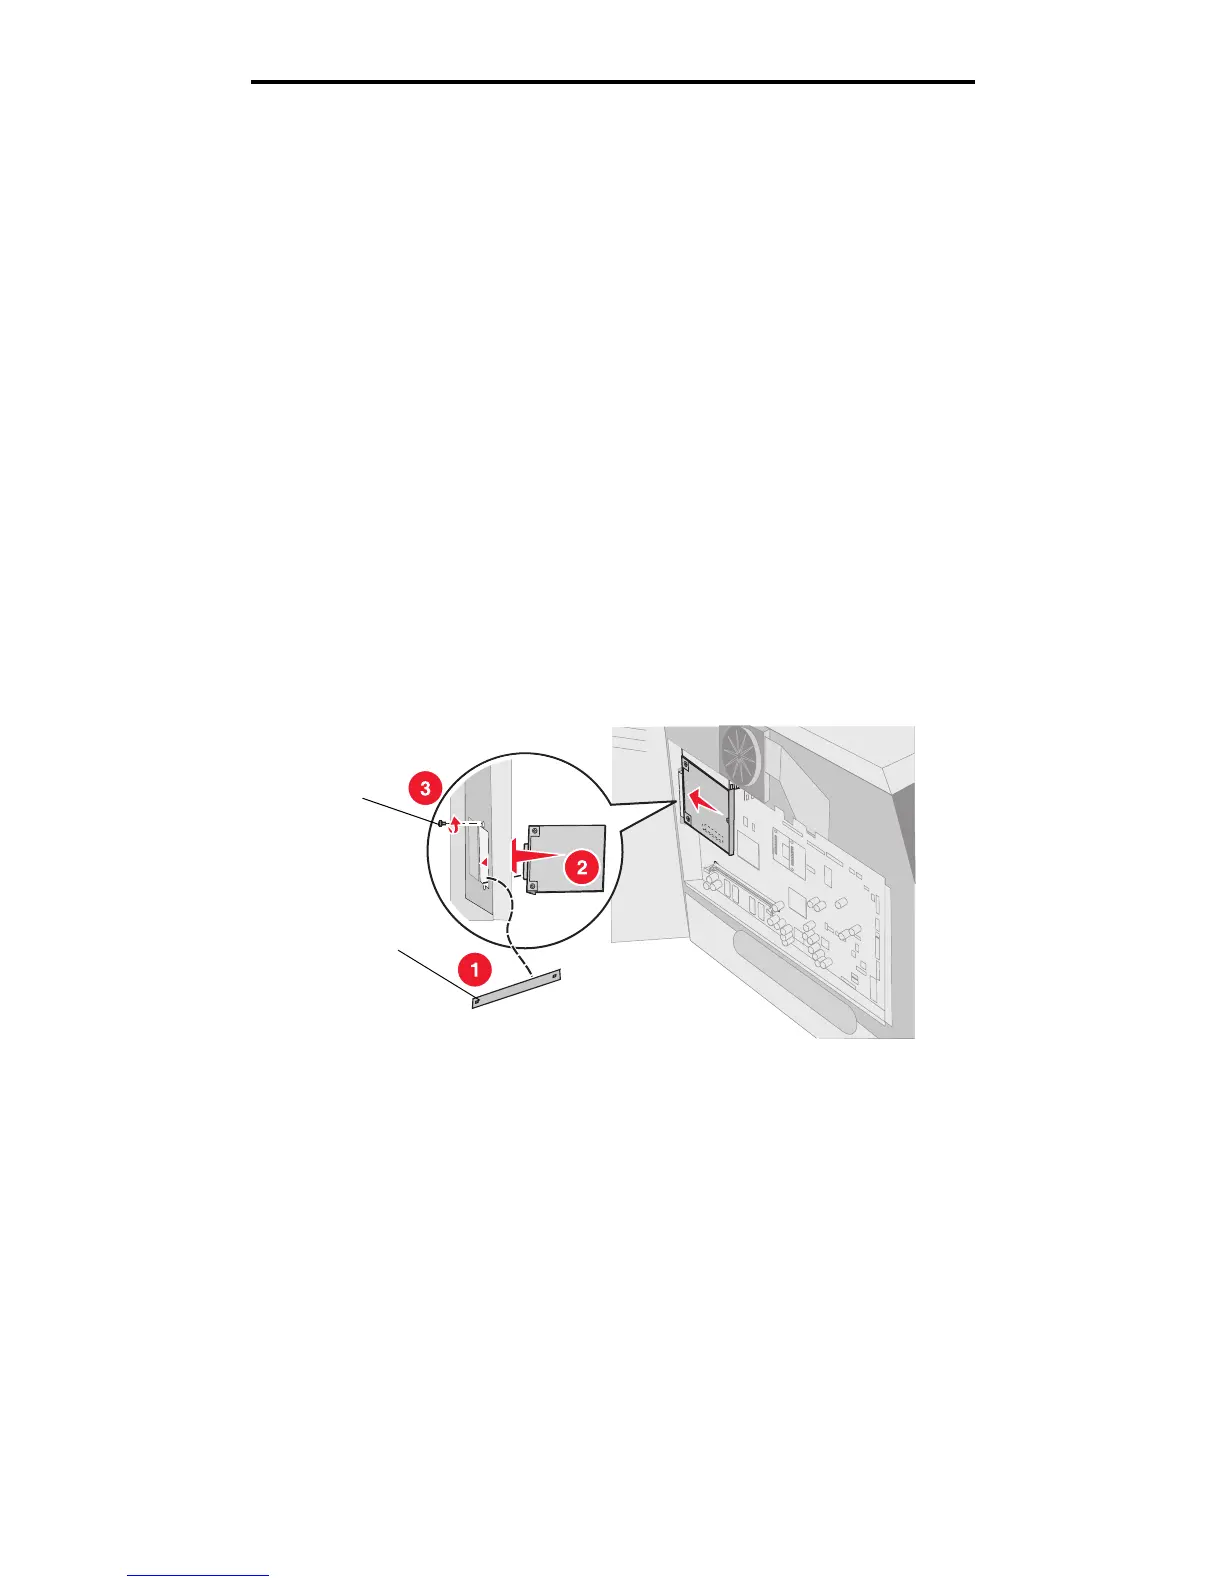
1 Locate the card connectors on the system board.
2 Remove the screw and the cover plate, and save them.
If you are installing a tall card, install it in connector 1. If you are installing two short cards on a model with multiple
connectors, use connector 1 first, and then use connector 2.
3 Unpack the card. Save the packaging materials.
4 Align the connection points on the card with the connector on the system board, and push the card firmly into the
system board connector.
5 Insert the screw saved from the cover plate (or the extra screw shipped with the card).
6 Tighten the screw to secure the card.
Screw
Cover plate
 Loading...


