RICOH SP C250SF/SP C252SF Color Multifunction Printers
Getting Started Guide
14
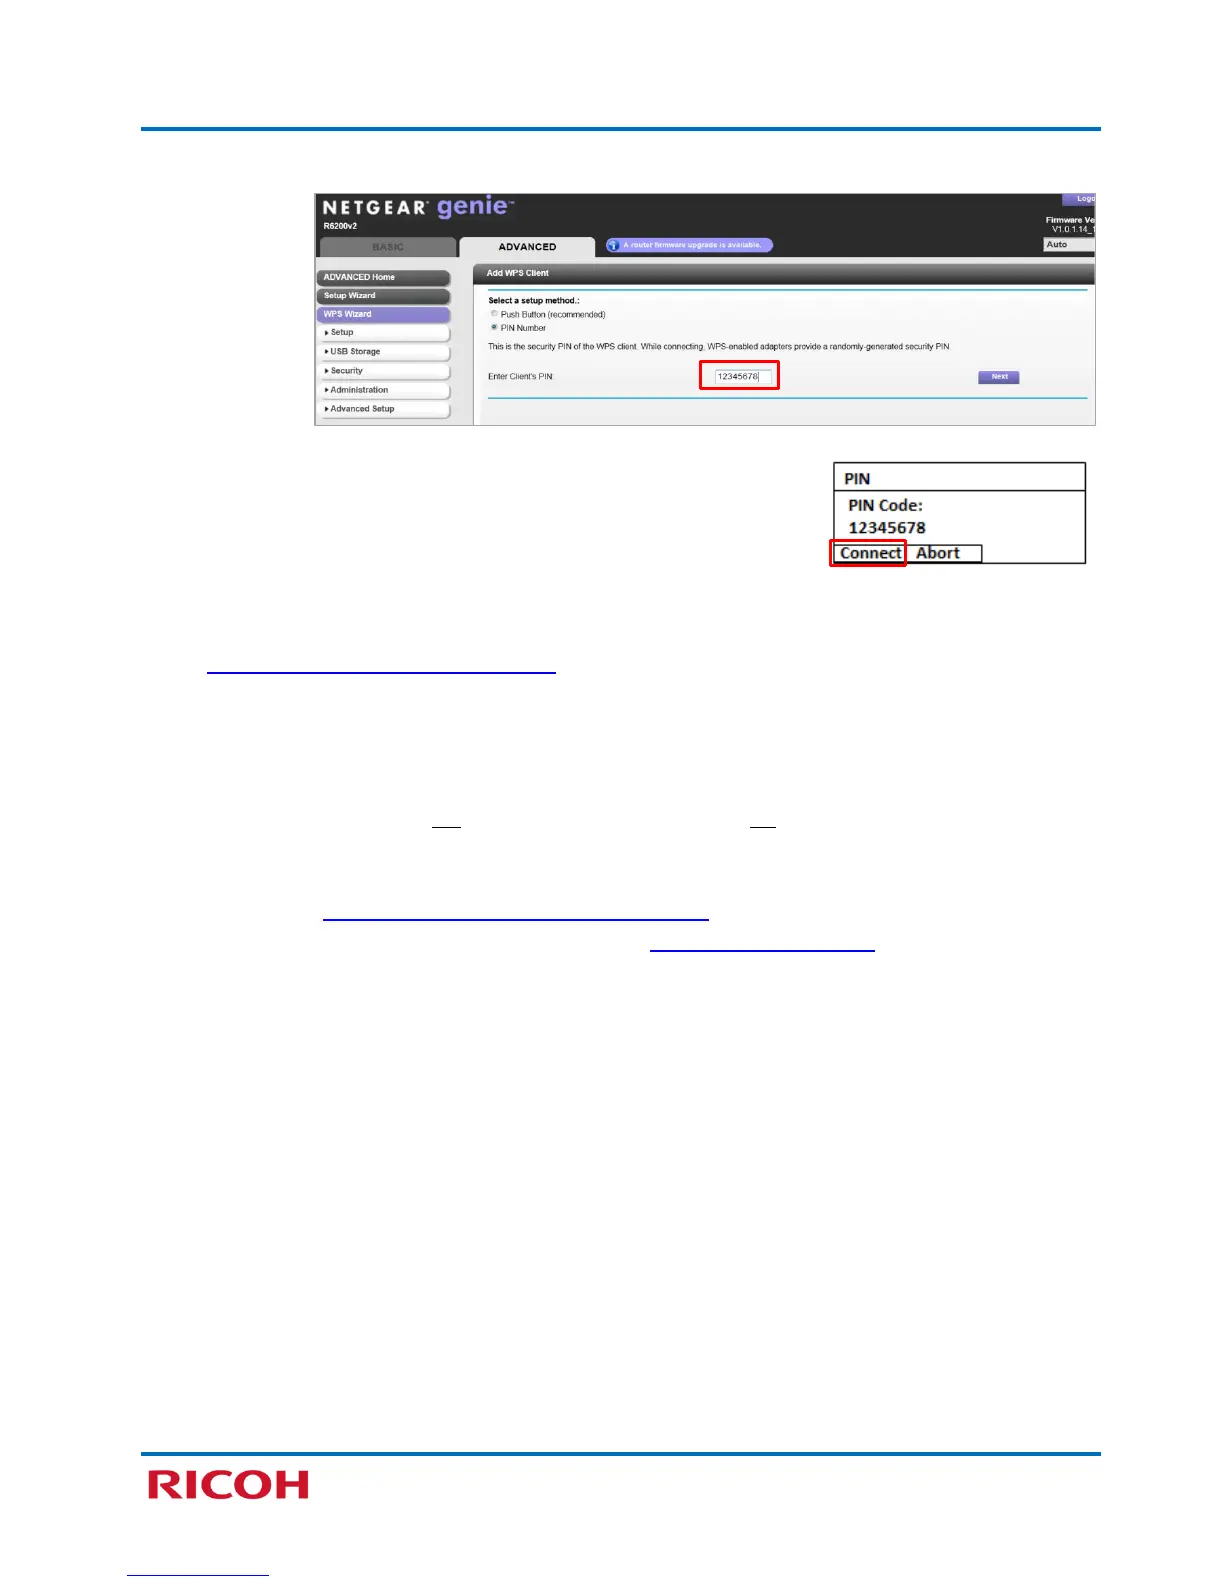
f. Follow screen prompts to enter Client’s (printer’s) PIN, i.e., number you wrote down in step 1f.
3. Click [Next], if necessary.
4. On printer control panel, press [Connect].
5. When printer display reads, Connection to AP has Succeeded,
press [Exit] [Clear/Stop].
Note:
• If the connection succeeds, an IP address has been assigned to the printer. To confirm, see
Appendix B: Print Configuration Report
.
• If the connection fails, Connection to AP has Failed appears on the display, press [Exit] and
repeat from step 1. If the problem persists, contact 1-800-RICOH38 (742-6438), option #1.
6. Router web page should indicate, for example, “The wireless client [xyz] has been added to the
network successfully.” Click [Logout].
7. Turn printer power switch Off. Wait a moment, and then turn On.
8. Check wireless connection status. Press [User Tools] [Network Settings] [Wi-Fi Configuration]
[Wi-Fi Status]. Display should read, Connected. To exit, press [Clear/Stop].
Note: Also see Appendix A: Check Wi-Fi Connection Status
.
9. Next, install Network Printer/Scanner Drivers. See 3.2 Network Quick Install.

 Loading...