7
Easy Setup Using the Wi-Fi Setup Wizard
The following item is necessary to set up a wireless
connection.
● Router (access point)
Checking the SSID and Encryption key
The SSID and Encryption key for the router (access point) may be
printed on a label affixed to the router (access point). For details
about the SSID and Encryption key, refer to the router (access point)
manual.
SSID
Encryption key
:XXXXXXXXXXXXX
:XXXXXXXXXXXXX
DSG099
Confirm the SSID and Encryption key, and write them down on the
blank space as shown below.
SSID:
Encryption key:
Configuring Settings Using the Control Panel
● Before doing the following procedure, install the printer
driver according to the procedure on page 5
"Connecting the Machine (USB/Network)".
● Make sure the Ethernet cable is not connected to the
machine.
1. Check that the router (access point) is working correctly.
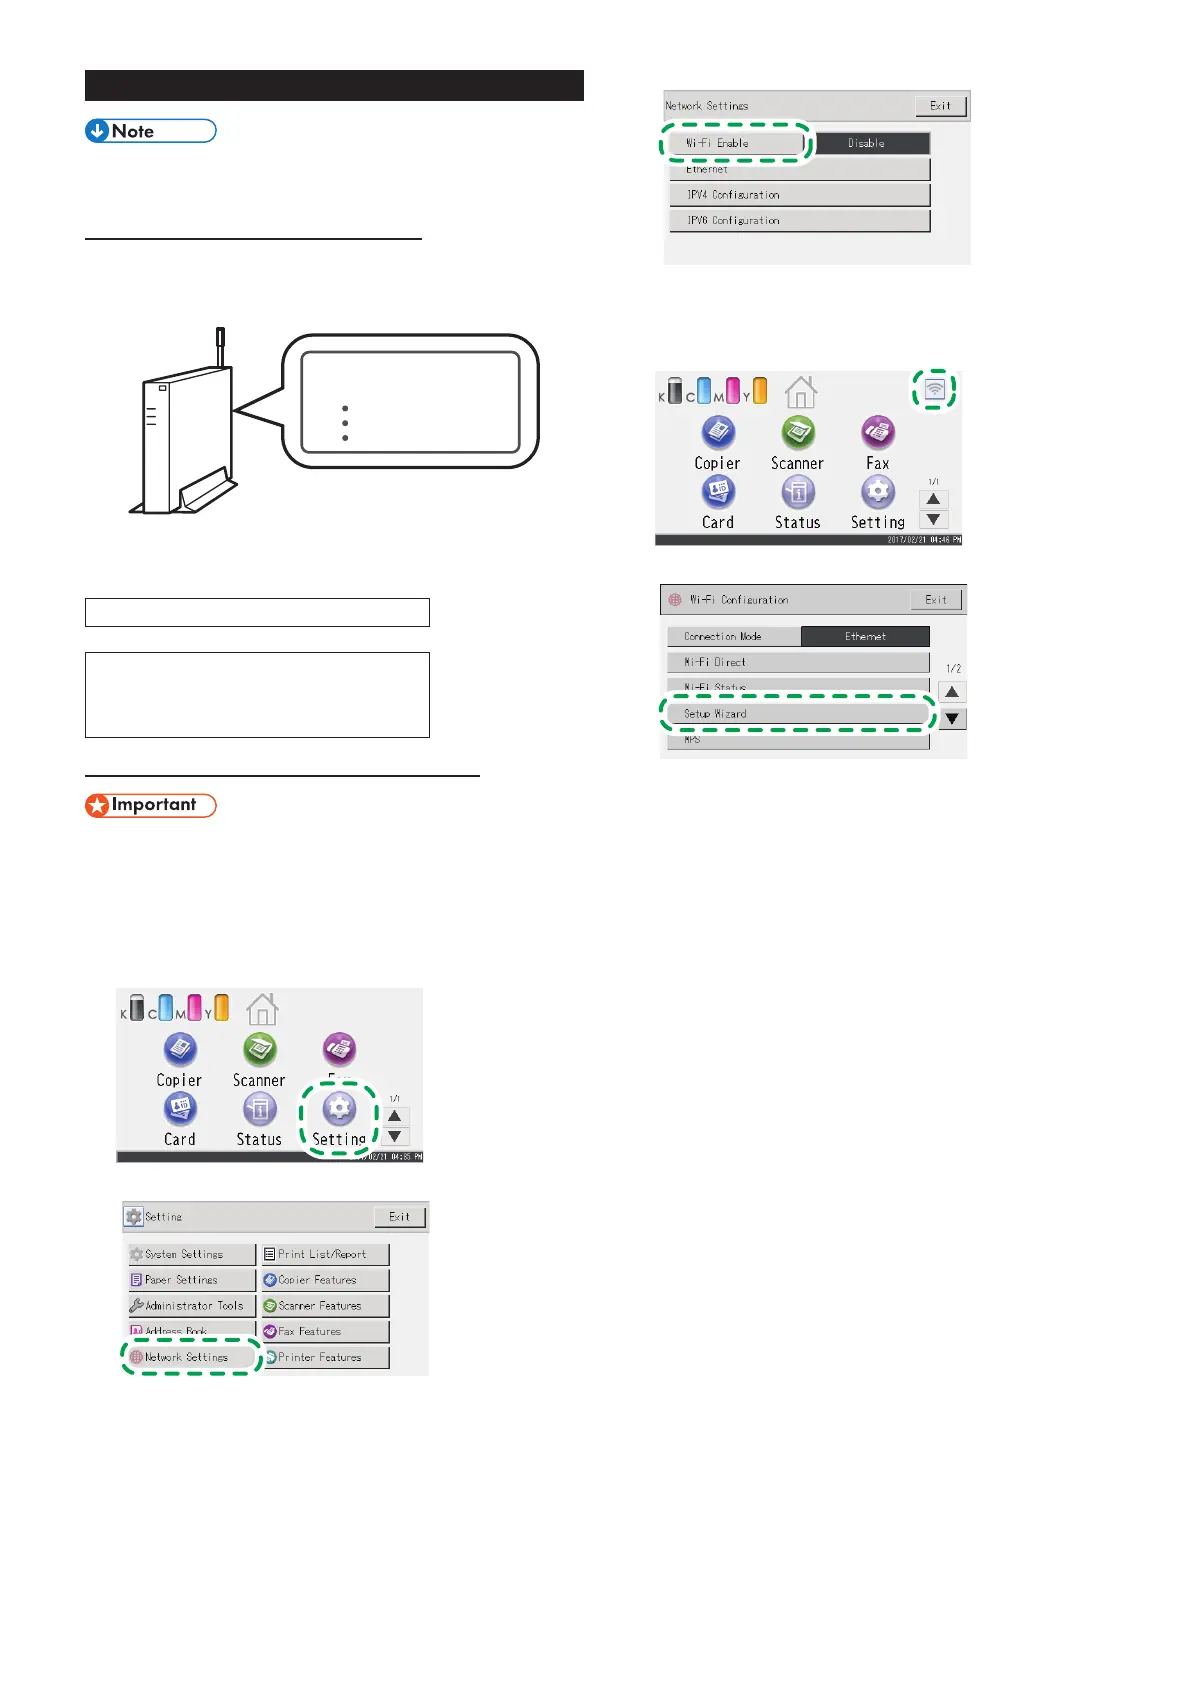
2. Press [Setting].
3. Press [Network Settings].
4. If you are requested to enter a password, enter the
password using the number keys, and then press [OK].
A password for accessing the [Network Settings] menu can be
specified in [Admin. Tools Lock] under [Administrator Tools]
menu.
5. Press [Wi-Fi Enable].
6. Press [Enable].
7. Turn off the machine, and then turn it back on.
8. Press the wireless LAN icon.
9. Press [Setup Wizard].
10. If you are requested to enter a password, enter the
password using the number keys, and then press [OK].
A password for accessing the [Wi-Fi Configuration] menu can
be specified in [Admin. Tools Lock] under [Administrator Tools]
menu.
11. Press the SSID of the router (access point) from the
searched SSID list.
12. Enter the encryption key using the number keys, and then
press [Connect].
• As the passphrase, you can enter either 8 to 63 ASCII characters
(0x20-0x7e) or 64 hexadecimal digits (0-9, A-F, a-f).
• For details about checking the encryption key, see “Checking the
SSID and Encryption key”.
13. Check the result.
Connection has succeeded:
“Connected to access point.” is displayed.
Connection has failed:
“Failed to connect to access point.” is displayed.
Check the configuration for the router (access point), and then try the
connection again.
14. Configuring the Wi-Fi settings is complete.

 Loading...