For the most up to date documents, bike models, additional information, instructional videos,
And more visit us at Ride1UP.com
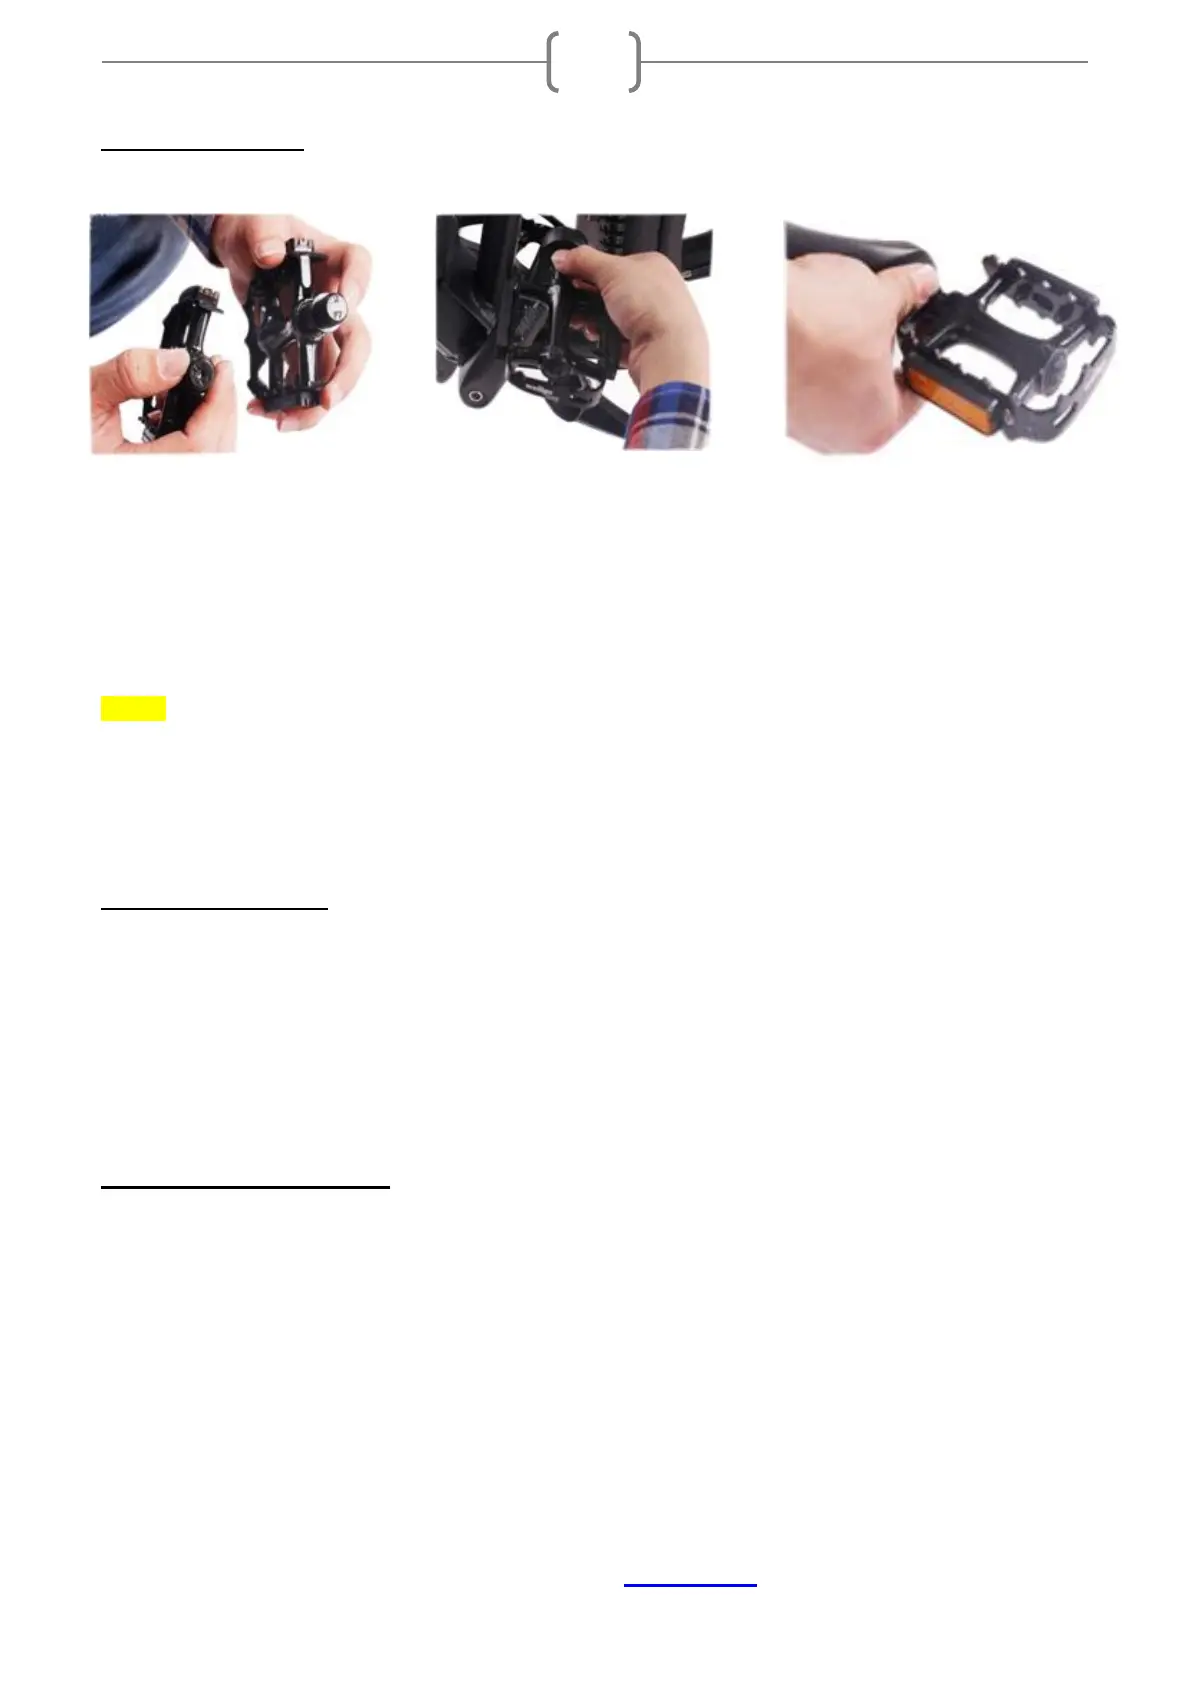
2.5 Pedal Assembly:
• Screw each pedal into a crank by hand. The pedals are marked with an R and L, the left pedal
tightens to the left.
• Use an adjustable wrench to finish tightening the pedal in place.
NOTE: ◆ THERE ARE TWO PEDALS INCLUDED IN THE BOX WITH YOUR BIKE. THE PEDALS
SCREW INTO THE ENDS OF THE CRANKS WITHOUT EXTRA NUTS, SCREWS OR PINS. BEFORE
INSTALLING PEDALS, CONFIRM THAT THE LEFT PEDAL IS MARKED “L”, AND THE RIGHT PEDAL
IS MARKED AS “R”. FAILURE TO USE THE CORRECT PEDAL ON THE CORRECT SIDE WILL RESULT
IN A STRIPPED CRANK ARM.
2.6 Air Fork Operation:
The top left of the fork crown is the air valve. Use a shock pump to reach the desired amount of stiffness or
sag.
The dial on the top right is a lockout. Turning this to the locked position will lock the fork from
compressing and in this mode, it acts as a rigid fork. This is for climbing hills, or riding on smoother
roads.
2.7 Detailed Torque Settings:
Saddle Clamp Bolt: 16-17nm (unless otherwise marked)
Crank Arms: 39nm
Compression Cap (bolt): 4-5nm
Stem/Steerer Clamp: 8-9nm (unless otherwise marked)
Handlebar Clamp: 8-9nm (unless otherwise marked), tighten evenly in a cross pattern