16
Assembly (continued)
Bolting Oscillating Edge Belt/
Spindle Sander To Workbench
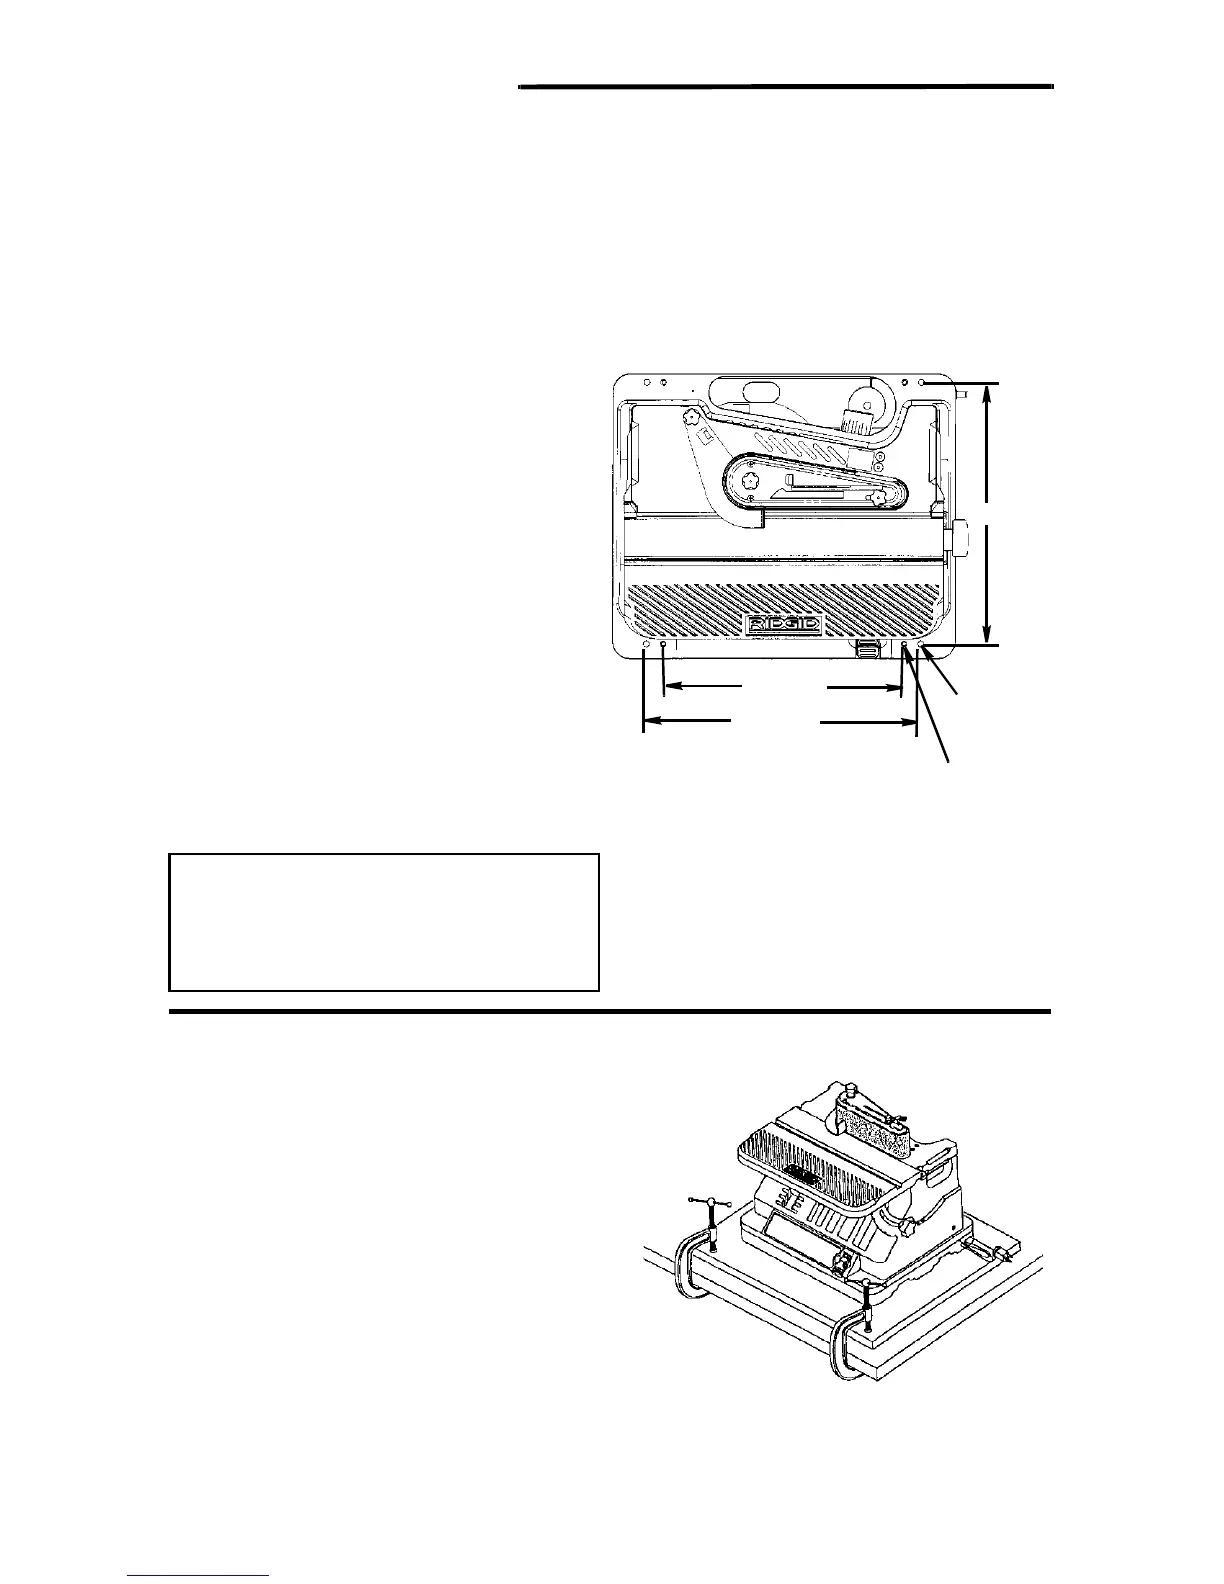
If sander is to be used in a permanent
location, it should be fastened securely to
a firm supporting surface such as a work-
bench, with either bolts or drywall screws.
Fastening with bolts
1. Use 1/4" bolts, washers, and nuts (not
included). The bolt length should be
1-1/2" plus the thickness of the work-
bench.
2. Locate and mark the holes where the
sander is to be mounted.
3. Drill (4) 3/8" diameter holes through
workbench.
4. Place sander on workbench, aligning
holes in base with holes drilled in work-
bench.
5. Insert (4) 1/4" diameter bolts and wash-
ers and attach nuts securely.
Fastening with screws
Drive (4) 2-1/2" long screws through the
holes in the base and through the work-
bench. Do not overtighten the screws.
CAUTION: To reduce the risk of
injury from tool movement, use
either 1/4" diameter screws and
nuts or 2-1/2" long screws.
Clamping Oscillating Edge Belt/Spin-
dle Sander To Workbench
An alternative method of mounting is to
fasten the sander to a mounting board.
The board should be sufficient size to
avoid tipping while in use. Any good
grade of plywood or chipboard with a 3/4"
thickness is recommended. (Thinner chip-
board can break.)
NOTE: For proper stability, holes must be
countersunk so screw heads are flush
with the surface of supporting board.
15-3/8"
14-1/4"
16-1/4"
1/4 Dia. Bolt
Holes
Screws Holes