English – 7
nano
TM
Assembly
WARNING
To reduce the risk of serious injury, properly assem‑
ble the nanoReel in accordance with these proce‑
dures.
Camera Head Routing
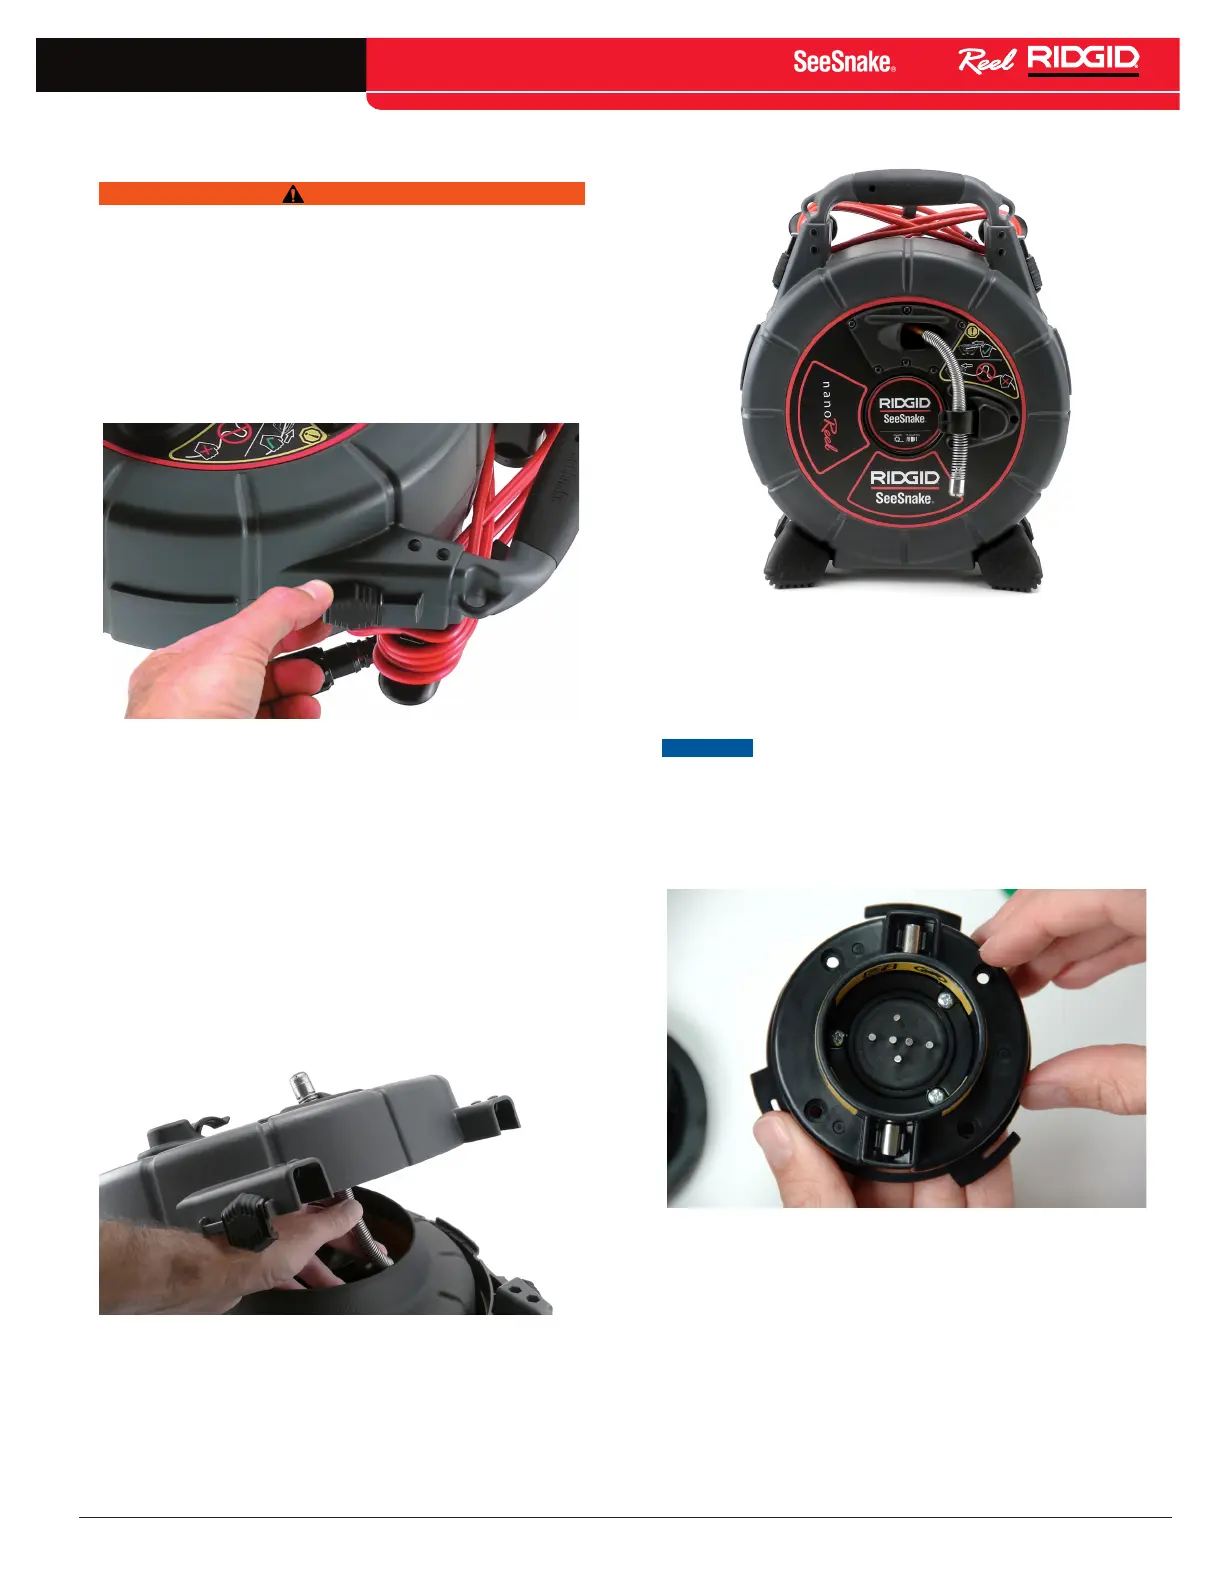
1� Set the unit on a level surface and lay it on its back�
2� Unfasten the case latches on either side of the
nanoReel (See Figure 4)�
Figure 4 – Unlatching the nanoReel Case
3� Open the front case and locate the camera head in
the push cable drum�
4� Route the camera head out through the push cable
guide in the front of the case (See Figure 5).
5� Secure the camera head in the provided clip (See
Figure 6).
6� Close and relatch the case�
Figure 5 – Routing the Camera Head
Figure 6 – Camera Head Properly Routed
Installing System Cable
NOTICE
Do not touch the contact pins inside the slip-
ring module or insert any tool inside the well where the
pins are located. Avoid stressing or breaking the contact
pins.
To avoid breaking the contact pins, do not press sideways
on the pins (See Figure 7).
Figure 7 – Broken Contact Pin
If the system cable slip‑ring module is not installed, insert
the slip‑ring module into the hub (See Item 1, Figure 8)�
Twist the slip‑ring module clockwise until it locks into
position (See Item 2, Figure 8)�