Do you have a question about the RIDGID R45101 and is the answer not in the manual?
Details on the importance and method of grounding the power tool.
Hazard where blade binds or stalls, throwing workpiece back toward operator.
Metal piece that keeps kerf open and prevents kickback.
Instructions on how to turn the saw ON, OFF, and lock the switch for safety.
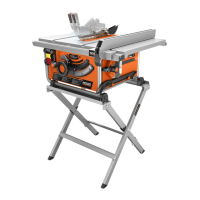
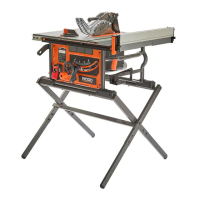
Guidance on how to securely mount the table saw to a workbench or leg stand.
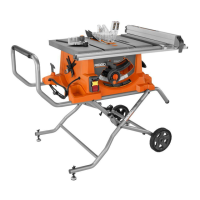
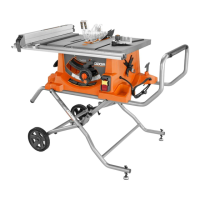
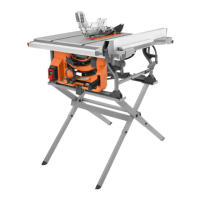
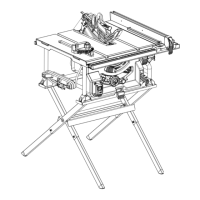
Step-by-step instructions for assembling the movable leg stand for the table saw.
Detailed instructions for attaching the assembled leg stand to the table saw base.
Steps to level the table saw on its stand to prevent rocking or movement.
Instructions on how to adjust the riving knife position for different cutting operations.
Procedure for installing the anti-kickback pawls and the blade guard.
Steps for installing the blade guard onto the riving knife.
Procedure to check and adjust the alignment between the riving knife and the saw blade.
Covers essential setup like grounding and plug usage for basic operation.
Explains actions and conditions that can cause kickback.
Provides essential precautions and techniques to prevent kickback.
Procedure for setting the correct blade depth relative to the workpiece.
Instructions for adjusting the blade angle for bevel and compound cuts.
Procedure for calibrating the rip fence indicator for precise rip cut measurements.
Instructions on positioning, locking, and checking the rip fence for smooth operation.
Procedure to align the saw blade parallel to the miter gauge groove.
Step-by-step guide for removing and installing a new saw blade.
Procedure to calibrate the bevel indicator and stops for precise 0° and 45° cuts.
Procedure to ensure the rip fence is parallel to the blade and miter gauge grooves.
Causes and solutions for when the saw blade binds or burns the workpiece.
Common causes and solutions for the saw failing to start.