Do you have a question about the RIDGID R4513 and is the answer not in the manual?
User must read manual to reduce injury risk.
Understand saw applications, limitations, and hazards.
Guard against shock by avoiding contact with grounded surfaces.
Keep work areas clean, lit, and free from hazards.
Use correct tools, secure work, wear safety glasses.
Secure work with clamps or vise for safer operation.
Keep tools sharp and clean for better performance.
Ensure switch is off before plugging in to prevent accidental starts.
Inspect damaged parts for proper operation before further use.
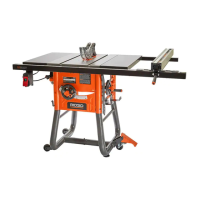
Bolt saw to workbench or leg stand for stability.
Understand kickback causes and use safety features.
Use rip fence for ripping and support panels to prevent pinching.
Never reach over or around the blade; keep hands away.
Avoid hand positions that could lead to contact with the cutting tool.
Use only manual-listed accessories to prevent injury.
Ensure work area is well lit for safe operation.
Product may contain hazardous chemicals; wash hands.
Defines DANGER, WARNING, CAUTION, NOTICE for hazard levels.
Explains symbols like Safety Alert, Read Manual, Eye Protection.
Use 3-wire cords of appropriate gauge and condition.
Ensure proper grounding to reduce electric shock risk.
Defines Bevel Cut, Cross Cut, Kickback, Rip Cut, etc.
Defines Arbor, Riving Knife, Featherboard, etc.
Lists blade diameter, cutting depth, rating, and speed.
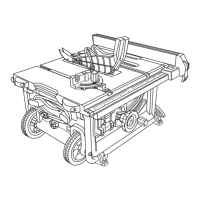
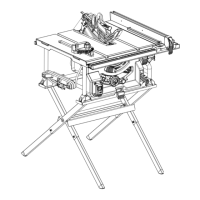
Diagram identifies key parts like rip fence, blade guard, miter gauge.
Pawls dig into wood to prevent kickback.
Controls blade angle and displays it on a scale.
Guard for safety; knob adjusts blade height.
Fence guides workpiece; riving knife prevents kickback.
Describes table, throat plate, blade height, and rails.
Key-operated switch to prevent unauthorized use.
Lists tools like square, screwdrivers, and clamps.
Identifies supplied accessories: rip fence, blade guard, push stick.
Diagram shows parts for the stand: tubes, brace, wheel, leg assembly.
Lift, inspect for damage, check parts against list.
Warnings on power, lifting, modification, and blade proximity.
Use holes to secure saw to workbench or leg stand.
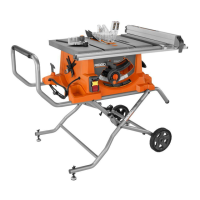
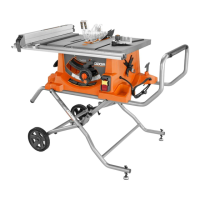
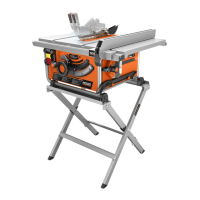
Step-by-step instructions and diagrams for assembling the leg stand.
Attaching the leg stand to the table saw base.
Instructions for safely opening the leg stand for use.
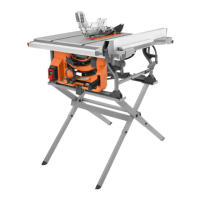
Adjust leveling feet for stability.
Designated areas for storing accessories.
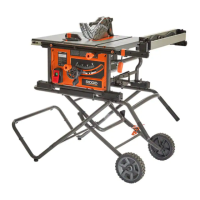
Steps to close stand and move saw on wheels.
Remove, replace, and align throat plate.
Set riving knife to 'up' for through cuts, 'down' for non-through.
Ensure correct blade mounting direction and clearance.
Attach pawls and guard for safety.
Procedure for correctly installing the blade guard.
Check and adjust riving knife/blade parallelism.
Warnings on familiarity, eye protection, accessories, guard.
Lists uses: straight cuts, dado cuts, cabinet making.
Explains kickback triggers and prevention methods.
Use push sticks/blocks to keep hands safe.
Create and attach auxiliary fence for thin material.
Construct a jig for safely ripping narrow workpieces.
Use featherboard for control; includes construction.
Details six basic cuts: cross, rip, miter, bevel, compound.
Advice on kerf, finish side up, knots, support.
Adjust blade height for optimal cutting.
Set and lock the blade's bevel angle.
Use disc to mark cut locations on workpieces.
Align rip fence indicator with scale.
Position, lock, and check rip fence for smooth operation.
Use miter gauge for accurate angled cuts and settings.
Extend table for larger workpieces and secure it.
Adjust blade parallel to miter gauge grooves.
Ensure rip fence parallel to blade to prevent kickback.
Includes setup checks, miter gauge use, test cuts.
Step-by-step guide for a standard 90-degree cross cut.
Cut along workpiece length using rip fence.
Cut at an angle using miter gauge.
Cut across grain with tilted blade.
Cut with grain while blade is tilted.
Cuts with angled blade and angled workpiece.
Safety for cutting large panels.
Steps for cuts not going through workpiece, like grooves.
Procedure for dado cuts using optional plate/stack.
Warnings before adjustments: unplug tool.
Detailed steps for removing and installing a new blade.
Calibrate indicator and set 0°/45° stops.
Calibrate miter gauge for 0°/45° angles.
Ensure rip fence parallel to blade/grooves.
Adjust fence using screws and check lock.
Fine-tune bevel lock for secure angle.
Ensure table extension is level and locks.
Use identical parts; avoid solvents on plastic.
Clean tools, surfaces, rails, protect blade.
Remove, clean, reinstall blade cover.
Lubricate threads, nuts, bearing points.
Check and replace worn motor brushes.
Lists optional accessories.
Solutions for vibration, rip fence movement, and locking.
Address binding, burning, and workpiece edge issues.
Diagnose issues with starting or 0°/45° cuts.
Troubleshoot poor cuts, overheating, motor labor.
Covers defects in workmanship/materials for three years.
Procedure for returns or contacting service centers.
What is not covered: misuse, wear, consumables.
Find and contact service centers for parts/repairs.
Record model/serial numbers for service.
| Type | Table Saw |
|---|---|
| Motor | 15 Amp |
| Blade Diameter | 10 inches |
| Max RPM | 5000 RPM |
| Cut Depth at 45 degrees | 2-1/4 inches |
| Table Material | Aluminum |
| Depth of Cut at 45 degrees | 2-1/4 inches |
| Arbor Size | 5/8 inches |
| Cut Depth at 90 degrees | 3-1/2 in |
| No Load Speed | 5, 000 r/min |
| Bevel Capacity | 0 to 45 degrees |
| Depth of Cut at 90 degrees | 3-1/2 in |