24
OPERATION
CUTTING AIDS
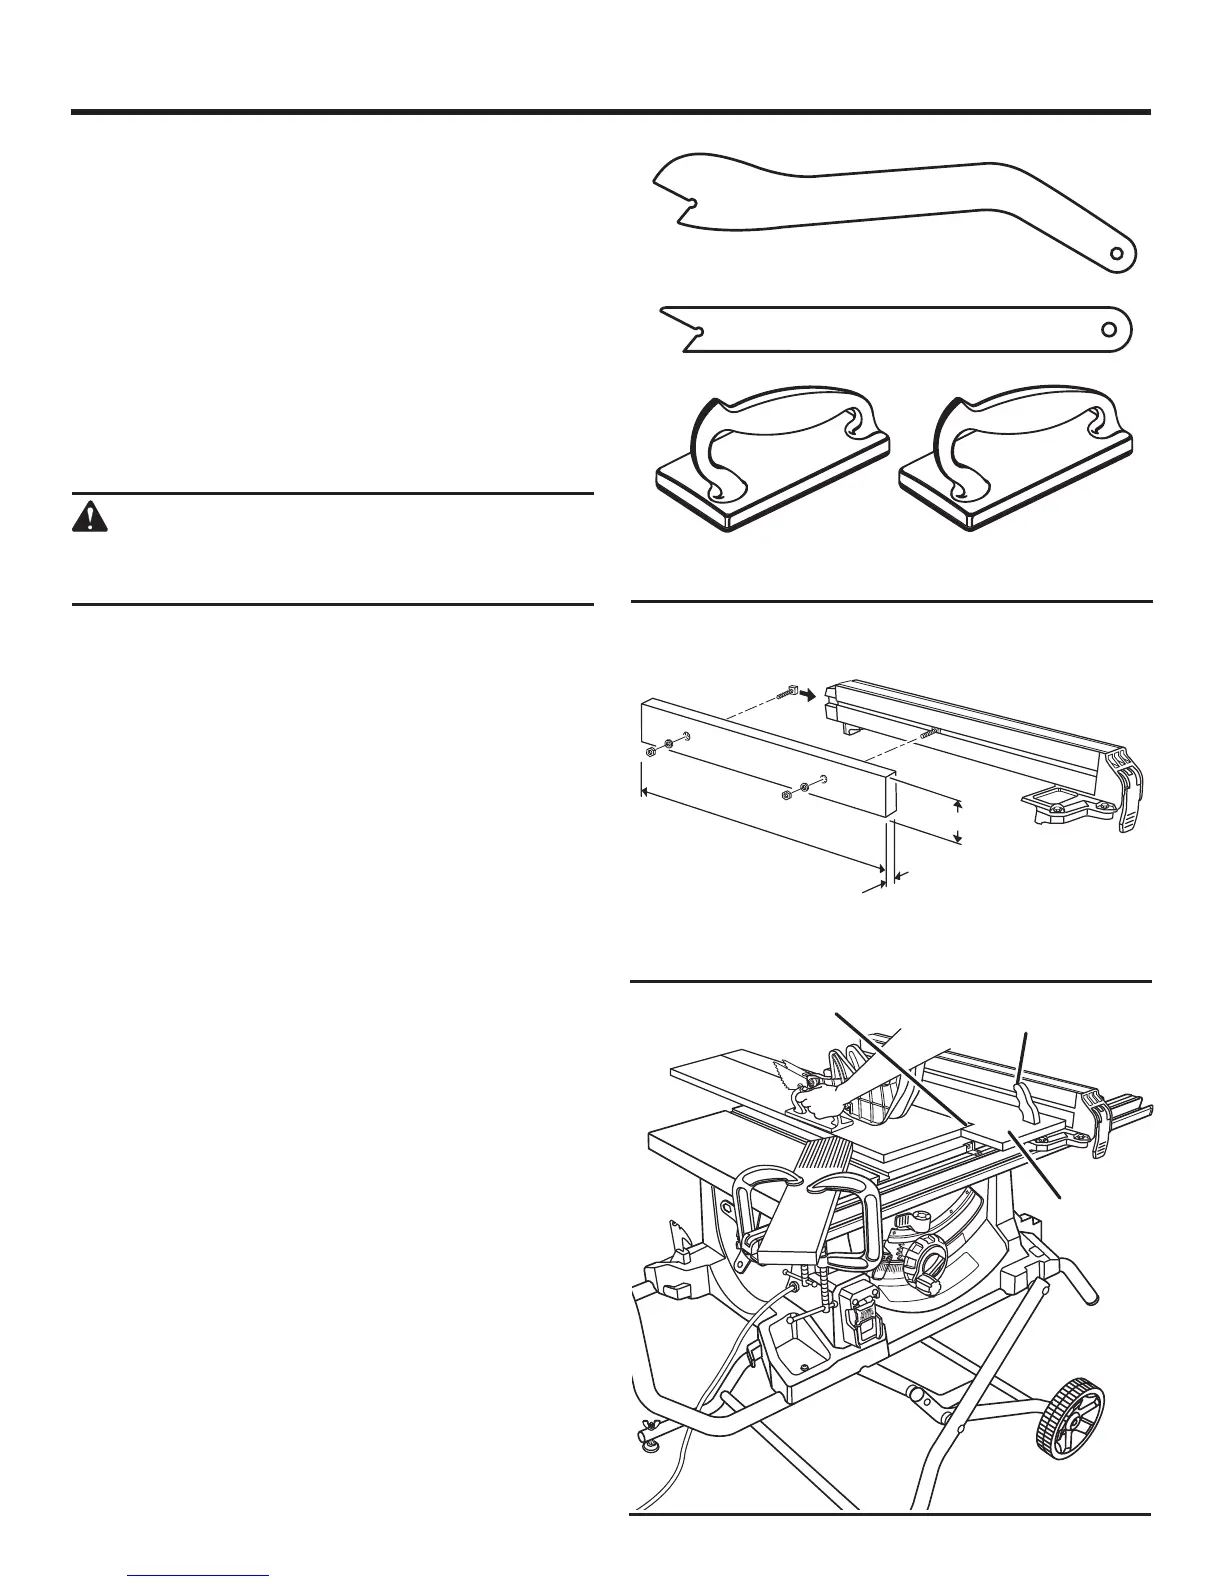
See Figure 25.
Push sticks are devices that may be used for pushing a
workpiece through the blade in any rip cut. When making
non-through cuts or ripping narrow stock, always use a
push stick, push block, and/or featherboard so your hands
do not come within 3 inches of the saw blade. They can be
made in various sizes and shapes from scrap wood and
used in a specific project. The stick must be narrower than
the workpiece, with a 90˚ notch in one end and shaping for
a grip on the other end.
A push block has a handle fastened by recessed screws
from the underside. Use push blocks for narrow cuts and
all non-through cuts.
CAUTION:
Be sure the screws in a push block are recessed
to avoid damaging the saw or workpiece.
AUXILIARY FENCE
An auxiliary fence is a device used to close the gap between
the rip fence and the saw table. Always make and use an
auxiliary fence when ripping material 1/8 in. or thinner.
HOW TO MAKE AND ATTACH AN AUXILIARY
FENCE (FOR RIP CUTTING THIN WORKPIECE)
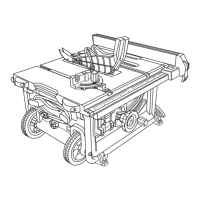
See Figure 26.
An auxiliary fence may be made for the saw by cutting a
piece of wood to 3/4 in. thick, 2-3/4 in. wide, and 24 in. long.
To attach the auxiliary fence to the rip fence:
Drill two countersunk holes in the locations shown.
Place hex head bolts in the holes and loosely secure the
bolts to the fence using washers and hex nuts positioning
mounting hardware away from the blade.
Slide the bolts into the slot on the rip fence then push the
auxiliary fence toward the front of the rip fence.
With the auxiliary fence resting firmly on the saw table,
tighten the hex nuts to secure the auxiliary fence to the
rip fence.
HOW TO MAKE A JIG (FOR RIP CUTTING
NARROW WORKPIECE)
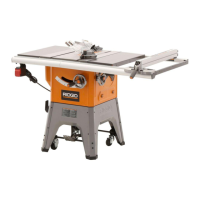
See Figure 27.
If ripping a narrow workpiece places the hands too close to
the blade, it will be necessary to make and use a jig.
To make a jig:
Attach a handle to a long, straight piece of wood and
secure from the underside using recessed screws.
Cut an L-shaped stop in the side of the jig.
To use a jig:
Position the workpiece flat on the table with the edge
flush against the jig and against the stop.
Holding the jig handle and using a push block and/or push
stick, make the rip cut as described on page 32 later in
this section.
Fig. 25
PUSH BLOCKS
PUSH STICKS
JIG
JIG
HANDLE
STOP
Fig. 26
Fig. 27
24 in.
3/4 in.
2-3/4 in.