EasyManua.ls Logo

RIDGID R4550 User Manual

RIDGID R4550
42 pages
To Next Page IconTo Next Page
Page #1 background imageLoading...
Page #1 background image
OPERATOR’S MANUAL
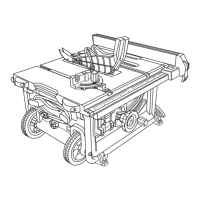
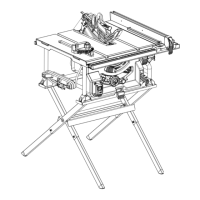
10 in. PORTABLE CONTRACTOR TABLE SAW
R4550
Your saw has been engineered and manufactured to our high standard for dependability, ease of operation, and operator
safety. When properly cared for, it will give you years of rugged, trouble-free performance.
WARNING:
To reduce the risk of injury, the user must read and understand the operators manual before using this product.
SAVE THIS MANUAL FOR FUTURE REFERENCE

Table of Contents

Questions and Answers:

RIDGID R4550 Specifications

General IconGeneral
BrandRIDGID
ModelR4550
CategorySaw
LanguageEnglish

Summary

Features

Important Safety Instructions

Safety Symbols and Definitions

General Power Tool Safety Warnings

Work Area & Electrical Safety

Keep work area clean, well-lit, and ensure proper electrical connections for safe operation.

Personal Safety & Tool Care

Follow personal safety guidelines, wear PPE, and maintain tools properly for safe use.

Tool Servicing

Procedures for servicing power tools by qualified personnel using identical replacement parts.

Table Saw Safety Rules

Terminology

Definitions of terms used in the manual, such as kickback, push stick, and kerf.

Guarding and Cutting Procedures

Keep guards in place, use blade guard, riving knife, and anti-kickback pawls for safe cutting.

Kickback Causes and Warnings

Explains kickback causes and provides warnings to prevent injury.

Saw Blade Guard, Anti-Kickback Pawls and Riving Knife Assembly

Details on the function and use of the blade guard, anti-kickback pawls, and riving knife.

Proposition 65 Warning

Power Connections

Extension Cords

Guidelines for selecting and using appropriate extension cords with the saw.

Unpacking

Package Contents Description

Lists all parts included in the package with corresponding part numbers.

Contents of Hardware Bags

Details the contents of each hardware bag provided with the saw.

Assembly

Tools Needed for Assembly or Adjustments

Lists the tools required for assembly and adjustments.

Initial Unpacking Steps

Initial steps for unpacking and preparing the saw body for assembly.

Assembling the Stand

Step-by-step instructions for assembling the saw's stand.

Height Adjustment Knob Installation

Instructions for installing the height adjustment knob onto the saw.

Fence Adjustment Knob Installation

Instructions for installing the fence adjustment knob.

Installing the Blade

Step-by-step guide for installing the saw blade correctly.

Throat Plate Installation

Instructions for installing and leveling the throat plate.

Anti-Kickback Pawls and Blade Guard Installation

Instructions for installing the anti-kickback pawls and blade guard assembly.

Installing the Fence

Instructions for attaching the fence to the saw rails.

Removing the Fence

Steps for detaching the fence from the saw.

On-Board Storage

Instructions for storing various components of the saw on the machine.

Making Adjustments

Leveling the Throat Plate

How to level the throat plate for optimal contact with the table surface.

Adjusting Blade Parallel to Miter Gauge Groove

Ensure the blade is parallel to the miter gauge groove to prevent binding and kickback.

Squaring the Blade Vertically to the Table

How to ensure the saw blade is perfectly perpendicular to the table surface.

Adjusting the Bevel Stops

Adjusting 0° and 45° stops for precise bevel angle settings.

Adjusting the Blade Height

How to set the blade height for different types of cuts, ensuring proper depth.

Changing the Bevel

Step-by-step guide for changing the bevel angle of the saw blade.

Using the Miter Gauge

Instructions on how to set and use the miter gauge for angled crosscuts.

Adjusting Rail System

How to adjust the fence rail system for accurate fence positioning and measurements.

Using Color Coded Scales

How to use the color-coded scales for accurate fence measurements.

Engaging the Flip Down Fence

How to use the flip down fence feature for specific cutting situations.

Riving Knife Position and Alignment

Riving Knife Height Settings

How to adjust the riving knife height for through and non-through cuts.

Riving Knife Alignment (Parallel, Horizontal, Vertical)

Steps to align the riving knife parallel, horizontal, and vertically to the blade.

Operation

Dust Collection

How to connect and use a dust collection system with the saw.

Turning the Saw On and Off

Procedures for safely turning the saw on and off, and locking it out.

Transporting the Saw

Instructions for folding and transporting the table saw.

Making Cuts

Rip Cuts

Detailed steps for performing rip cuts, including setup and safety.

Bevel Ripping

Instructions for performing rip cuts with a beveled blade angle.

Crosscutting

Steps and safety for performing cross cuts.

Bevel Crosscutting

Instructions for performing cross cuts with a beveled blade angle.

Miter Cuts

How to set up and perform miter cuts using the miter gauge.

Compound Miter Cuts

How to perform compound miter cuts, combining bevel and miter angles.

Large Panel Cuts

Guidance for cutting large panels using the table saw.

Non-Through Cuts

Information on performing cuts that do not go through the workpiece.

Cutting Aids and Accessories

Push Stick

Detailed instructions on how to construct and use a push stick safely.

Auxiliary Miter Gauge Facing

How to attach an auxiliary facing to the miter gauge for better workpiece support.

Flip Down Fence

Instructions for using the flip down fence feature.

Push Block

How to construct and use a push block for holding down workpieces.

Grooving and Rabbeting

Using featherboards for safety during grooving and rabbeting cuts.

Featherboard

How to use featherboards to hold workpieces and prevent kickback.

Cut Off Gauge

How to use a clamped block as a cut-off gauge for consistent lengths.

Jigs

General advice on creating specialized jigs for specific cuts.

Maintenance

Keep Machine Clean

How to clean the saw's components and air passages.

Maintenance Reminders

Key areas requiring regular maintenance checks and cleaning.

Accessories

Troubleshooting

Failure to Start

Checks to perform if the machine fails to start.

Parts, Service or Warranty Assistance

5 Year Limited Service Warranty Details

Details of the 5-year limited warranty, including coverage and exclusions.

How to Obtain Service

Instructions on how to contact customer service for repairs or support.

Additional Limitations

Legal limitations and disclaimers related to implied warranties.

Related product manuals