45
Adjustments
WARNING: For your own safety, turn switch “OFF”
and remove plug from power source outlet before
making any adjustments.
Miter Gauge
NOTE: The slots for the stop pin and the graduations are
manufactured to very close tolerances which provide
accuracy for average woodworking. In some cases where
extreme accuracy is required, when making angle cuts,
for example, make a trial cut and then recheck it.
If necessary, the miter gauge head can be swiveled
slightly to compensate for any inaccuracy.
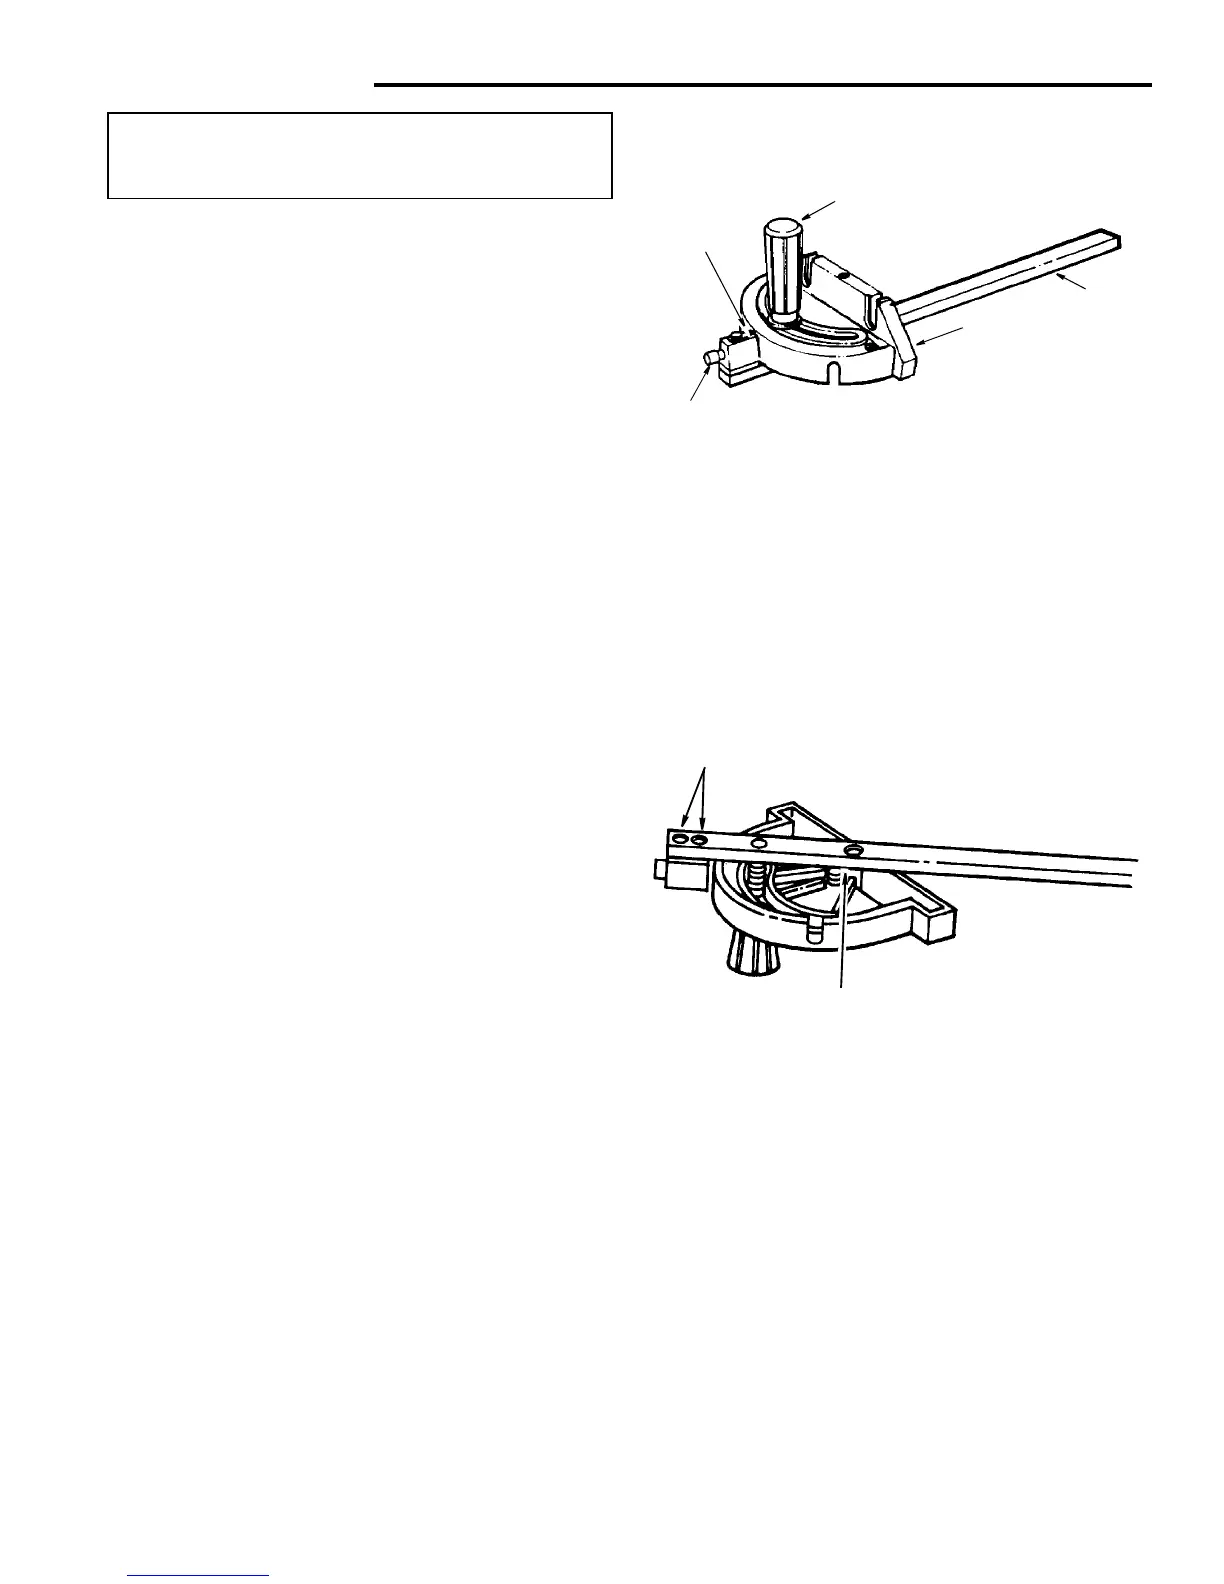
1. Loosen the “knob” and pull “stop pin” out.
2. Swivel the head, position it at “0”, push the stop pin in,
lock the handle.
3. The head should be square with the bar and the
pointer should point to “0”. Readjust the pointer if nec-
essary.
4. If the head is not square with the bar, adjustments are
required.
A.Loosen the “knob” (1) and the “two screws” (2).
B.Position the head square with the bar using a combi-
nation square. Tighten knob.
C.Push the stop pin into the slot in the head and twist
it.
D. With the head square with the bar and the pin
pushed into the slot, tighten the two screws and
adjust the pointer to point to “0”.
E.The miter gauge head must rest on top of the bar
without being able to move up and down, yet is must
swivel freely.
F. The swiveling movement of the head can be
adjusted by tightening or loosening the setscrew
using a 1/8 inch hex “L” wrench.
NOTE: The setscrew is located inside of the head. To
reach it, swivel the head to 60° and turn the miter gauge
upside down.
Two Screws
Set Screw
Bar
Knob
Miter Gauge
Head
Stop Pin
Pointer



 To Next Page