Rinnai CVent 32
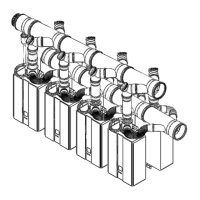
Common Header Check Valve Maintenance
Visually inspect the check valve annually (or aer 4000 operaon hours) for obstrucons, proper operaon ,
large and small parcles of debris, according to the instrucons below. Operaon hours can be obtained on the
controller by pressing and holding the down buon for 2 seconds and without releasing the down buon, press
the ON/OFF buon. The third number to cycle through will be the operang hours in units of a hundred hours.
For example, “40” means 4000 hours.
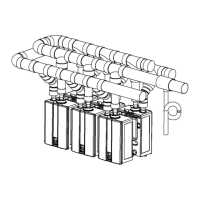
1. Shut the electrical power o, for the appliances before inspecng the common header, otherwise ue gasses
can emerge uncontrolled into the appliance room.
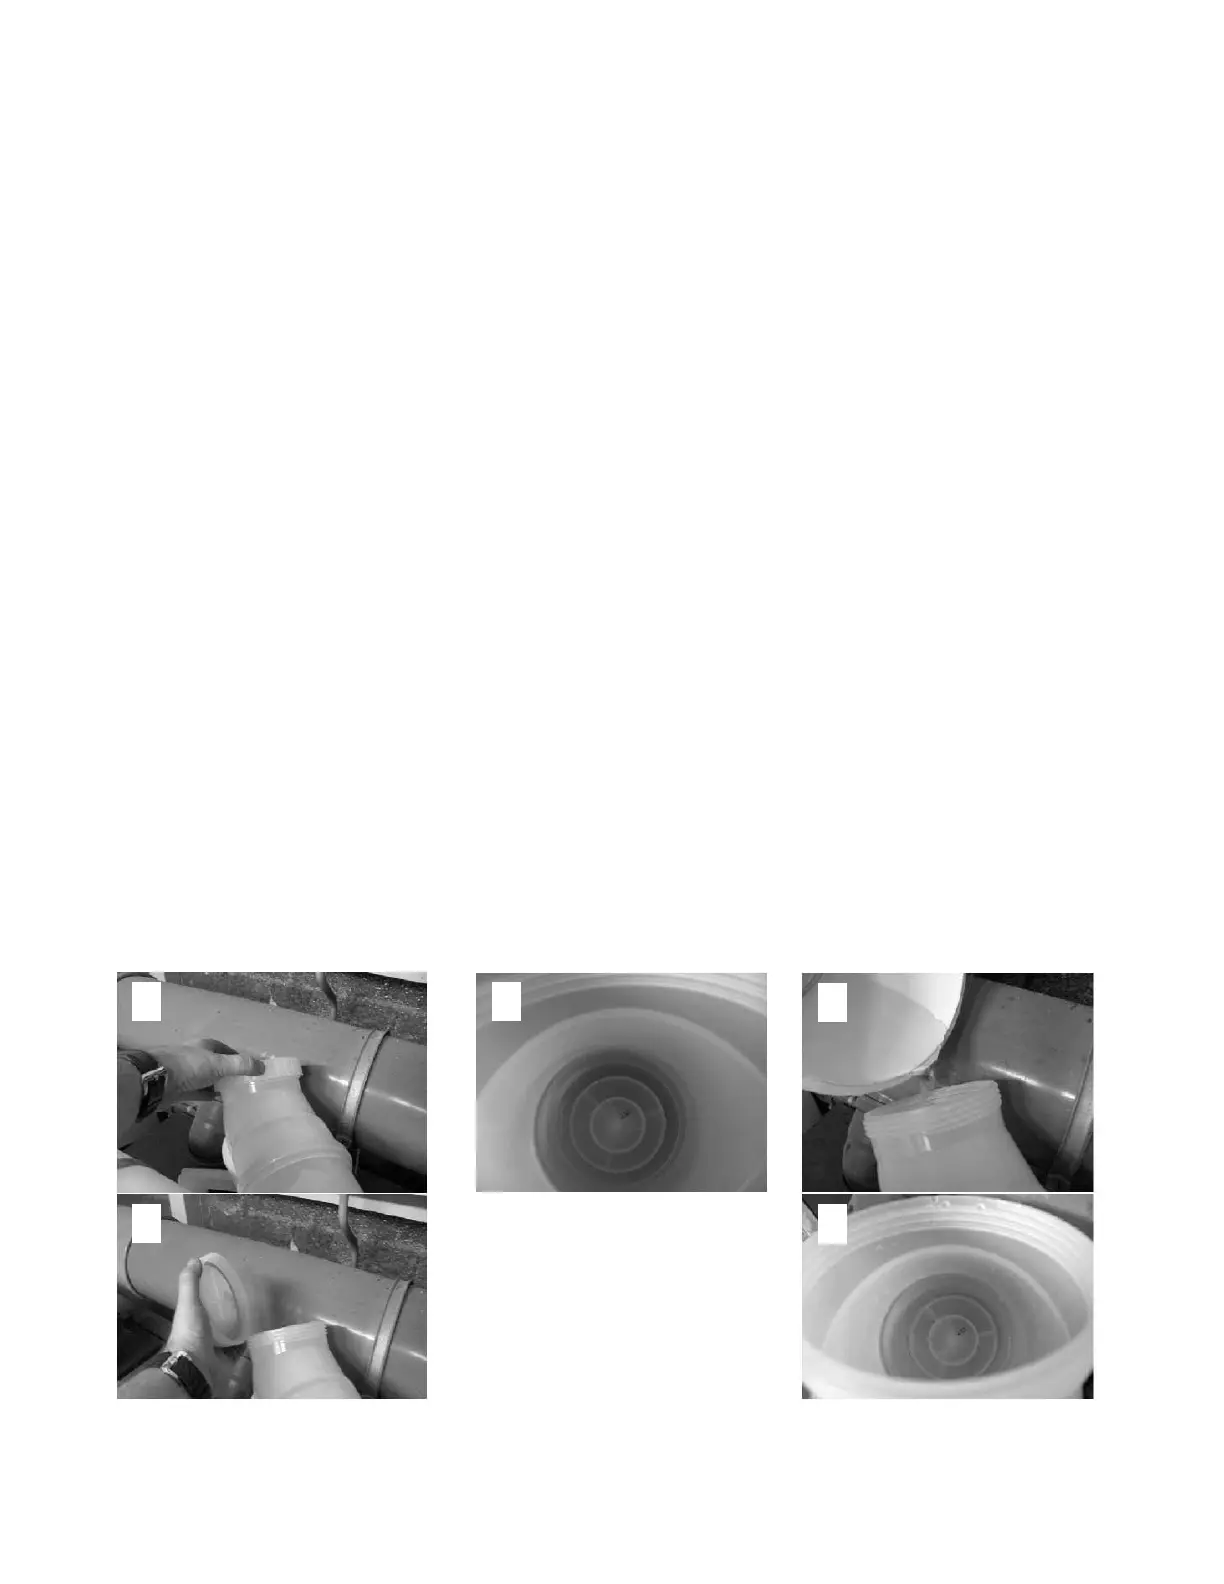
2. Over the check valves an elbow is installed with an inspecon lid, the lid must be twisted o for inspecon
and maintenance of the check valve.
3. Restore the electric power for the inspected appliance and manually re the appliance and check if the check
valve opens fully and is free of obstrucons.
4. In case debris is noced , for the cleaning of the check valve of large parcles (over 1 mm) we advise to use a
vacuum cleaner for removal of the large parcles. The vacuum cleaner should be used at either low power,
and/or with an adapter small enough to clean the check valve out. For smaller parcles (under 1mm) we
advise to use a sucient amount of luke-warm water to ush the adapter. Do not use detergents or solvents
for cleaning the check valve!! When applicable the small check valve can be removed and re-installed for
inspecon by pulling it out of posion. We do not advise to do this frequently. When re-installed, the check
valve must be inspected again for proper operaon by operang the appliance.
Note: When an in-line condensate trap is installed (oponal component) this must be removed and a hose
should be connected for the correct disposal of the ushing water. Protect the building structure for the
water emerging from this hose and dispose the water with debris in a way acceptable to the local codes. Be
aware that condensate is a corrosive substance that could aect metals, brick etc.
5. Re-assemble the components aer the cleaning procedure in reverse order. Check the correct installaon of
the rubber seals. Power the appliances again and let them run for 30 minutes minimum. While running, check
the common header system visually for condensate leaks caused by the inspecon. In case leaks are sighted
these must be solved before the installaon is released. When seal rings are damaged by the inspecon these
must be replaced, they cannot be repaired by using a silicon sealant or other.
1
2
3
4
5
Note: Rinnai recommends replacing the check valve when replacing the water heater.
 Loading...