KBP Series Manual 29
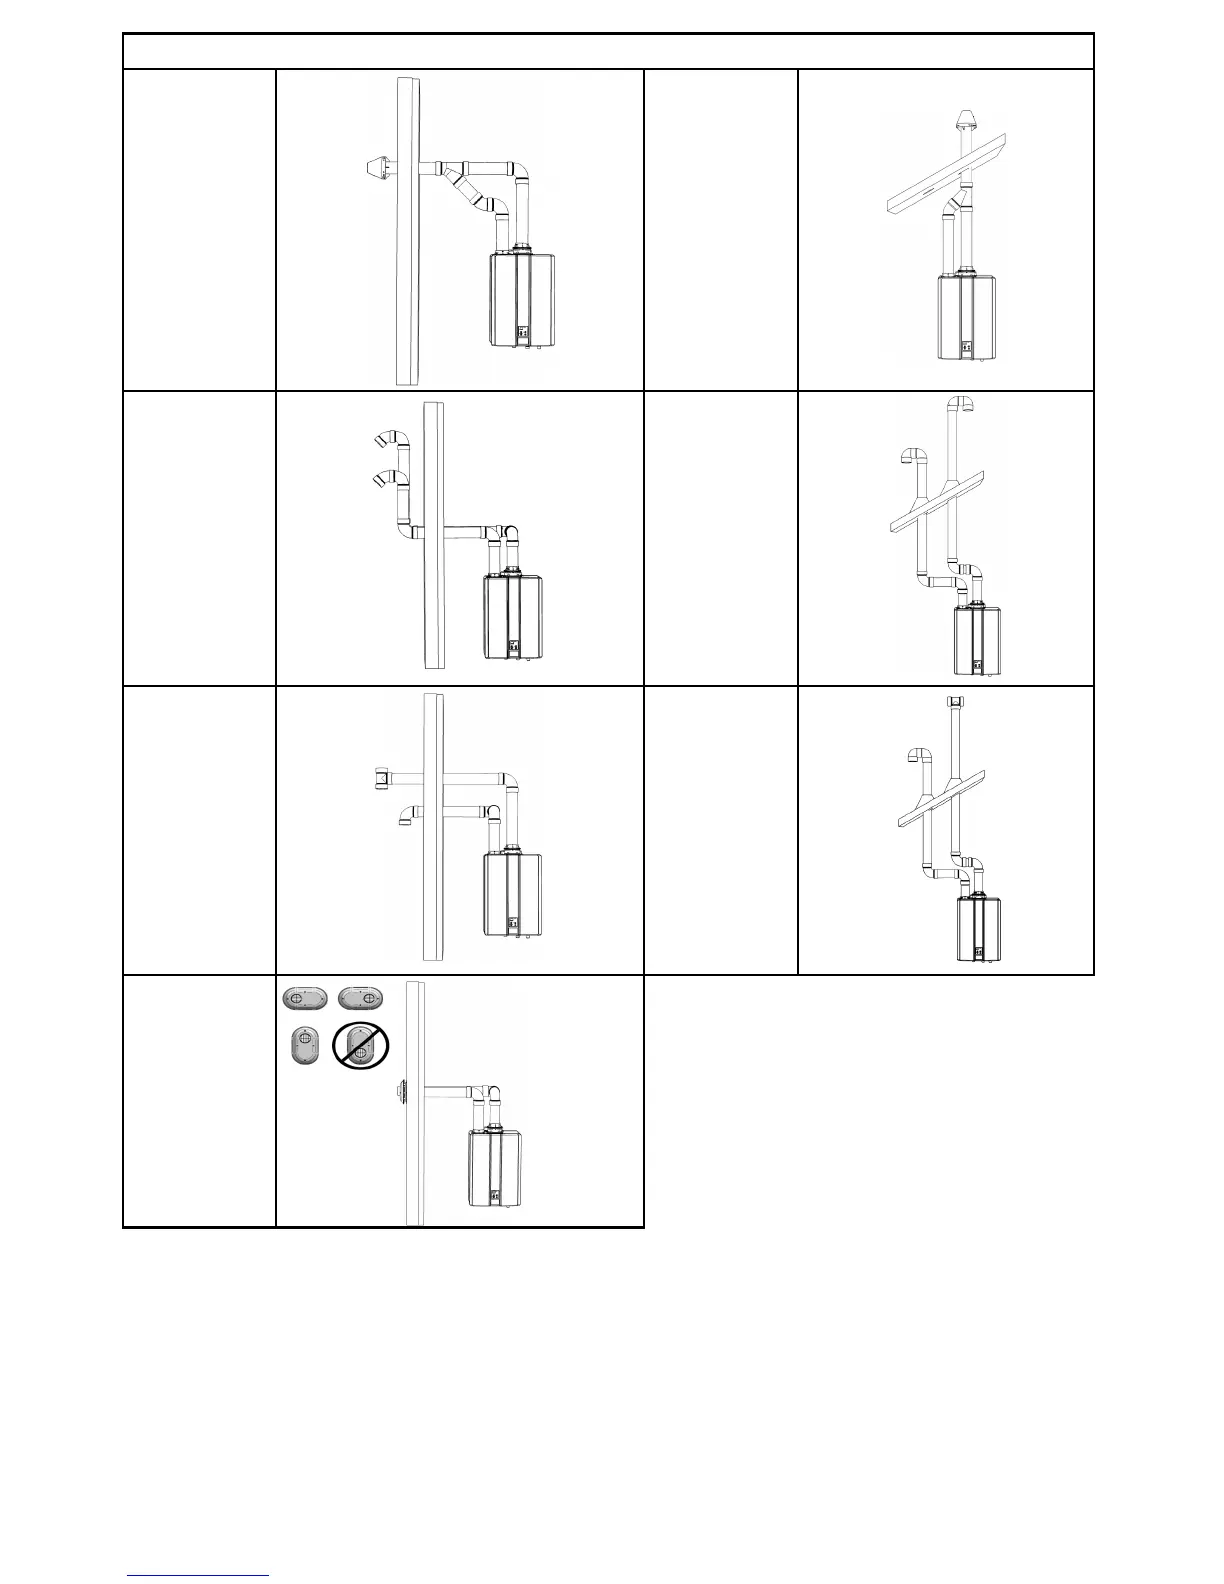
Rinnai 3" or
4" PVC/CPVC
Concentric
Side Wall
Terminaon
Conguraon
Rinnai 3" or 4"
PVC/CPVC
Concentric
Vercal
Terminaon
Conguraon
Rinnai 3" or
4" PVC/CPVC
Snorkel
Terminaon
Conguraon
Rinnai 3" or 4"
PVC/CPVC
Standard
upside down
"U" Vercal
Terminaon
Conguraon
Rinnai 3" or
4" PVC/CPVC
Tee Side Wall
Terminaon
Conguraon
Rinnai 3" or 4"
PVC/CPVC Tee
Vercal
Terminaon
Conguraon
Rinnai 3" or
4" PVC/CPVC
Low Prole
Terminaon
Conguraon
1. Install the water heater.
2. Determine the terminaon method—sidewall or
vercal, concentric, or separate pipes, etc.
3. Determine proper locaon for wall or roof
penetraon for each terminaon.
4. Install terminaon assembly as described in this
manual.
5. Install air and vent piping from water heater to
terminaon.
6. Slope horizontal exhaust run towards the water heater 1/4”
per foot. slope combuson air pipe
towards unit. Be sure to dispose of condensate per
local codes.
7. Install pipe supports and brackets every 4 feet allowing for
movement from expansion or as per vent manufacturer’s or
local coderequirements.

 Loading...