KCM Series Manual 45
Mounng the controller
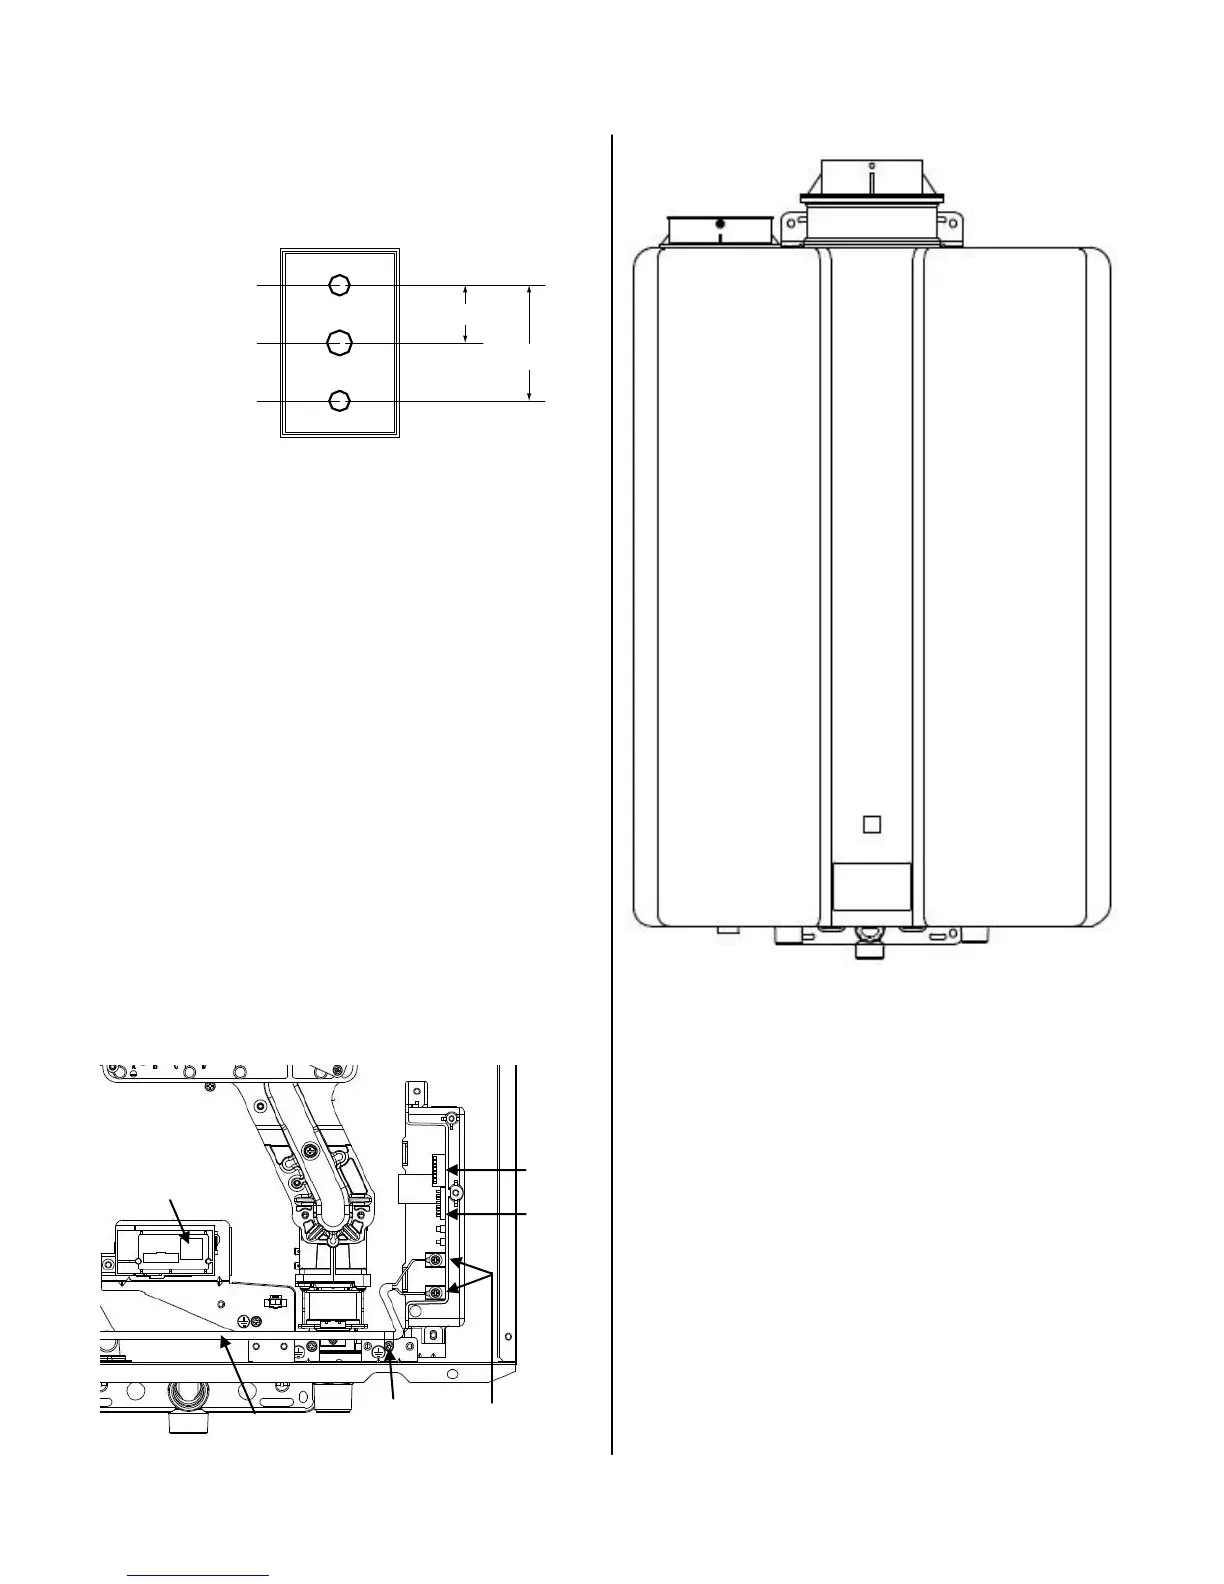
1. Make three holes in the wall as shown.
2. Run the cable between the controller and the
water heater or the controller and another
controller.
3. Remove the face plate from the temperature
controller using a screwdriver.
4. Connect the cable to the temperature controller.
5. Mount the controller to the wall using the holes
drilled in step 1.
6. Disconnect the power from the water heater.
7. Remove the plasc cover from the PCB and
electrical connecons.
8. Thread the cable through the access hole at the
base of the unit and connect the wires to the
controller terminals on the right hand side boom
of the PCB.
9. Secure the controller cable using the clamp
provided.
10. Replace plasc cover over PCB and then replace
the cover of the water heater.
Outline of Remote
securing screw
1-21/32"
3-5/16"
securing screw
wiring hole
Cable Clamp
Remote Control
Cable
Remote Control
Connecon Terminals
Once Installaon is complete, install the front panel
and cycle the unit on to ensure it is funconing
correctly. Proper installaon/operaon of the unit is
with the front panel installed.
DIPSW 1
DIPSW 2
Status Monitor
 Loading...