V53De Manual 15
Mounng the Controller
Follow the procedure below to install an MC-601-US
temperature controller.
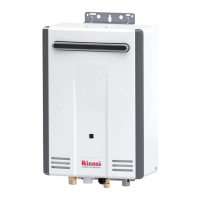
1. Determine a suitable locaon for the controller.
2. Make three holes in the wall as shown.
3. Run the wiring between the controller and the
Rinnai water heater or the controller and another
controller as shown in the illustraon on P.14.
4. Remove the face plate from temperature
controller using a screwdriver.
5. Connect the cable to the temperature controller
(refer to remote controller installaon instrucons
for details).
6. Mount the controller to the wall using the holes
drilled in step 2.
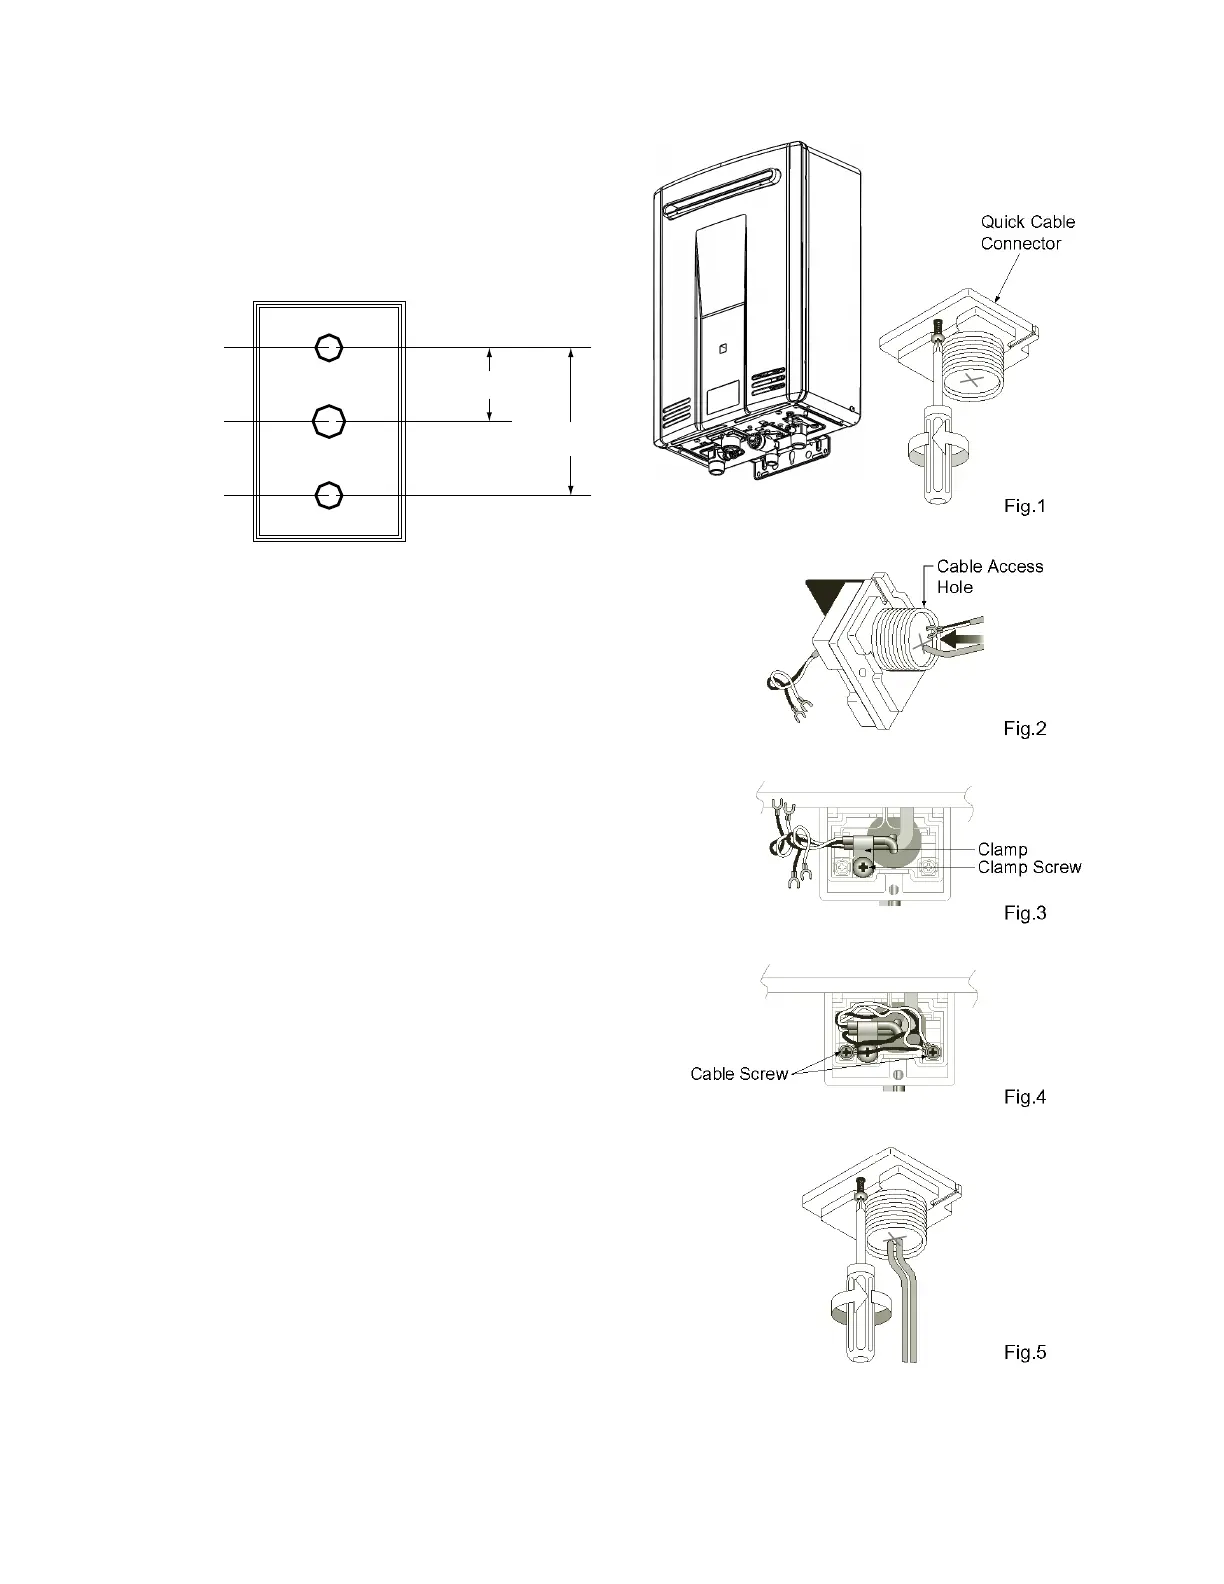
7. Disconnect power from the water heater.
8. Remove the screw on the Quick Cable Connector.
(Fig. 1)
9. Rotate the Quick Cable Connector. (Fig. 2)
10. Route the wires through the Cable Access Hole
(Fig. 2)
11. Loosen the clamp screw and secure the wires with
the clamp. The clamp is in the box with the
temperature controller. Make sure the wire
lengths are of sucient length. There should be
no tension in the wires. (Fig. 3)
12. Loosen 2 screws on the terminals for controls and
connect the cable (polarity is unimportant, either
color can be connected to either terminal). When
connecng more than 2 cables, connect them in
parallel. (Fig. 4)
13. Reinstall the Quick Cable Connecon. (Fig. 5)
 Loading...