drawing D
drawing E
6. Your start-up operation of the UPS is com-
pletely now as illustrated as drawing E.
Make sure the UPS is plugged onto the wall
receptacle for charging at least 8 hours and
the batteries of the UPS are fully charged
4.4.2. Start-up in Battery Mode (Cold Start)
1. Make sure the UPS has already been in-
stalled with batteries.
2. Press the UPS “ON” switch to awake the
UPS for approx. 3 seconds, and then the
buzzer sounds twice. The LCD display will
illustrate from drawing A to drawing B.
drawing G
3. Press the UPS “ON” switch of the UPS again
for approx. 3 seconds till the LCD display il-
lustrates from drawing B to drawing G, then
the UPS will be in self-test Mode. The UPS
may offer energy to the output in a minute,
and the LCD display illustrates as drawing H.
In case of failure in pushing the UPS “ON”
Switch in 10 seconds, the UPS will automati-
cally turn off.
Note!
Was the UPS started in Battery
Mode it will not switch to Normal
Mode if the Utility is connected
during the Initial phase. The UPS
must be completely restarted to get
back to Normal Mode.
drawing H
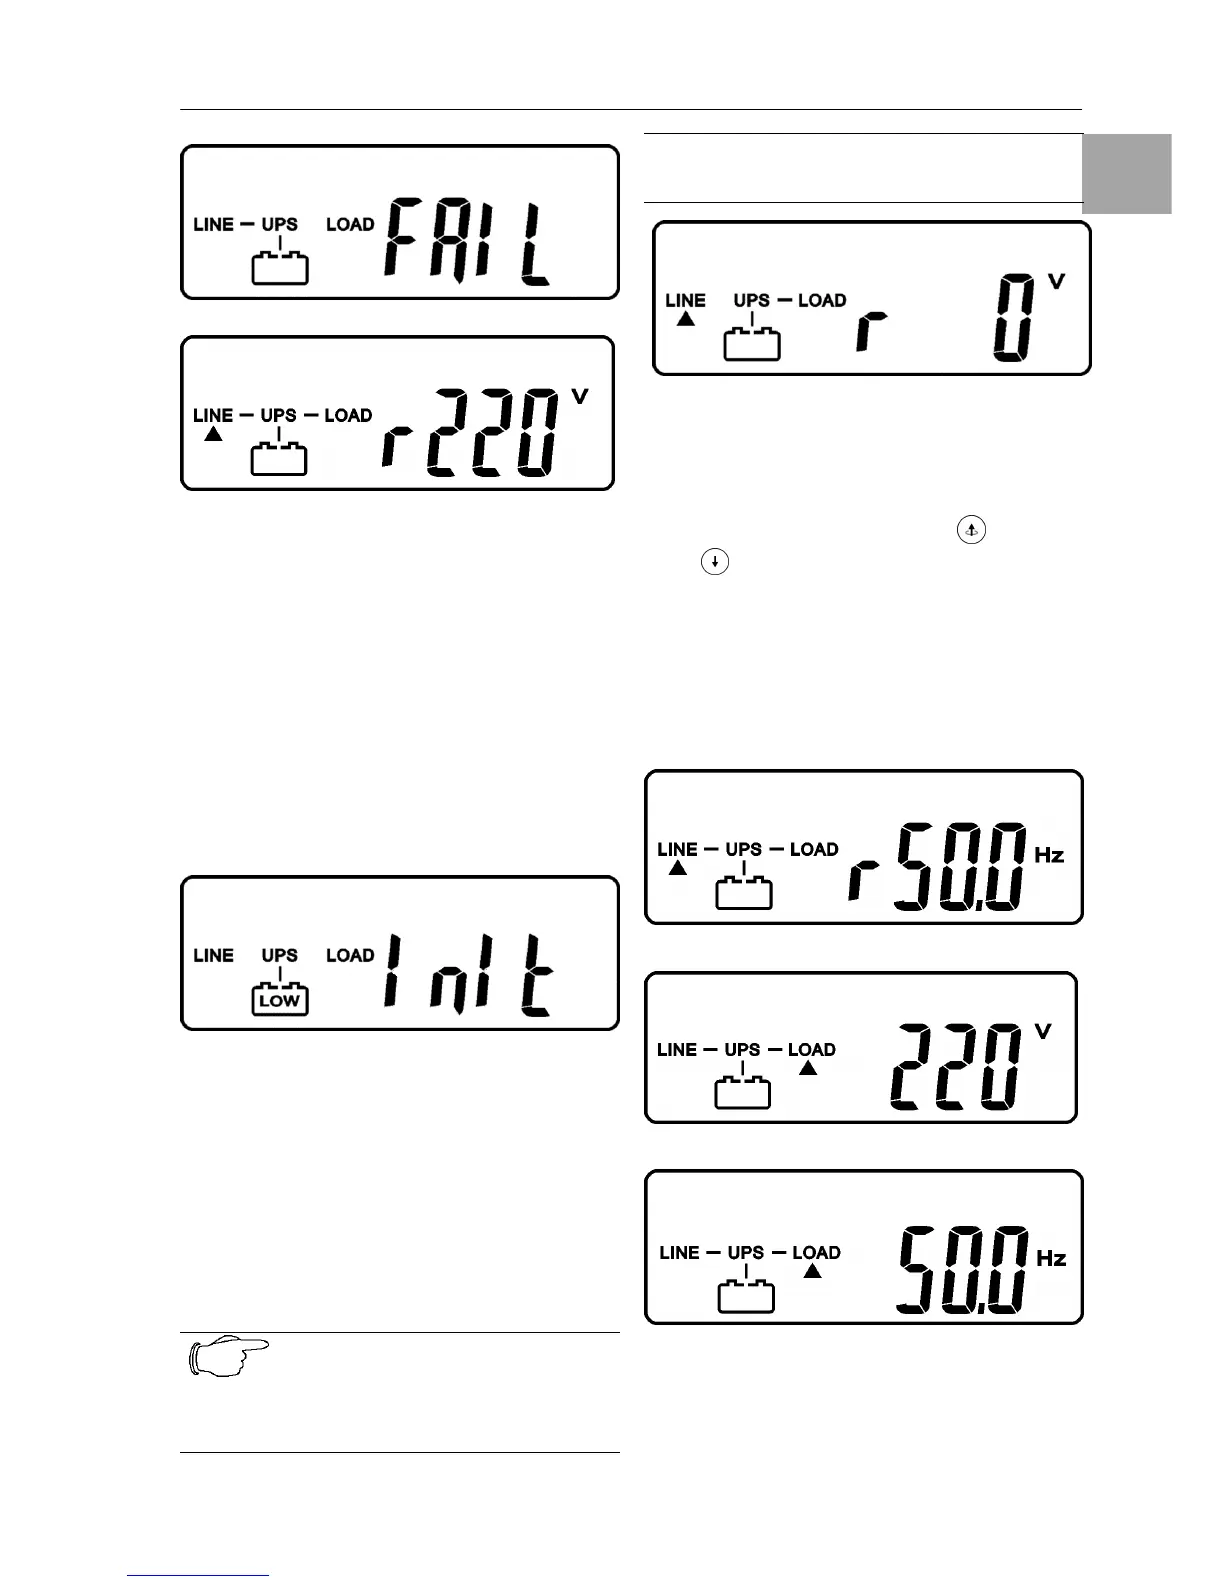
4.4.3. Check Measured Values &
Figures detected by UPS
If you would like to check the measured values
& messages, please use scroll up and scroll
down key pads. When you use scroll down
key pad, the LCD display will illustrate in se-
quence from drawing E(Input Voltage)
drawing J(Input Frequency) drawing K(UPS
Output Voltage) drawing L(UPS Output Fre-
quency) drawing M(UPS Output Load per-
centage) drawing N(UPS Battery Voltage)
drawing O(UPS inner temperature).
drawing J
drawing K
drawing L