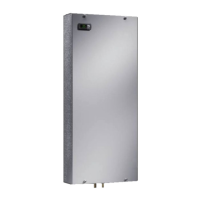
2 Trennschalterhaube VX25 und Nebentürverriegelung Montageanleitung/Isolator door cover VX25 and adjacent door latch assembly instructions/
Notice de montage capot de disjoncteur VX25 et verrouillage de porte secondaire
Inhaltsverzeichnis
Contents
Sommaire
Seite
1. Hinweise zur Dokumentation 4
1.1 CE-Kennzeichnung 4
1.2 Aufbewahrung der Unterlagen 4
1.3 Mitgeltende Unterlagen 4
1.4 Normative Verweise 4
2. Sicherheitshinweise 5 – 15
3. Gerätebeschreibung 16 – 18
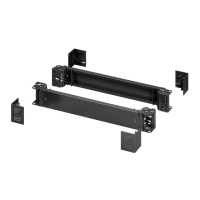
3.1 Lieferumfang Trennschalterhaube 16
3.2 Lieferumfang Türverriegelung 17–18
4. Montage und Aufstellung 19 – 40
4.1 Anforderungen an den Aufstellort 19
4.2 Montage Dichtung 20
4.3 Montage Trennschalterhaube 21
4.4 Montage Betätigungshebel 22
4.5.1 Montage Trennschalter-Betätiger 23
4.5.2 Checkliste Türverriegelung 24
4.5.3 Funktionsprüfung (spannungsfrei) 25
4.6 Erdung und Potenzialausgleich 26
4.7 Montage Montageplatten-
Zwischenstück innerhalb
der Trennschalterhaube 27
4.8 Montage Montageplatten-
Zwischenstück bündig mit
Montageplatte 28
4.9 Montage Seitenwand
Trennschalterhaube 29
4.10.1 Montage Türverriegelung
eintüriger Schrank, Türrohrrahmen 30
4.10.2 Montage Türverriegelung
eintüriger Schrank, Schrankprofi l 31
4.10.3 Montage Türverriegelung
eintüriger Schrank, Schubstange 32
4.11 Anreihung bei eintüriger
Schrankkombination 33 – 34
4.12.1 Montage Türverriegelung
doppeltüriger Schrank,
Türrohrrahmen 35
4.12.2 Montage Türverriegelung
doppeltüriger Schrank,
Schrankprofi l 36
4.12.3 Montage Türverriegelung
doppeltüriger Schrank,
Schubstange 37
4.13 Anreihung bei doppeltüriger
Schrankkombination 38 – 40
5. Transport 41
6. Installation 41
7. Erdung und
Potenzialausgleich 42
8. Bedienung 42
9. Inspektion und Wartung 43
10. Lagerung 44
11. Technische Daten 44
12. Ersatzteile 45
13. Garantie 45
14. Kundendienstadressen 45
Page
1. Notes on documentation 4
1.1 CE labelling 4
1.2 Storing the documents 4
1.3 Other applicable documents 4
1.4 Normative references 4
2. Safety instructions 5 – 15
3. Device description 16 – 18
3.1 Scope of delivery
for isolator door cover 16
3.2 Scope of delivery
for adjacent door latch 17–18
4. Assembly and siting 19 – 40
4.1 Site requirements 19
4.2 Attaching the seal 20
4.3 Mounting the isolator door cover 21
4.4 Mounting the actuator levers 22
4.5.1 Mounting the isolator door actuator 23
4.5.2 Door lock checklist 24
4.5.3 Function test (power disconnected) 25
4.6 Earthing and potential equalisation 26
4.7 Mounting plate infi ll
inside isolator door cover 27
4.8 Mounting plate infi ll
fl ush with the mounting plate 28
4.9 Mounting the side panel
of the isolator door cover 29
4.10.1 Mounting the door latch, single door
enclosure, tubular door frame 30
4.10.2 Mounting the door latch, single door
enclosure, enclosure section 31
4.10.3 Mounting the door latch, single door
enclosure, interconnecting rod 32
4.11 Baying with single-door
enclosure combination 33 – 34
4.12.1 Mounting the door latch, two-door
enclosure, tubular door frame 35
4.12.2 Mounting the door latch, two-door
enclosure, enclosure section 36
4.12.3 Mounting the door latch, two-door
enclosure, interconnecting rod 37
4.13 Baying with two-door enclosure
combination 38 – 40
5. Transport 41
6. Installation 41
7. Earthing and potential
equalisation 42
8. Operation 42
9. Inspection and maintenance 43
10. Storage 44
11. Technical specifi cations 44
12. Spare parts 45
13. Guarantee 45
14. Customer services addresses 45
Page
1. Remarques relatives
à la documentation 4
1.1 Certifi cation CE 4
1.2 Conservation des documents 4
1.3 Autres documents applicables 4
1.4 Renvois à la norme 4
2. Consignes de sécurité 5 – 15
3. Description de
l’équipement 16 – 18
3.1 Composition de la livraison
pour capot de disjoncteur 16
3.2 Composition de la livraison pour verrouil-
lage de porte secondaire 17–18
4. Montage et implantation 19 – 40
4.1 Exigences concernant le lieu
d’implantation 19
4.2 Montage du joint 20
4.3 Montage du capot de disjoncteur 21
4.4 Montage du levier du commande 22
4.5.1 Montage du levier pour disjoncteurs 23
4.5.2 Liste de vérifi cation verrouillage
de porte 24
4.5.3 Test de fonctionnement
(hors tension) 25
4.6 Mise à la terre et équipotentialité 26
4.7 Intercalaire pour plaque de montage
à l’intérieur du capot de disjoncteur 27
4.8 Intercalaire pour plaque de montage
en a eurement avec
la plaque de montage 28
4.9 Montage du panneau latéral
du capot de disjoncteur 29
4.10.1 Montage du verrouillage de porte
sur armoire à une porte,
cadre de porte tubulaire 30
4.10.2 Montage du verrouillage de porte
sur armoire à une porte,
profi lé d’armoire 31
4.10.3 Montage du verrouillage de porte
sur armoire à une porte,
tringle coulissante 32
4.11 Juxtaposition avec combinaison
d’armoires à une porte 33 – 34
4.12.1 Montage du verrouillage de porte
sur armoire à deux portes,
cadre de porte tubulaire 35
4.12.2 Montage du verrouillage de porte
sur armoire à deux portes,
profi lé d’armoire 36
4.12.3 Montage du verrouillage de porte
sur armoire à deux portes,
tringle coulissante 37
4.13 Juxtaposition avec combinaison
d’armoires à deux portes 38 – 40
5. Transport 41
6. Installation 41
7. Mise à la terre et
équipotentialité 42
8. Utilisation 42
9. Inspection et entretien 43
10. Stockage 44
11. Caractéristiques techniques 44
12. Pièces de rechange 45
13. Garantie 45
14.
Coordonnées des services
après-vente 45