– English
Silverline - PS 3200 V0713 19
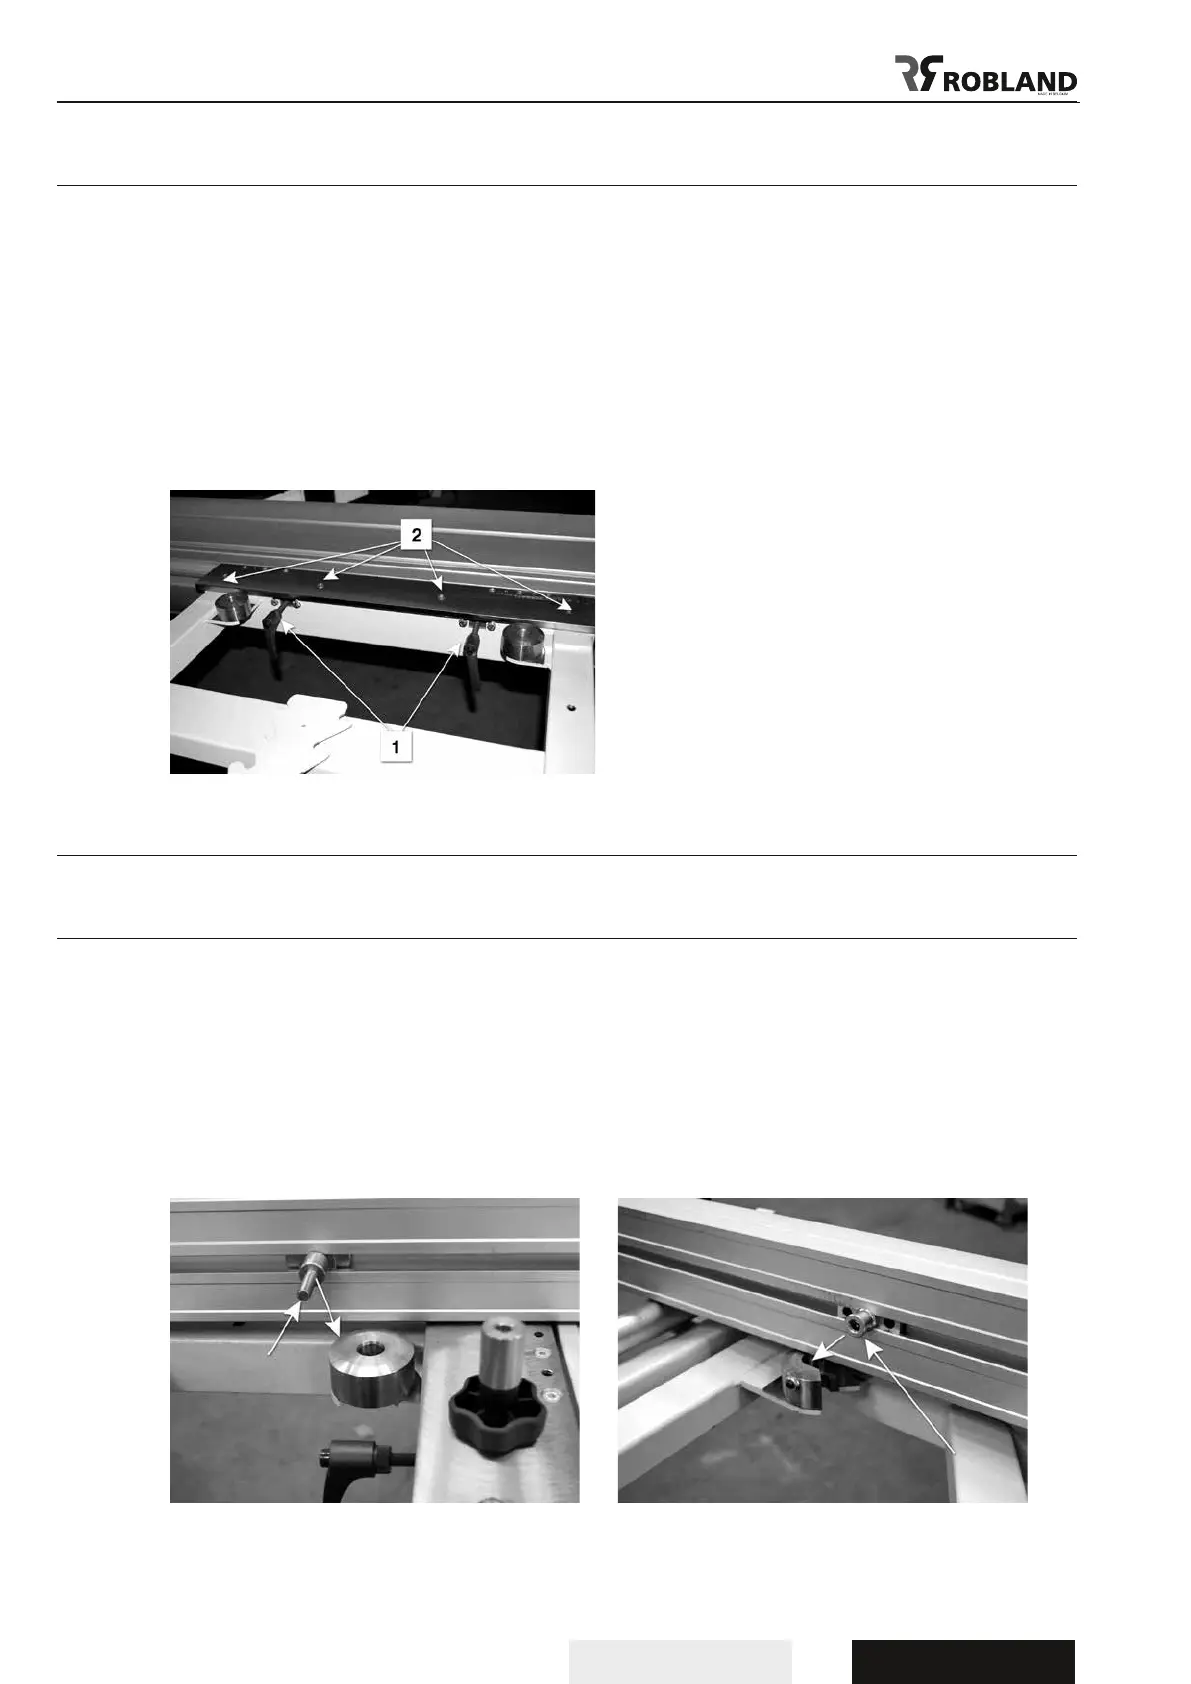
Mounting of the cross-cut table (Fig.17)
The cross-cut table can be mounted on the sliding table as follows: make sure that both mounting
brackets are well placed in the lateral groove of the sliding table.
The locking itself is done with the two locking handles (1). Make sure the cross-cut table rests well on
the vertical post of the telescopic arm. The machine serves only to put the cross-cut table at the back
of the sliding table, with a maximum at the centre.
The cross-cut table and fence are factory set at 90° to the saw blade but if for some reason this is not
the case and not exact anymore, the 90° angle setting adjustment is done by loosening the 4 bolts
(2) and shifting the complete cross-cut table. Make sure these 4 bolts are well tightened after the
adjustment is done.
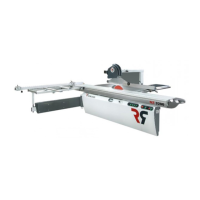
Mounting of the cross-cut fence (Fig.18)
The cross-cut fence has 2 positioning pins which locate in 2 precision holes in the cross-cut table.
Make sure the fence is placed fully down on to the table, put the locking knobs in place and tighten
them well.
The two adjustment grub screws in the left side bore assure the correct, play free, position of the fence
and do not serve as 90° angle setting, this adjustment is done as described above by shifting the
complete cross-cut table (g. 17.2).
The cross-cut fence can be used on 2 positions: at the front, or back side of the cross-cut table.
Fig.17
Fig.18