EasyManua.ls Logo

Rockwell Automation Allen-Bradley Micro800 User Manual

Rockwell Automation Allen-Bradley Micro800
108 pages
To Next Page IconTo Next Page
Page #1 background imageLoading...
Page #1 background image
Quick Start
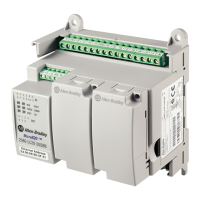
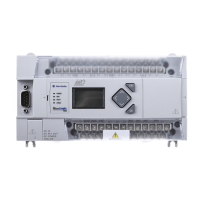
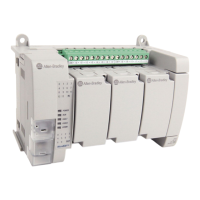
Micro800 Controllers Starter Pack
Controller Catalog Numbers 2080-LC10, 2080-LC20, 2080-L50E
Starter Pack Catalog Numbers 2080-LC10-STARTERPACK,
2080-LC20-STARTERPACK, 2080-LC20-STARTERPACKL,
2080-LC50-STARTERPACK, 2080-LC50-STARTERPACKL
Original Instructions

Other manuals for Rockwell Automation Allen-Bradley Micro800

Question and Answer IconNeed help?

Do you have a question about the Rockwell Automation Allen-Bradley Micro800 and is the answer not in the manual?

Rockwell Automation Allen-Bradley Micro800 Specifications

General IconGeneral
SeriesMicro800
Programming SoftwareConnected Components Workbench (CCW)
Communication PortsSerial (RS232/RS485)
MemoryVaries by model
Programming LanguageFunction Block Diagram, Structured Text
Digital I/OVaries by controller model and expansion modules
Analog I/OVaries by controller model and expansion modules
Power SupplyIntegrated or External
MountingDIN Rail
Processor SpeedVaries by controller model
DimensionsVaries by controller model

Summary

Preface

About This Publication

Overview of the quick start guide's purpose and scope.

Download Firmware, AOP, EDS, and Other Files

Instructions for obtaining necessary software and firmware.

Summary of Changes

Lists new or updated information within the publication.

Additional Resources

Lists related Rockwell Automation publications for further information.

Chapter 1 Study Guide Overview

What You Need

Lists hardware and software prerequisites for using the guide.

Start Connected Components Workbench Software

Instructions to launch the CCW software.

Connected Components Workbench Software Design Environment

Describes the default project layout and its components.

Project Organizer

Explains the function of the Project Organizer window in CCW.

Workspace

Describes the Start Page workspace and its sections.

Toolbox

Explains the context-sensitive Toolbox for editing.

Output

Describes the Output window for messages and debug information.

Status Bar

Explains the Status bar's role in showing software activity.

Chapter 3 Create and Save a Connected Components Workbench Project

Create a Connected Components Workbench Project

Step-by-step guide to creating a new project in CCW.

Save Your Connected Components Workbench Project

Steps to save the created project.

Chapter 4 Build and Download Project

Build and Download the Project to your Micro800 Controller

Guide to building and downloading the project to the controller.

Chapter 6 Monitor Your Micro800 Controller Program

Monitor Your Program in Connected Components Workbench Software

How to view program status and values in CCW.

View Real-time Changes in List Format

How to view variable changes in a list format.

Chapter 7 How to Create Variables

Create Local Variables for your Program

Steps to create local variables within a program.

Chapter 8 How to Implement an Instruction Block

Add a TON Instruction Block

Guide to adding a Timer-on-Delay (TON) instruction.

Enter Parameters for TON Instruction Block

Steps to configure parameters for the TON instruction block.

Add an ANY_TO_TIME Instruction Block

Guide to adding a data conversion instruction.

Chapter 9 How to Add a Plug-in Module

Add a Plug-in Module to the Micro800 Controller

Steps to install and configure a plug-in module.

Chapter 10 Learn About User-defined Functions and User-defined Function Blocks

Create a UDF for your Program

How to create a User-Defined Function (UDF).

Add the UDF to your Program

How to incorporate a created UDF into a program.

Get Sample Code from the Rockwell Automation Sample Code Library

Instructions to access sample code from Rockwell Automation.

Import Sample Code into Your Project

Steps to import sample code into a project.

Chapter 11 Import and Export Project

Import and Export Project

How to export and import entire projects for transfer.

Chapter 12 Quick Tips

Keyboard Shortcuts in Connected Components Workbench Software

Lists keyboard shortcuts for CCW operations.

Chapter 13 PanelView 800 Graphic Terminal Design in Connected Components Workbench Software

Add a PanelView 800 Terminal to Your Project

Steps to add a PanelView 800 terminal to a CCW project.

Configure Your PanelView 800 Terminal Communication Settings

How to set up communication parameters for the terminal.

Chapter 14 Using HMI Tags

Create Global Variables

Steps to create global variables for HMI tags.

Edit Ladder Diagram Program

Instructions to modify ladder logic for HMI control.

Chapter 15 Configure Micro800 Controller Ethernet Settings

Configure Micro800 Controller Ethernet Settings

How to set IP address and Ethernet configuration for the controller.

Chapter 16 HMI Tag Editor

HMI Tag Editor

How to use the Tag Editor to manage HMI tags.

Chapter 17 HMI Screen

Create a Screen for Your PanelView 800 Application

Steps to create a new screen for the HMI application.

Create Objects for Your Screen

How to add graphical objects like buttons and displays to the screen.

Chapter 18 Configure PanelView 800 Terminal Ethernet Settings

Configure PanelView 800 Terminal Ethernet Settings

How to set static IP address and network settings for the PanelView 800.

Chapter 19 Download HMI Application

Save and Download Project

Steps to save and download the HMI application to the terminal.

Chapter 20 Test the HMI Application

Run the HMI Application

How to launch and run the downloaded HMI application.

Test the HMI Application

Procedures to test the functionality of the HMI application.

Appendix A Set Up Serial Communication Between Computer and Micro820 Controller

Prerequisites for Serial Communication

Lists required hardware and preliminary checks for serial communication setup.

Modifying the 1761-CBL-PM02 Cable

Instructions on how to modify a specific communication cable.

Configure RSLinx for Serial Communication

Steps to configure RSLinx software for communication.

Restore Serial Port to Factory Defaults

Procedure to reset serial port settings using a microSD card.
Related product manuals